
 RSMUS.com
This blog provides an accurate and easier alternative to manually preparing “T” accounts from your D365 Vouchers.
“T” accounts are used by accountants to teach the flow of transactions and also to provide clarity for complex transactions.
Creating “T” accounts for numerous vouchers takes a lot longer than Pivot Tables and is harder to read.
Trying to review multiple vouchers with “T” Accounts is tedious and can be error prone due to typographical errors and misclassified accounts.
Example of “T” Accounts

-
Export the various D365 vouchers that you want to analyze.
I will choose a set of vouchers from the General Ledger Audit Trail that are related to a Fixed Asset Acquisition, three months of depreciation, and subsequent sale with a Free Text Invoice.
I wish to analyze these vouchers to see if they are all posted to proper accounts, and that I have not made any setup errors. I am going to use Excel Pivot Tables instead of “T” Accounts.
You can choose as many desired vouchers from any module.
You probably know Excel can process a pivot table with over one million rows.
This would take a very long time to create “T” accounts.
Choose your vouchers, then Export them to Excel
D365 > General ledger > Inquiries and reports > Audit trail > Voucher (transactions)

Your export will show up in lower-left corner of the browser.
Export each voucher.
2. Assemble your exported vouchers
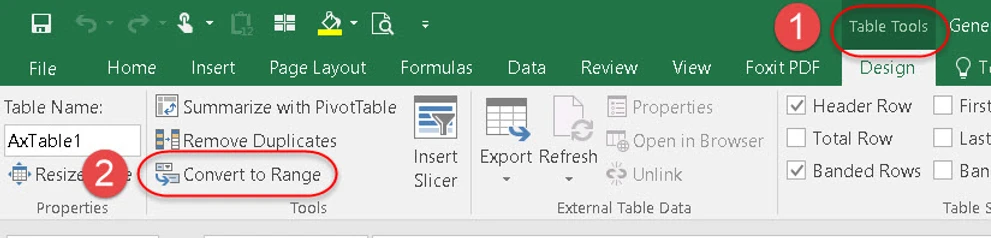
First convert each exported voucher to a “range”.
Excel > Table tools > Convert to Range

Now we are ready to format the worksheet so that we can generate an Excel Pivot Table in the next step.
Make your Excel sheet look like the Exhibit.
First insert a column for the Excel Pivot Table to use for filtering. Label cell A1 “Pivot Filter” and label each voucher with a sequential number of your choice and include some form of descriptive abbreviation. In D365 I used the following sequence to create my vouchers, thus I will use similar labels in column A to sequence and describe each voucher.
-
Acquisition of Fixed Asset (ACQ)
-
Depreciation for three months (DX)
-
Sale with Free Text Invoice (FTI) (D365 posts this as two vouchers)
Exhibit: Updated worksheet containing an additional column.

First we will create the Pivot Table, then change it to tabular form for increased legibility
Click any cell in the range, then:
Excel > Insert > Pivot table

Right Click the top left cell within the pivot table (A5),
Choose: Pivot Table Options > Field settings > Subtotals & filters (tab) > (select) None > Layout & Print (tab) > (select) Show item labels in tabular form

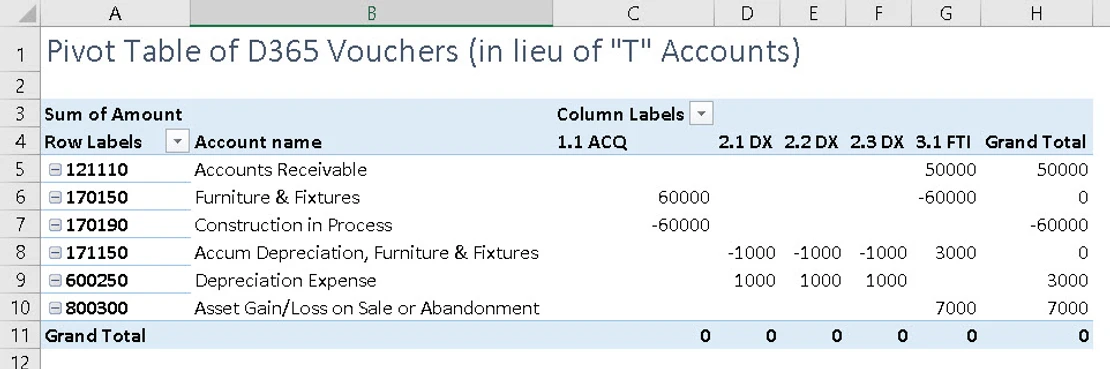
I like to enhance my Pivot Tables with some normal Excel formatting and add a recap.

In lieu of “T” accounts, we have easily and accurately created a Pivot Table of D365 Vouchers.