RSMUS.com
Recently, Microsoft introduced additional personalization functionality in Dynamics 365 Finance and Supply Chain Management that is a total game-changer for users that want to make changes to their user experience. By using the Saved Views functionality, users can make multiple sets of personalization on a single page. Why would you want to do something like this? There are several use cases. For example, you may need to add several filters throughout your day to see specific customers that range from A-M and are only in a specific customer group, and you may also have fields that you only want to view with this specific set of customers. You may also want to have another view to show all customers, another for all customers in a specific customer group, and so on.
Not only is this functionality useful from an end-user perspective, but this is also useful for organizations. Organizations have the ability to create views for specific legal entities, corporate views, or departmental views. The possibilities with this are nearly endless.
Set up a new View in Dynamics 365:
- Navigate to the page you wish to create a new view for.
- Make any page personalization as you wish, for example:
- Adding/Hiding fields
- Moving table columns
- Adjusting column widths
- Adding data filters
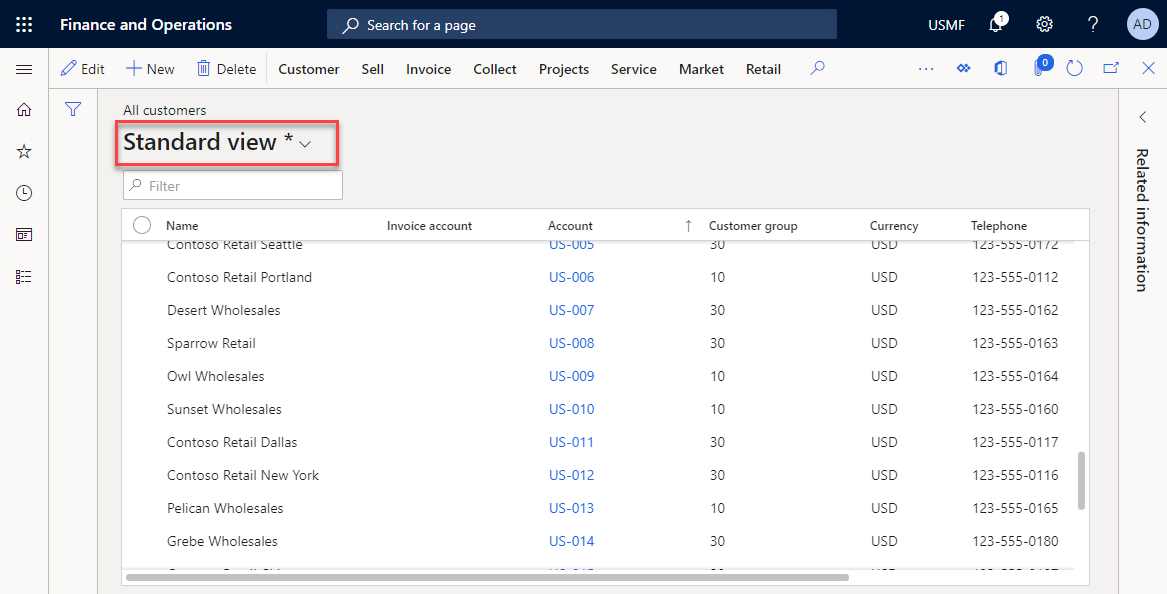
- Once you have completed adding personalization, click the Standard view
- Note that when you make any personalization changes or filters to any page, an asterisk will appear next to the view name dropdown.

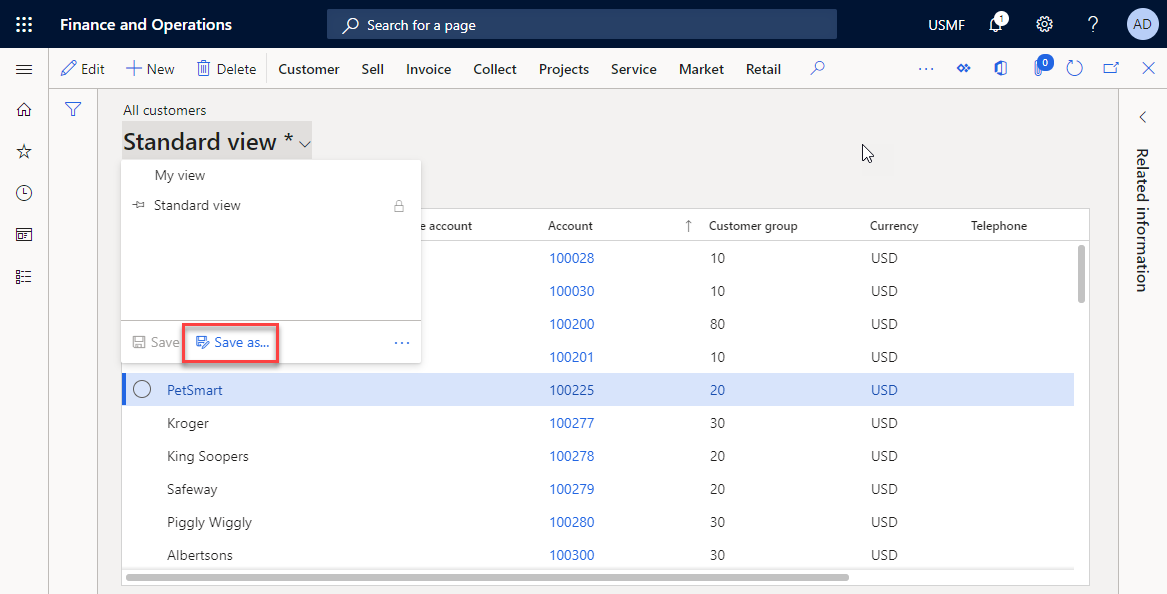
- Click Save as in the menu.
- Specify a name and description for the new view, you can also change the slide bar to yes if you would like to make this view your default view when you open the page.
- Your new view has been saved.
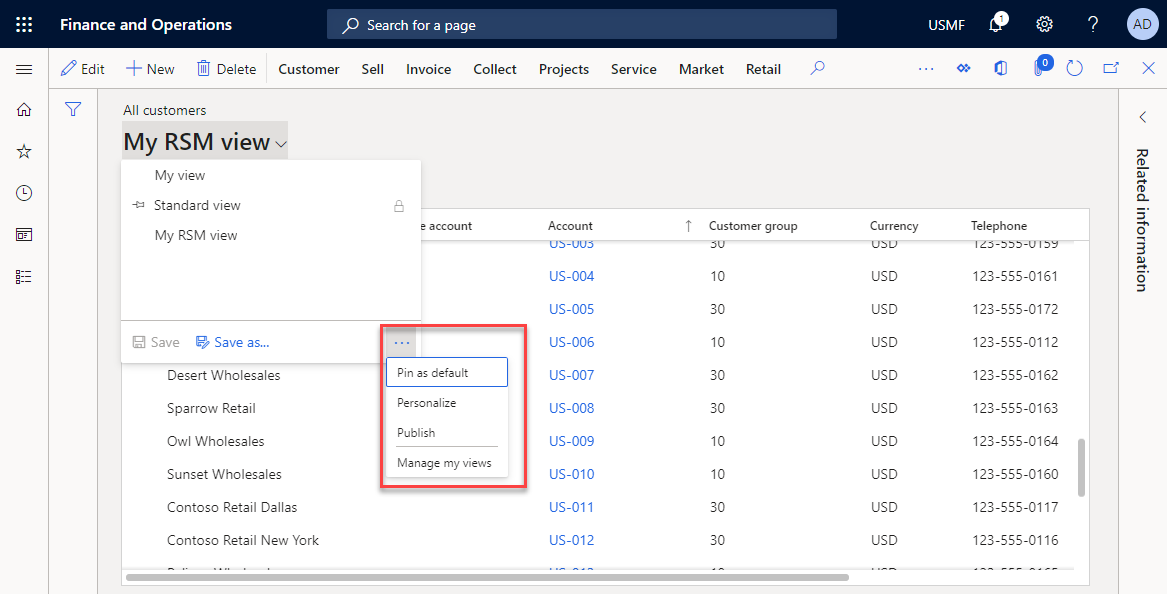
- To switch between views, click the view dropdown on the page and you can toggle between views.
- You also have the ability to manage your views by clicking the ellipsis in the dropdown menu:
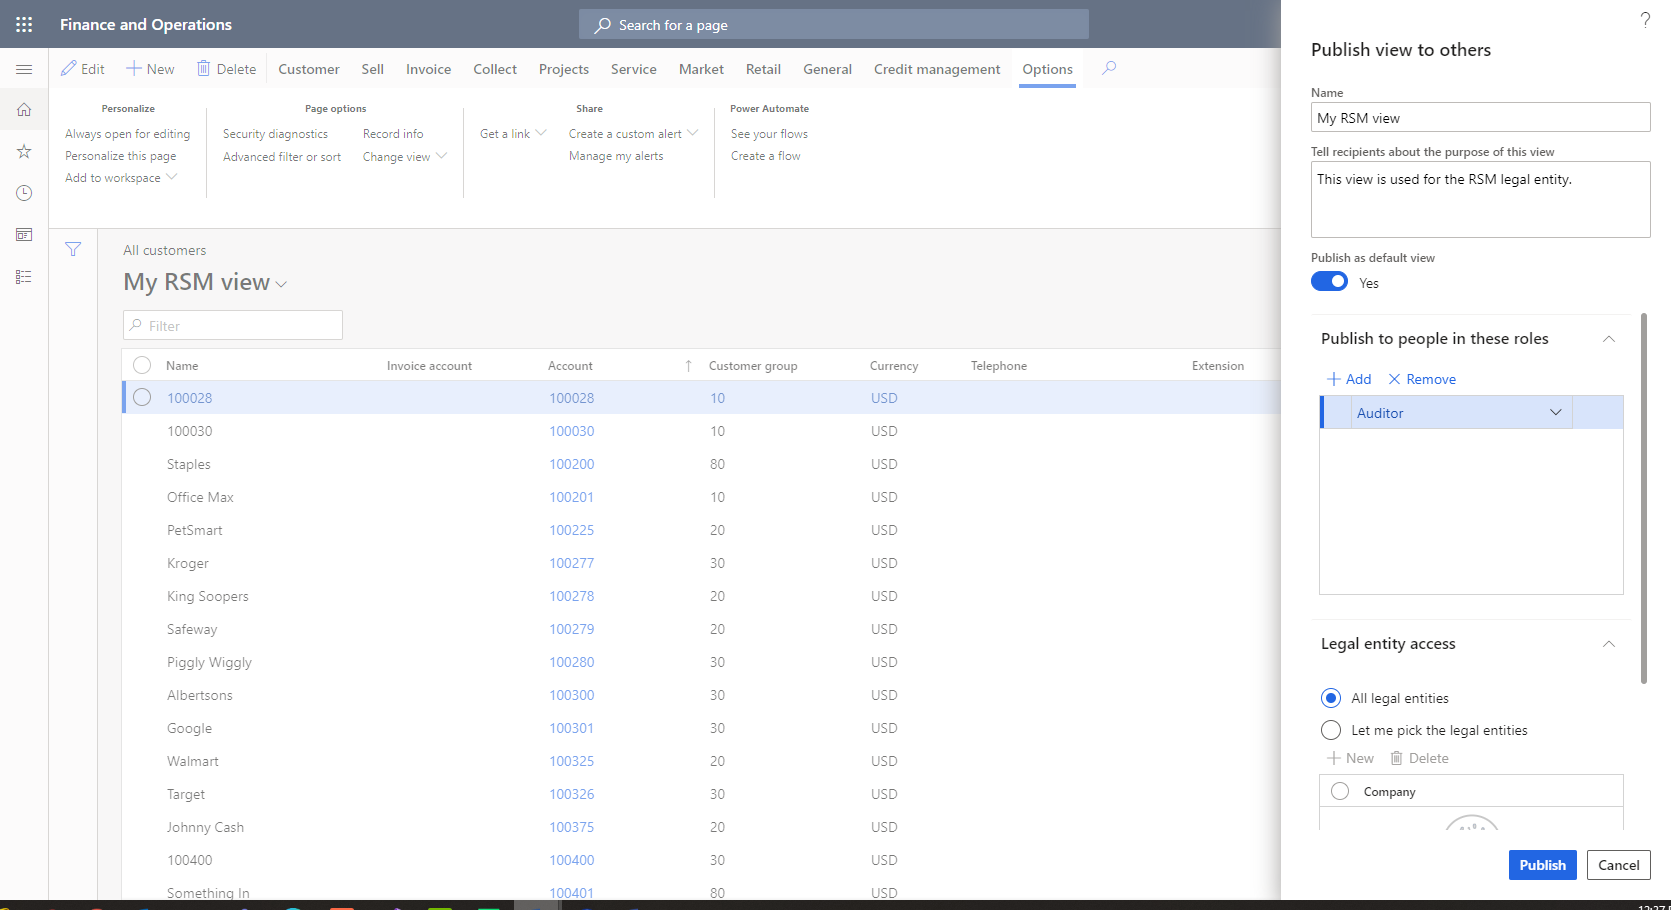
Publishing views
As a system administrator, a view can be created, then published for specifics users or groups of users depending on their assigned role in the application. By using this functionality, users that can access the view cannot make explicit personalization to that view. When publishing a view, system admins can specify the specific legal entity for the view as well, so only users with the assigned role and assigned legal entity can use the view. If the user’s legal entity changes, they will no longer have access to that view. You can publish a view by making the personalization necessary for the view, save the view then click the Publish button on the ellipsis menu. On the Publish view to others dialog, you can specify the roles, and legal entities to publish the view for.