
 RSMUS.com
NetSuite offers users many ways to search for items on transaction lines. Below are some of the more commonly-known methods of adding an item or items to an opportunity, quote or sales order.
- Keying in the beginning of an item number/name will show a list of all items starting with what is typed.
- Using the “%” symbol as a prefix followed by any part of an item number/name will show a list of all items that have that string in the item number/name.
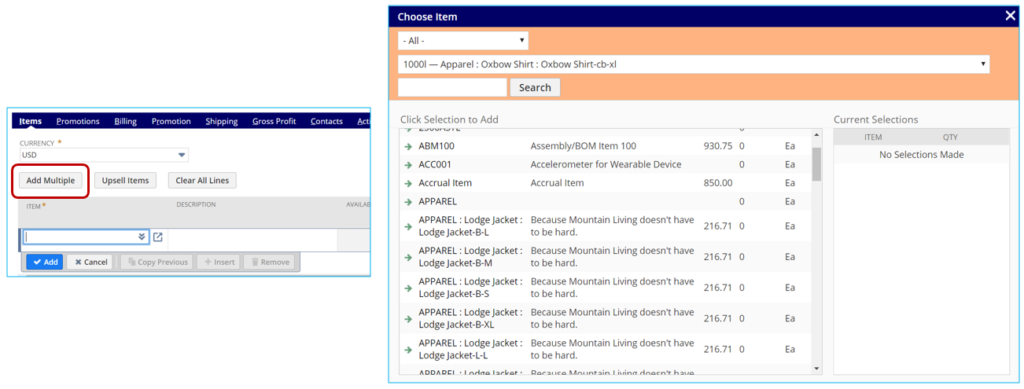
- The native Add Multiple button can be used to get a pop-up window that allows you to do some light filtering but only shows a set number of item fields. The content of this window cannot be customized.
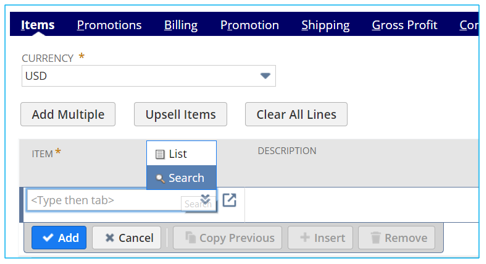
For more robust and configurable product search capabilities, you can create an item saved search and associate it to roles that create opportunities, quotes, or sales orders. Once set up, the user can use the search option shown below to view, filter, and select items to add using as many item attributes as desired.
Here are the steps to create this saved search and assign to roles along with the wonderful, dynamic search capability that gets produced.
Item Saved Search Creation
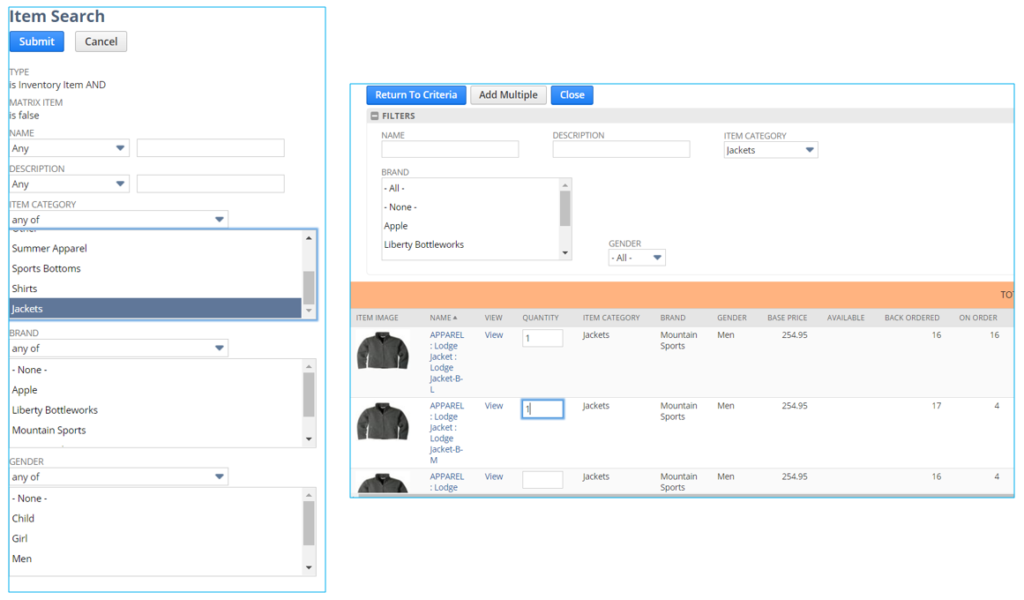
Criteria Tab: You can choose to set criteria or leave it blank. In my example I chose to select only items of type Inventory Item that are not matrix parent items.
Results Tab: Choose all item fields that you want to show in the advanced item search window.

Available Filters Tab: Choose all item fields that you want to use to filter the resulting item list in the advanced search result window.

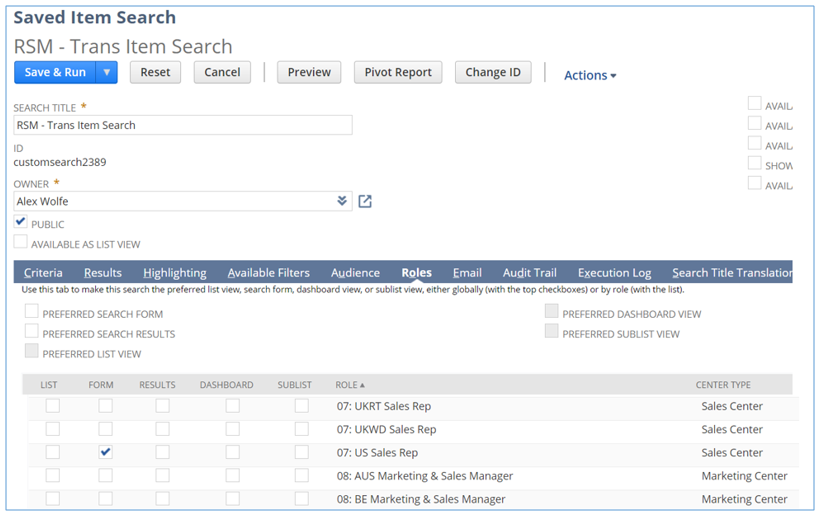
Roles Tab: This is the key tab since it determines which roles will use this saved search to generate the advanced item search window when using the search option shown above on each transaction line item. Check the Form box for each role that should use this search.
Viewing and Searching Items
Now that the saved search has been created and assigned to the correct roles, it is very simple to use it and see the dramatic improvement it offers over the other searching options.
- Create a new opportunity, quote or sales order.
- Click the double down arrows and select the Search option as discussed and shown above.
- You will then be presented with a criteria selection window and can either set filters here and click the Submit button or immediately click the Submit button to be taken to the search results screen where you can also perform filtering.
- Note how the search result includes all fields selected on the Results tab of the saved search and you can even show a picture of the item, which is not possible using the other item searching methods.
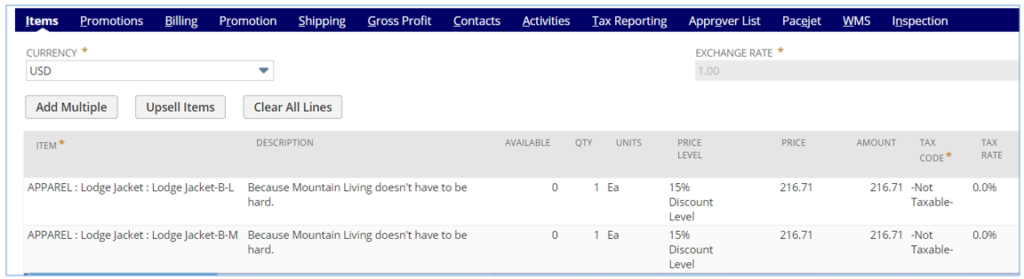
- Now you simply enter a quantity value for any of the items you want to add to the transaction and then click the Add Multiple button.
- The items you chose along with their quantities get added to the transaction item sublist.
If you would like more information on the content covered here, or you have any NetSuite customization or consulting needs, the NetSuite professionals at RSM can help. We are a NetSuite Solution Provider and a NetSuite Systems Integrator partner, and have more than 30 years experience implementing ERP solutions. We’ll provide you with industry insight, project management and the technical resources you need to make your project a success. Contact RSM at erp@rsmus.com or by phone at 855.437.7202.
By: Gary Leitner – Colorado NetSuite Solution Provider
RSM Staff
RSM empowers middle market companies worldwide to take charge of change. Our unique middle market perspective makes RSM the natural choice for growth-oriented, internationally active organizations seeking relevant insights and tailored, innovative solutions for a complex and changing world. With a global reach spanning more than 120 countries, we instill confidence in a world of change by bringing the full power of RSM to make a lasting impact on our clients, colleagues and communities.