Last week I attended the CRMUG Summit in Reno and leda session called Dissecting the Administrator’s Office 365 Experience with Microsoft Dynamics CRM. The premise of this session was to help project owners and administrators decide how best to leverage the new features in Microsoft Office 365 in order to make the most of their Dynamics CRM deployment. For those of you who didn’t attend, this blog is Part One in a series that will walk you through those benefits.
The goal of this integration is to give you one unified place to manage all your administrator settings, which are separate from your Dynamics CRM administrator settings. For instance, you’ll be adding and licensing users in Office 365, as opposed to within Dynamics CRM itself. In addition, you’ll be able to manage Exchange Online, SharePoint Online, and Lync Online, if you’re also subscribed to those services.
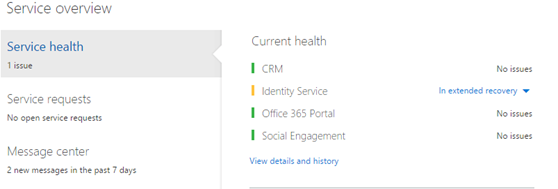
When you first log into the Office 365 admin center, you’re taken to the dashboard, which gives you an overview of all your Microsoft services and their status. In the center pane, you’ll also see any planned maintenance steps that will affect your services, along with any open service requests you may have opened or messages you may have received. Clicking any of these items will give you more information on them. The top right corner contains shortcuts for things like resetting shortcuts, adding new users, and downloading software, including the Dynamics CRM application across platforms.

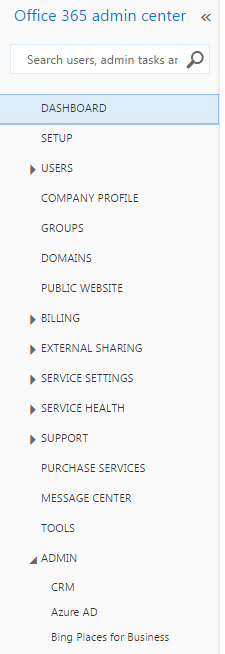
On the left side of the screen you’ll see the navigation bar, with a Search bar at the top. This search not only searches through your organization, but a lso the Office 365 community, so you can search for help right from the admin center! Right below the Search bar is the Dashboard button, which will take you Home, followed by the Setup button, which will let you connect your organization to Office 365, and then configure and manage it. This tab will be covered in more detail throughout this blog series.
Below Setup, you’ll find Users and Company profile, which you’ll use to manage active Users and their information, apply or remove licenses, and give delegate permissions to partners. In the Company profile tab, you can specify default addresses and contact information for created users, as well as change the Organization’s name in your Office 365 deployment and the theme used. Below these two is the Groups tab, which you’ll use to manage your SharePoint groups (also covered more in this blog series!).
Finally, we have the Billing tab where you can view active subscriptions, add a Microsoft Partner to your organization and pay your bills. Service health and support go hand in hand, as they’ll let you see how everything is currently functioning within your organization, and to create a support request for anything that isn’t performing the way you expect it to be. The tabs covered here are a good start for a first time system administrator looking to cover the basics of Office 365. The remaining tabs delve into the more advanced tasks and features, and will be covered in more detail in this blog series.
If you have a specific question about the features between Office 365 and Dynamics CRM, please leave a comment below. Otherwise, check back for my review of the other features that will be covered in this blog series. If you like these tips, consider subscribing to our Dynamics Community News publication.
In the meantime, if you need support for your Dynamics CRM system, RSM can help. We are a nationally recognized Microsoft Dynamics partner with Gold Customer Relationship Management (CRM) Competency and Gold Enterprise Resource Planning (ERP) Competency in the Microsoft Partner Network. We can help with basic “out of the box” implementation to a complex xRM architecture. Contact our professionals to learn more – crm@rsmus.com or by phone at 855.437.7202.
By: Zach Greenbaum – Mid-Atlantic Microsoft Dynamics CRM partner

 RSMUS.com