In the second post of this series, “Creating and understanding display templates,” I explained how to create new display templates by understanding the structure and the essential elements. This post will show you how to upload a custom display template and configure it in Content Search Web Part (CSWP) and Search Results Web Part (SRWP).
In order to upload a custom template and configure follow the following nine steps:
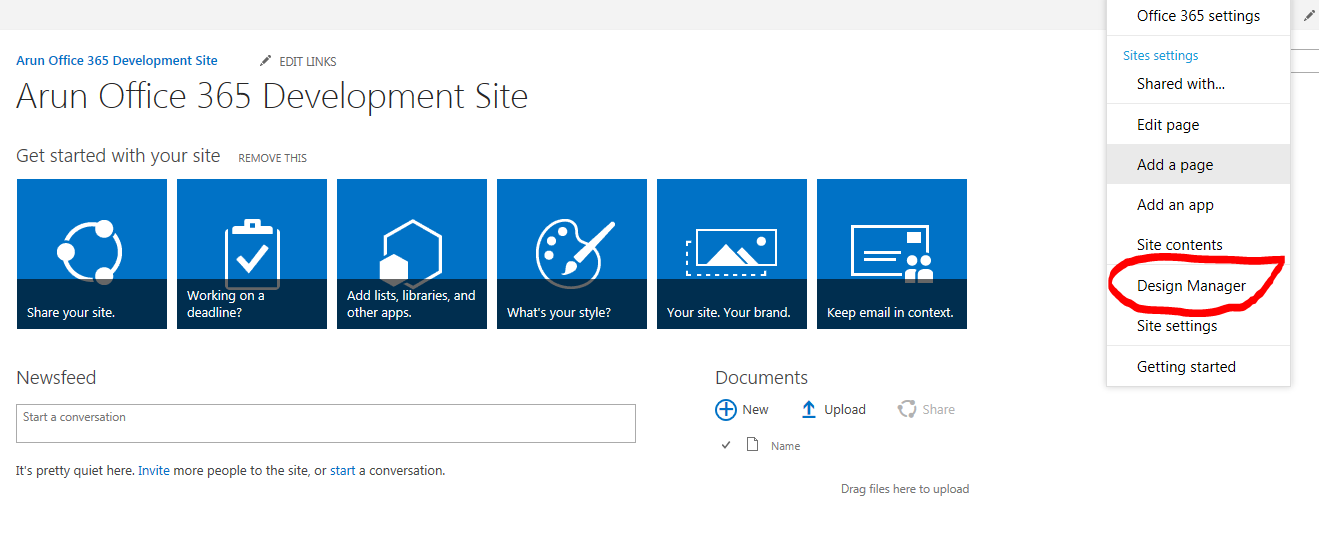
- Go to Site Settlings ->Design Manager (If design manager is not available, then SharePoint server publishing feature must be activated first.)

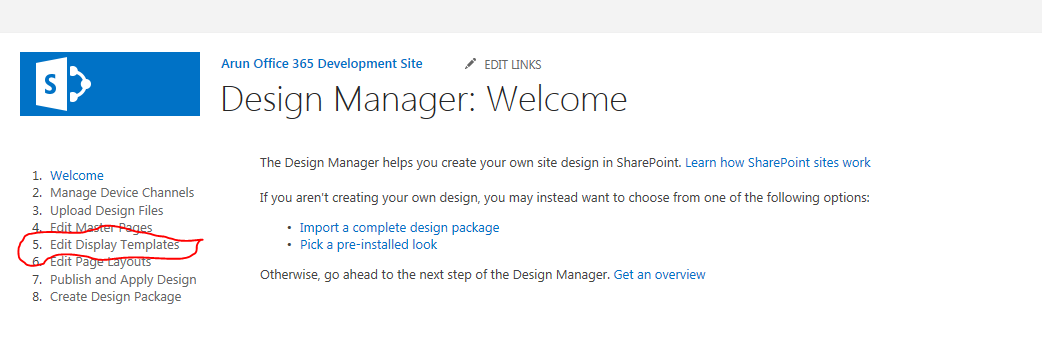
- Click on Edit Display Templates to view what is available.

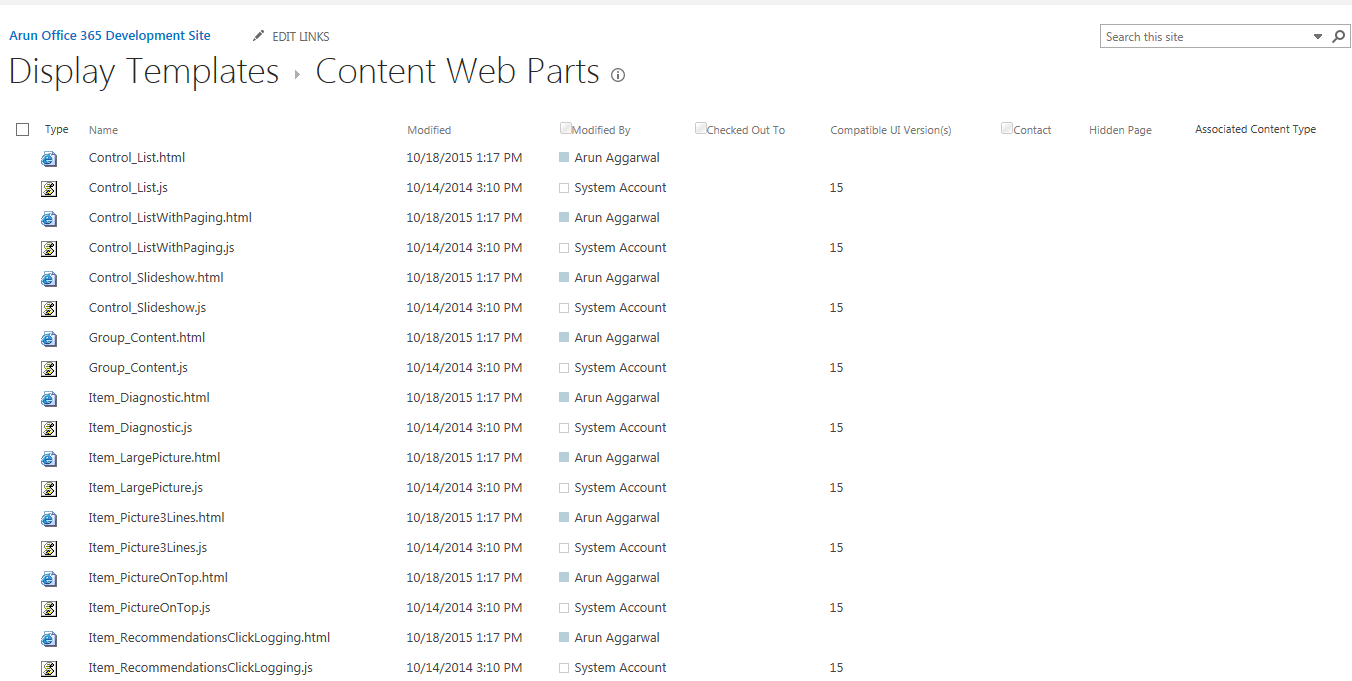
- Navigate to Display Templates -> Content Web Parts

- Download Item_TwoLines.html files as a sample display template. This will be customized to create a new display template.
- You can edit this file in Visual Studio, Notepad or any standard HTML editor.
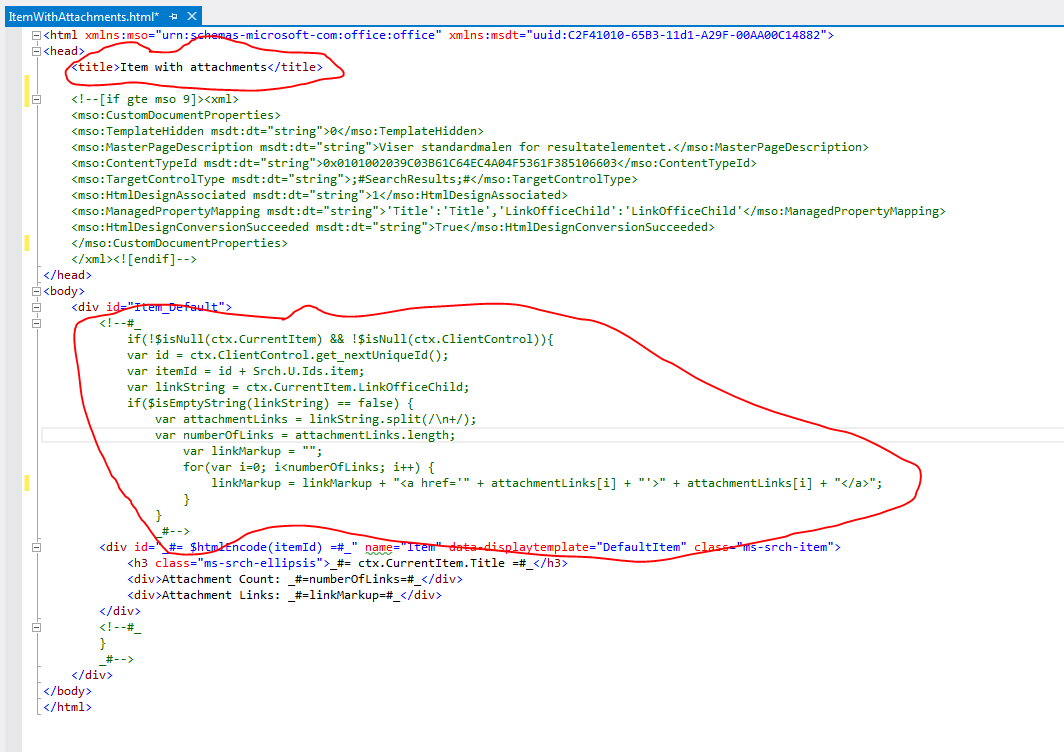
- Change the file to display the attachments of list items in the list as follows. (Please note: The first red highlight is the title value which is what appears in the content web part configuration. The second red highlight has the JavaScript code which uses ctx object to display the attachments to the list items.)
- Save the file as ItemWithAttachments.html

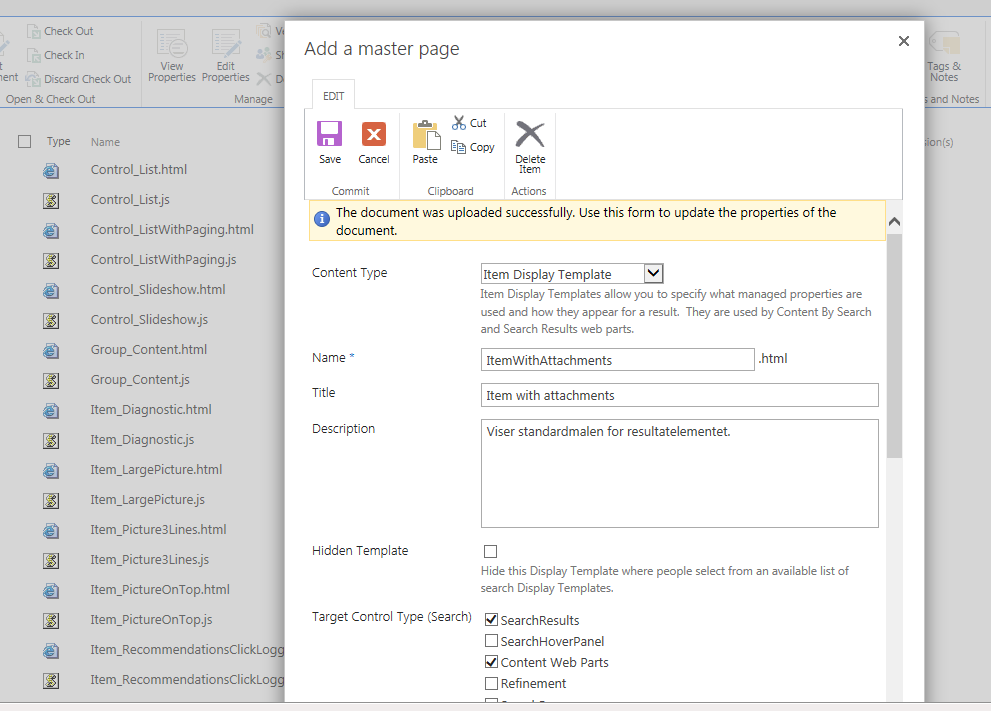
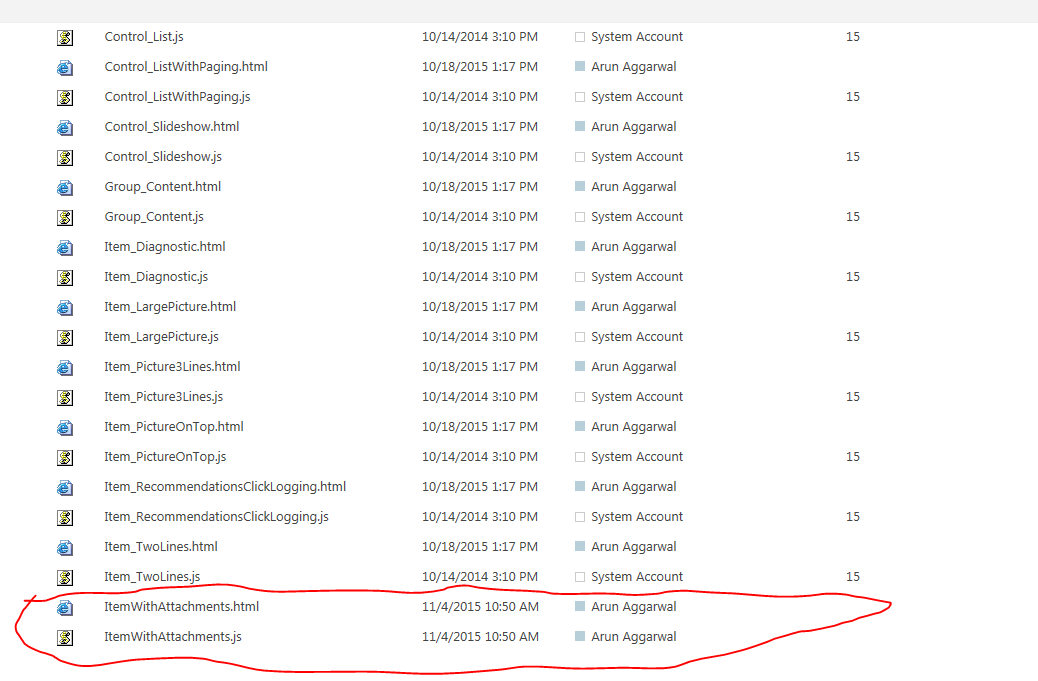
- Upload the new display template in the display template gallery (Step 3 above)

- SharePoint automatically adds a corresponding .js file to your display template file in the display templategallery. You cannot edit this js file and is for internal use by SharePoint only.

- Edit the page where you need the Content Search Web Part (CSWP) to display the list items with attachments. The item option in the CSWP configuration shows the “item with attachments,” as an option which corresponds to the, “title,” property in the HTML file. (Step 6 above

To find out more about this or other ways that RSM can assist you with your SharePoint needs, contact our professionals at 800.274.3978 or email us.

 RSMUS.com