
 RSMUS.com
In this article, we are going to look at the Production cycle in Microsoft Dynamics 365 for Finance and Operations. This cycle is the same whether you are in a discrete environment or a process manufacturing operation.
Process Overview
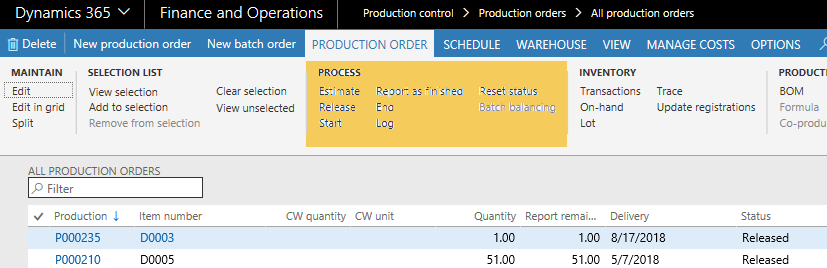
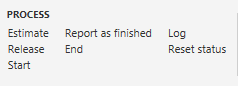
To start, we can take a look at the Production order tab on the All production orders list page (Production control > Production orders > All production orders). The Process group in the tab, shown in this screenshot, shows the production cycle in order: Estimate, Release, Start, Report as finished, and End. The Schedule tab represents a possible part of the process in a production order.
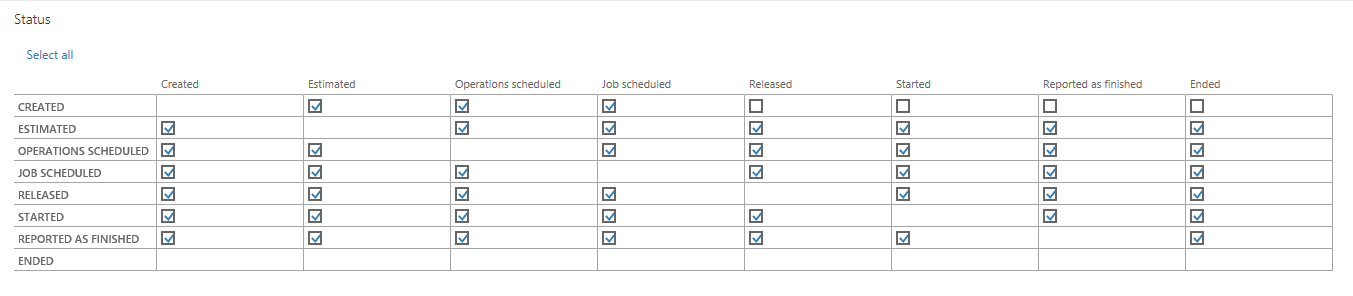
This screenshot shows the production control parameters, found at Production control > Setup > Production control parameters on the Status page. From here, we can see which processes are capable based on the current status. For example, when the order is in Created status, you can only schedule operations or schedule jobs. The Release, Start, Report as Finished, and End processes cannot be performed until the job is in Estimated status. Once the production order is estimated, (as you can see in the Estimated row in the screenshot), you can perform more actions on the project. If you intend to follow the steps exactly as listed, you would clear the check boxes for everything except Released, which would require you to release the job before performing any other actions.
Estimating the Production Order
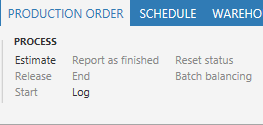
This screenshot shows that once created, the only action you can perform is estimate the Production order. Note that the other options in the Process group are disabled in response to the sections made in the production order parameters.
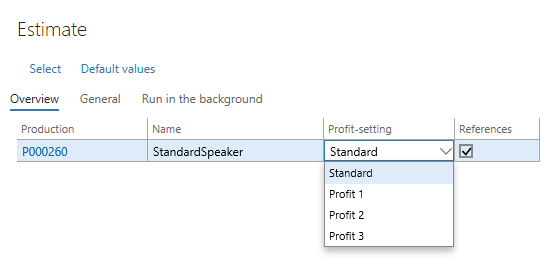
When you click Estimate, you are presented with profit-setting options, as shown in this screenshot. These options are set up in cost groups that determine if you are going to have the system create a selling price for the production order. In most cases, the option of Standard is used, which indicates there will be no markup and your pricing is not based on a percentage of the cost.

Once run, the result of the Estimate process is to create a cost analysis of the order. You can click the Manage costs tab in the action pane and then select the View calculation details option to see how much the order would cost.
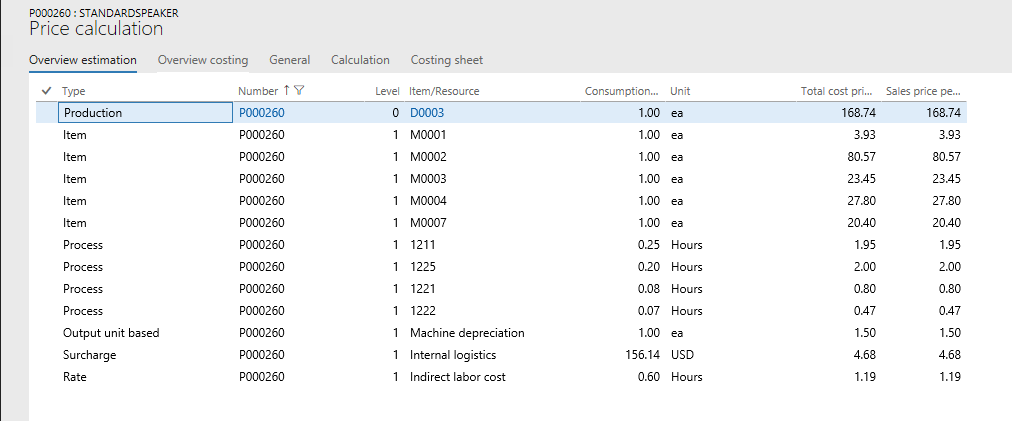
This example screenshot shows the price calculation based on all the settings in the system. In this case, it would cost $168.74 to make a quantity of one, including parts and labor.
Once you have run the estimate, you can see that all the other options are enabled. Again, this is in response to the sections in the production order parameters.
Releasing the Production Order
The next step in the linear process is releasing the order. “Releasing” the order can be described best by considering the role of the manager. Once the production manager (or other manager type role) analyzes the order and validates the costing is appropriate, the job is released, which means the order can be started.
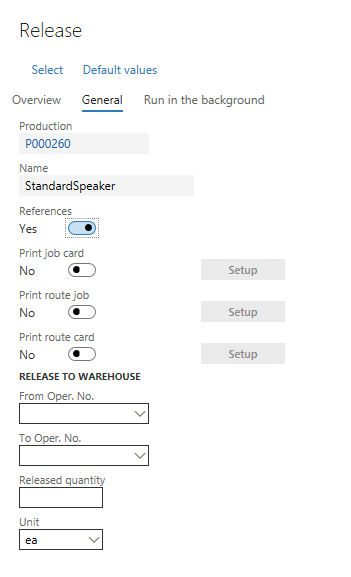
As you can see in the Release page in the screenshot, you can make selections here regarding the production order, including printing the job card, route job, and route card, all of which are sets of documents to record various times to complete operations and consumption of material. From this form, you can also choose to release specific parts of the job by only releasing certain operations. This is useful, for example, if you would be sending part of the route out to a contractor for completion. You can also choose to release only a certain quantity. Otherwise, you can leave the selection options blank in the Release to warehouse group and click OK to accept the defaults.
Starting the Production Order
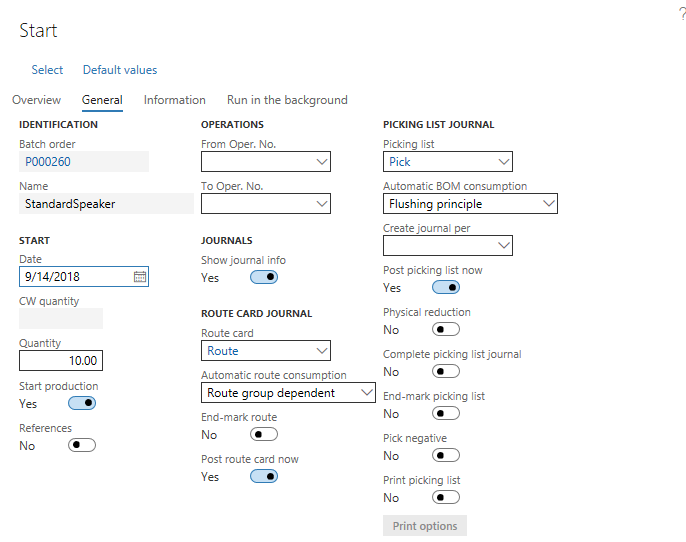
Once the job is released, you can Start the job. (As mentioned earlier, you can also perform scheduling at this point.) As you can see from the screenshot of the Start page, you have options regarding various journals, consumption, and posting of various aspects of the production order.
Once the job starts, you also have options to record actual times spent on each operation and to reconcile any extra or unneeded material you may have picked. For example, if you expected a 5% scrap percentage, picked extra raw materials, and then didn’t need the extra, you would need to complete a journal that indicated that you put materials back into stock.
Reporting as Finished and Ending the Production Order
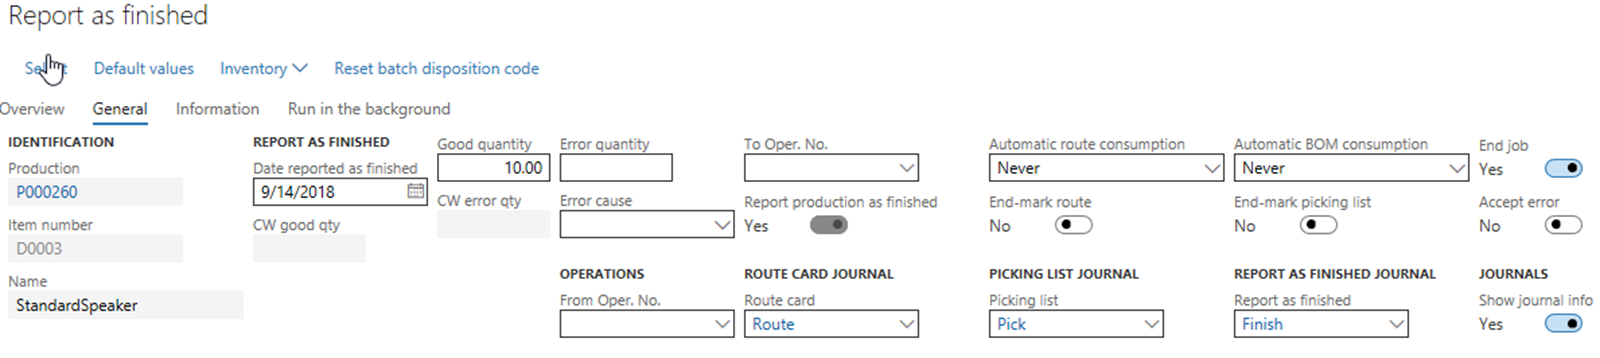
The next step in the process is to Report as finished. This step allows for the quantity produced to be placed into inventory. The dialog box in the screenshot shows that you enter the amount of items finished along with the date finished. It also provides the option to end the job.
If you do not end the job at this point, you can add more items to the quantity finished. This is a useful feature if you had a large job producing thousands of items, for example, and you were only reporting the end of a portion of the entire job. In those cases, you would not end the job at this point. Instead you would end it after there were no more items to finish.
So there you have it: the production cycle from beginning to end! In future articles, we will examine the steps in this process in more detail.
Want to learn more? Interested in training for Dynamics 365 for Finance and Operations? Visit the RSM Technology Academy website at academy.rsmus.com to view our live, virtual, and self-paced training options. You can also email us at academy@rsmus.com with any questions or specific training needs.
By: Howard LeCover
RSM Staff
RSM empowers middle market companies worldwide to take charge of change. Our unique middle market perspective makes RSM the natural choice for growth-oriented, internationally active organizations seeking relevant insights and tailored, innovative solutions for a complex and changing world. With a global reach spanning more than 120 countries, we instill confidence in a world of change by bringing the full power of RSM to make a lasting impact on our clients, colleagues and communities.