
 RSMUS.com
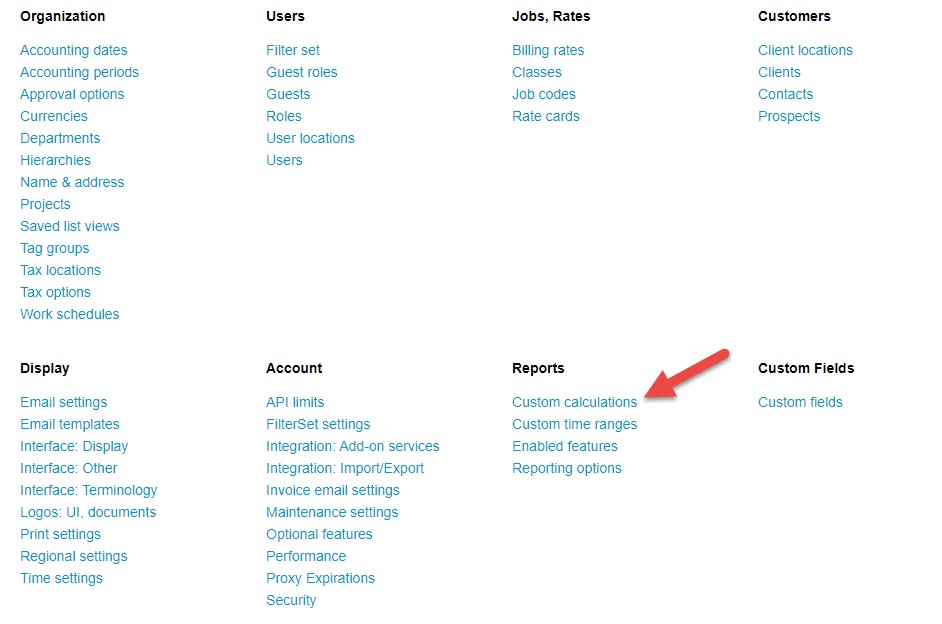
A custom calculation allows you to create a more specific calculation in the system than what comes out of the box. Custom calculations are managed in Administration –> Global Settings — Reports Header: Custom Calculations.
Setting up a Constant:
A Custom Calculation must have an equation even if you are just trying to filter a single value by a certain attribute (i.e. Timesheet – approved hours by task type). Because of this, setting up constants with a value of 1 is critical. Before we get started, let’s set up a couple of constants:
NOTE: Each constant needs to be individually defined by the data type (ex: time entry, expense, charge, etc.). If you select calculation types that do not match, you will either get an error message or zeroes in your report. Constants will need to be created for the calculations to work.
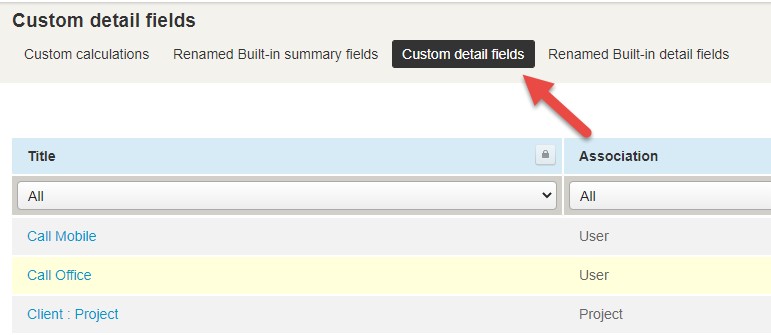
- Click on custom calculations – + Create – Account-wide Company custom calculation a Custom detail fields.
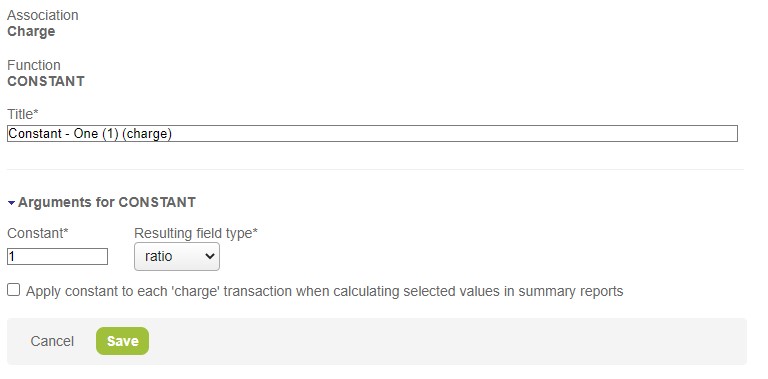
- Click +Create – Charge custom detail field. Set it up as follows, click save.
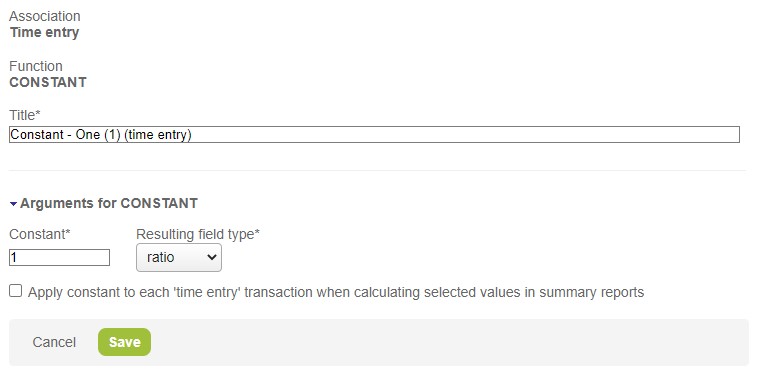
- Click +Create – Time entry custom detail field. Set it up as follows, click save.
Create a Custom Calculation:
In order to use custom calculations, each attribute must have a custom calculation. Let’s say we are trying to multiply approved hours for tasks with a task type of ‘billable’ by the user’s hourly rate. We will create two custom calculations as follows:
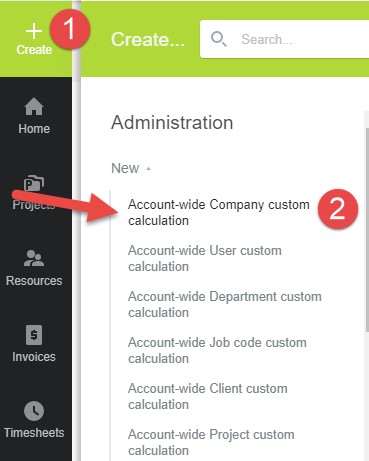
- Create the first calculation to get all approved hours for tasks with a task type of ‘billable’. Click on create –> Account-wide Company custom calculation
NOTE: A custom calculation can be created and tied specifically to the user, department, job code, etc. We recommend creating your custom calculations at the company level (see the screenshot below) so that it can be used on more reports. Selecting any of the lower-level options will limit the reports in which the calculation can be selected.
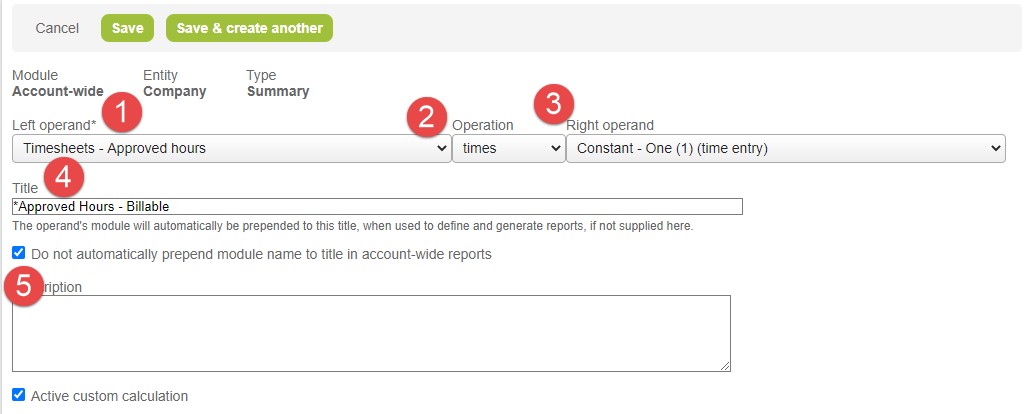
- Fill out these details:
- Left operand = Timesheets – Approved hours
- Operation = times
- Right operand = Constant – One (1) (time entry)
- This is the constant we created earlier. Since we are looking for hours, we are using the constant for the time entry.
- Title = *Approved Hours – Billable
- We recommend putting an asterisk at the front of any custom calculation you create so that it is easy to differentiate between what is a native OpenAir calculation vs one you created.
- Check the box next to ‘Do not automatically prepend module name to title in account-wide reports’
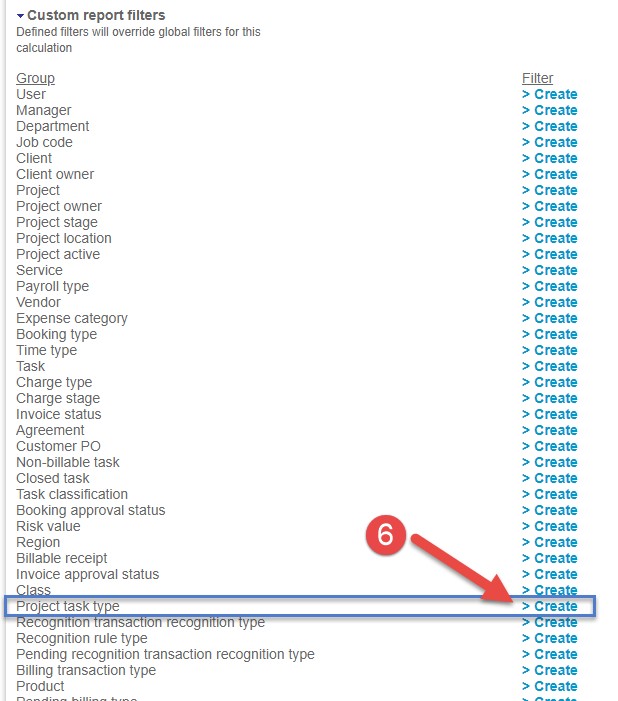
- Click on ‘> Create’ next to the Project task type. Select billable, then ‘add selected’ to move it to the selected column on the right. Then click ok.
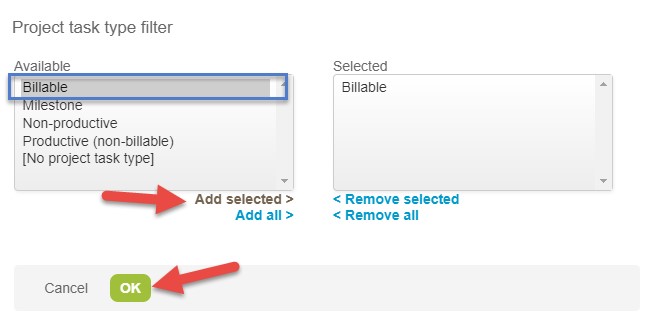
7. Save the custom calculation. It will now appear in your list of custom calculations. It will be at the top of the list since you put an asterisk at the front of the name.

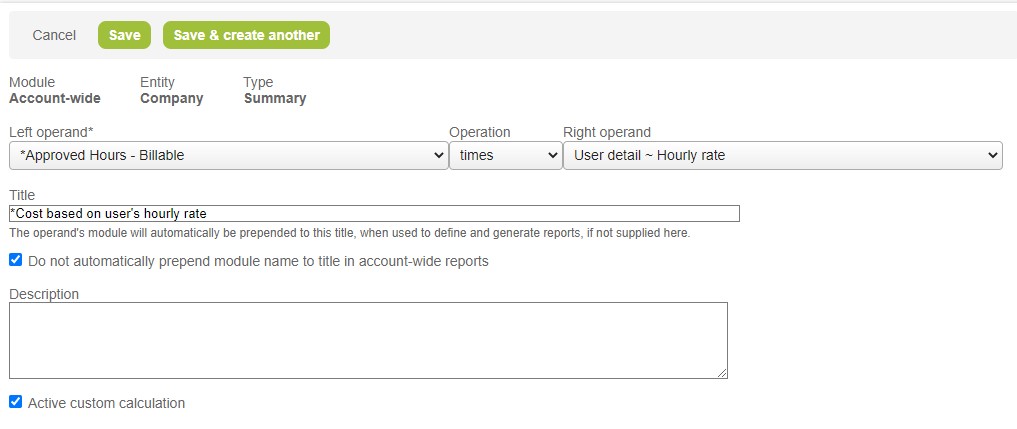
- Create the second calculation to multiple the calculation we created in step 1 by the user’s hourly rate.
- Click on create –> Account-wide Company custom calculation
- Fill out these details:
- Left operand = Select the custom calculation you created in step 1 – “*Approved Hours – Billable”
- Operation = times
- Right operand = User detail – Hourly rate
- Title = *Cost based on user’s hourly rate
- Check the box next to ‘Do not automatically prepend module name to title in account-wide reports’
- Save
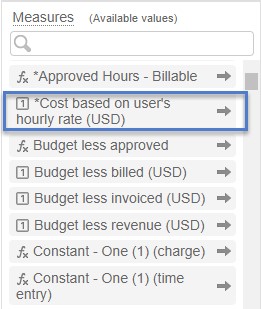
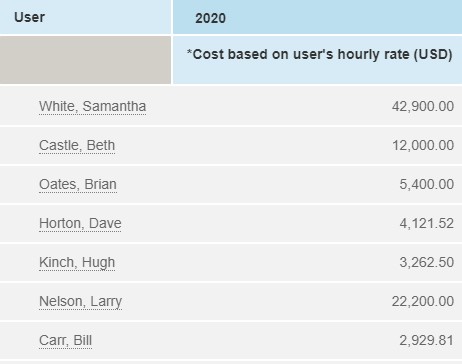
Now you are ready to pull your new custom calculation onto a report! In the reports module, your custom calculation will show up at the top of the list under ‘measures’ because of the asterisk at the front of the calculation.
In summary, custom calculations can be incredibly useful to customize reporting to fit your organization’s needs. Our consultants at RSM are here to help with a custom-fit solution that meets your needs – contact us today at OpenAirSupport@rsmus.com!
RSM Staff
RSM empowers middle market companies worldwide to take charge of change. Our unique middle market perspective makes RSM the natural choice for growth-oriented, internationally active organizations seeking relevant insights and tailored, innovative solutions for a complex and changing world. With a global reach spanning more than 120 countries, we instill confidence in a world of change by bringing the full power of RSM to make a lasting impact on our clients, colleagues and communities.