In our continuing series on Asset Management, we will now discuss more of the detailed functionality and setup of assets. We will start with Condition assessment templates.
Condition assessment
A company is naturally going to be concerned about the condition of assets they use in their business, whether it is manufacturing equipment, storage equipment or vehicles. They typically will inspect these assets on a regular basis to determine their viability and to prevent possible down time. A Condition assessment can be used to measure and monitor various conditions on an asset. The use of the template is to avoid variation of condition data on similar assets.
You can find the template at Asset management > Setup > Asset types > Condition assessment
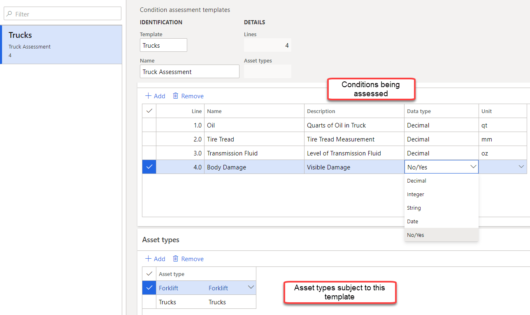
In this screen shot, you can see the areas that are being “assessed” on trucks, such as the oil, tire tread, etc. It also includes the kind of data being collected – Decimal, Integer, String, Yes/No for example – and how it is measured. Then you have the Asset types that will be assessed using this template.
Once we have a template, we apply it to an asset as shown in the screen shots below:
Asset management > Common > Assets > All assets
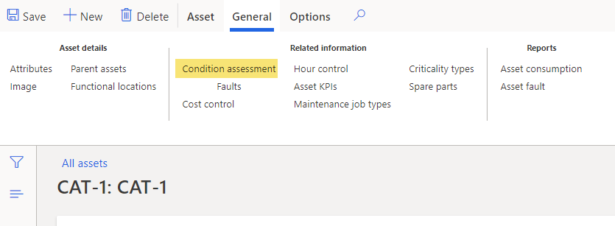
Clicking on the Condition assessment, will bring you to this screen, where you select the template and then are able to enter the assessment details:
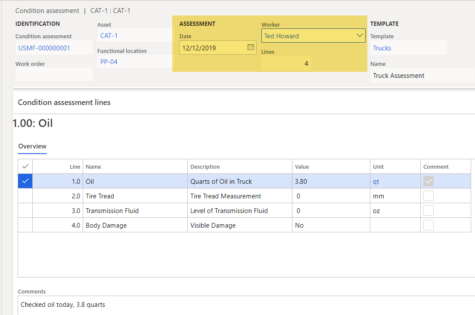
The assessment automatically uses today’s date and you can select the worker that performed it. It shows all lines and allows the user to enter the results.
Asset manufacturer and model
An optional setup of an asset is the Manufacturer and model. Some assets lend themselves to these details, and some may not.
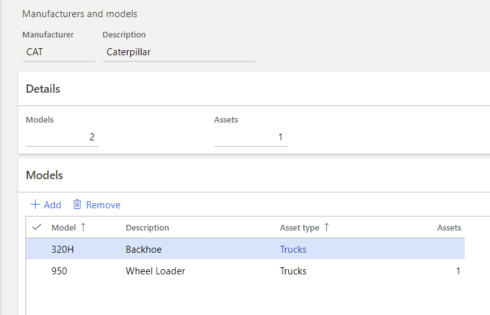
This is a relatively simple screen. Note that in order to apply it to an asset, the manufacturer and model need to be set up first.
Asset management > Setup > Assets > Manufacturers and models.
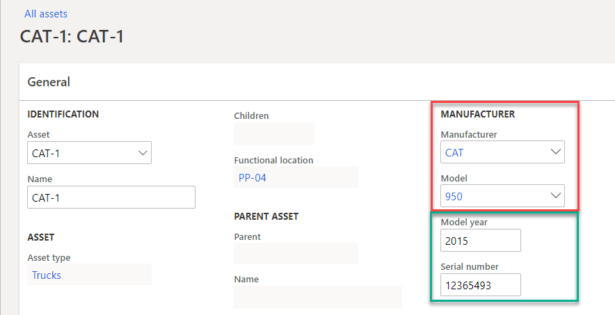
On the Asset screen, you can see where you can select the manufacturer and model. Also note that you can enter a model year and serial number and these are free form, and do not need the manufacturer and model to be filled out.
Asset management > Common > Assets > All assets
Counters
Another optional detail of assets are Counters. For example, for Trucks, it could be miles. For production equipment, it could be the number of hours of use.
To set these up, you would go to Asset management > Setup > Asset types > Counters:
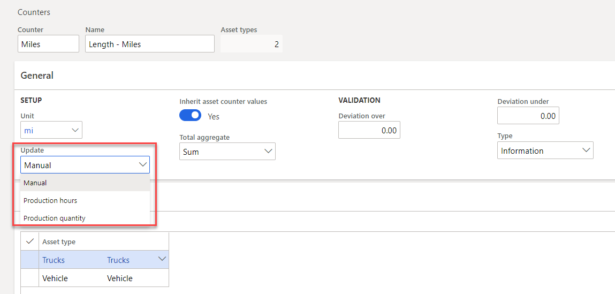
An interesting feature of this setup, is how the counter could be updated. Note that of the options, depending on the asset, production hours and production quantity could be automatically updated based on actual production data as used in a production order. They can also be updated manually, as would be the case in the mileage of a truck.
Asset lifecycle states
Asset lifecycle states define whether an asset is active or inactive. This flag on an item is similar to the Inventory status of Storage dimensions, which allow several different wordings of the status, but regardless of the name, it’s either available or blocked. In the case of Lifecycle states, they can have different names, but the key is whether they are active or not, as you can see from the screen shot below.
Asset management > Setup > Assets > Lifecycle states
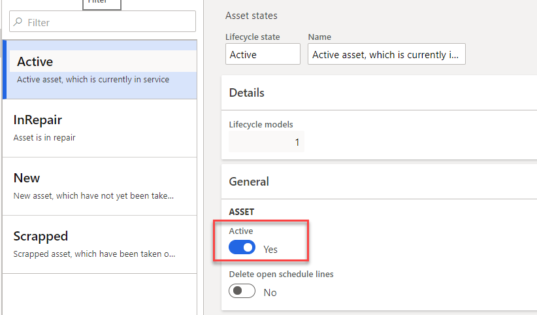
Note the different names for the states, which describe a status, and then the slider on the Active option on the General fast tab. If the flag for active is set to no, work orders cannot be created for the asset on that status.
Asset management > Common > Assets > All assets

Note the Lifecycle state listed for each asset.
Asset service levels
Service levels relate to assets, and are transferred to maintenance requests and service orders. They are a field on an asset so that priority can be set on work orders.
Asset management > Setup > Asset service levels
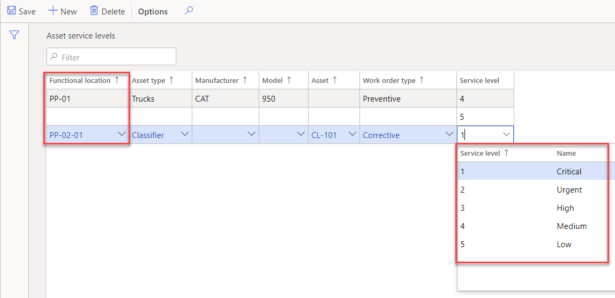
Note on this screen, when assigning service levels, you can be as detailed as you want, as shown on 3rd line where you note a very specific location, asset, and work order type with Service level 1 – Critical; or you can be very general as on line 2, where no details are entered. This works like the Table, Group, All functionality in other areas of the system. If there are no detail records, you would assign service level 5 which is low.
Asset criticality types
This topic is similar to service levels; it relates to an asset and is transferred to a work order, where it cannot be changed. It’s used to indicate just how critical a maintenance job would be since it affects the production schedule. For example, in a milk production plan, a milk pasteurizer machine could be so critical that if it has a breakdown and is not fixed timely, you could end up scrapping a large quantity of raw milk.
To set this criticality types, go to:
Asset management > Setup > Assets > Criticality types
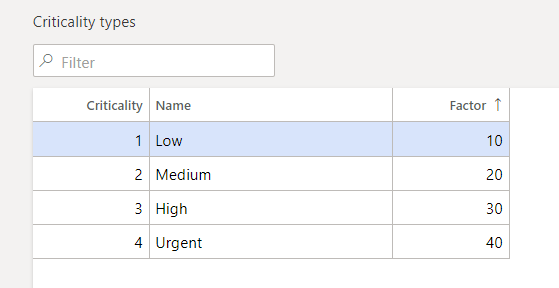
Within this data, we have basic criticality ranging from Low to Urgent. With that set we would go to another screen to set the criticality for an asset, based on the various details needed. For example, in the following screen, we would see some location and assets combination with an urgent level, and others at a medium level.

The same asset in this example, the BLN-101, is urgent when it is corrective action is needed, but low when it is preventive maintenance.
We will cover additional areas in future articles discussing Asset management.
Want to learn more about Dynamics 365 for Finance and Operations? Visit academy.rsmus.com for eLearning courses and information about our hosted training classes in Denver! Or contact our Microsoft Dynamics experts at RSM (855) 437-7201.

 RSMUS.com