For anyone that has worked with DAX’s Application Integration Framework (AIF) in previous DAX versions, knows that a typical interface starts with a DAX query and a series of document classes and endpoints to configure. AIF in DAX 2012 has simplified the creation of interfaces and at the same time, has made interface creation more flexible.
In this article, I will guide you through creating a simple but, useful interface, using the AX/AIF 2012 integration tools.
DAX/AIF 2012 allows you to expose a class without the need to create and use document classes. This can be a big time saver when you want to create a web service that, for example: updates DAX inventory, checks an order’s status, or returns product pricing, etc.
In this example, I will demonstrate how to create a real-time web service using AIF to return sales order information to an ecommerce site. The service is expecting a DAX CustAccount and SalesId from the ecommerce site, and the DAX service will respond by returning selected SalesTable fields.
When working with AIF 2012, you will notice how simple the AIF administration menu options are when compared to AX 2009. You will also find the new AIF menu on the “System Administration” area page.
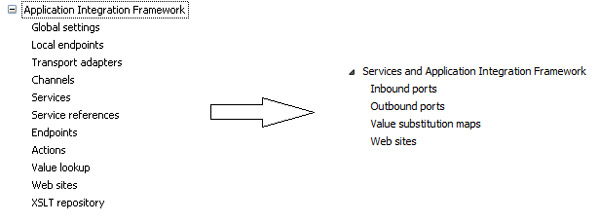
So let’s get started…
Steps to create DAX web service
- Create the classes
- Create the DAX service
- Register the DAX service
- Deploy the service
1) Create the Service class
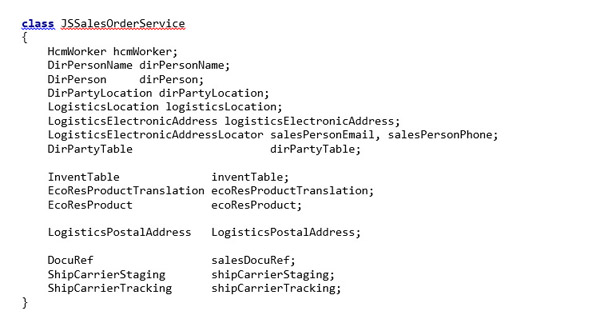
Example of the class declaration. Note, I included additional tables in this class that I expect to use to respond to the web’s request for sales order data.
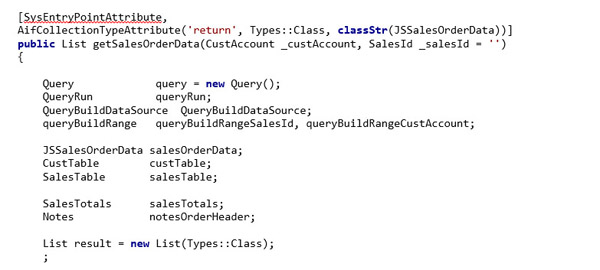
Example of the class’ “getSalesOrderData” method:
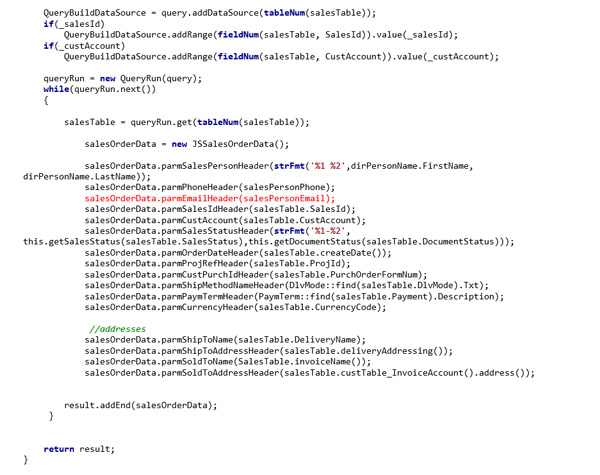
Create the class containing the data fields for the response message.
Class declaration:
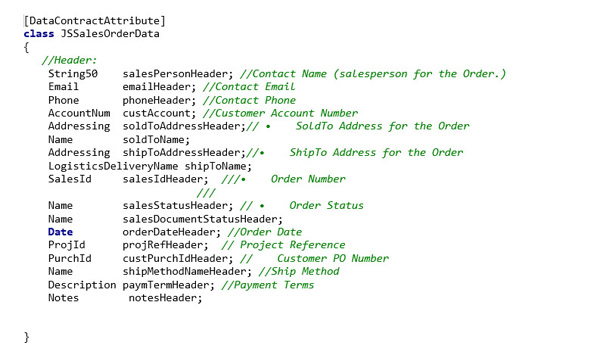
Example of one of the data class’ data field methods:

2) Create the DAX Service. Be sure to select/include any and all Operations…

Enter Service properties. At this point, you can change the Namespace of the web service if necessary.
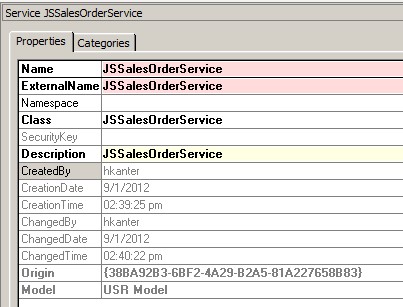
3) Register the DAX Service
a. Right click on the DAX service
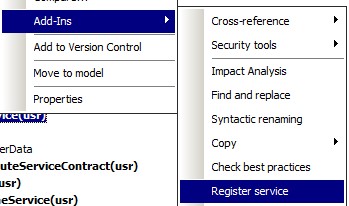
b. Click on Refresh, and we then play the waiting game; this process takes a while to complete.

When the service registration process completes, you should see something like this:
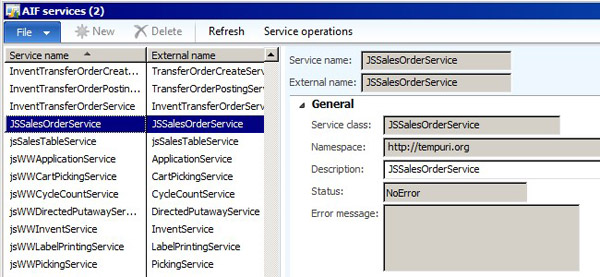
4) Deploy the DAX Service
At this point, this new AIF service can receive data from a flat file, a message queue, BizTalk, or from a real-time web service and respond using the same channel.
Navigate to System administration > Setup > Services and Application Integration Framework > Inbound Ports (since this is a message that is expected to be received in by DAX).
Here is where you can create a new HTTP address (URL) for the ecommerce site from which to consume the web service.
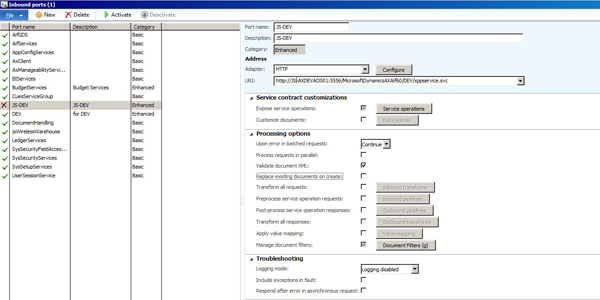
From here, press the “Service Operations” button.
You will then be presented with the screen to choose all of the AIF services that you would like to associate with this AIF port. This process has replaced assigning AIF services to endpoints as demonstrated with DAX/AIF 2009.
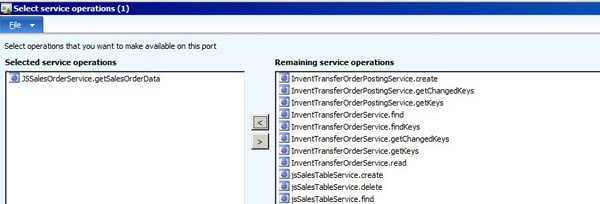
Press the “Close” button and then press the “Activate” button. If there are no errors, the service has been deployed to the URL you specified. An important thing to look for here is whether there are CIL build error messages, The port will appear to be deployed, but the last usable version of this class will be running. Therefore, it is important that there are no error messages when you activate the port.
Conclusion
To learn more about the capabilities of DAX/AIF 2012, be sure to check out these sites:
Services and Application Integration Framework (AIF) [AX 2012]
Microsoft Dynamics AX 2012 Services and AIF White Papers
Please send me your questions and comments.
Thank you.
Herman J. Kanter

 RSMUS.com