5 – System vs. Custom Dimensions
As stated in the first part of my blog, a system-defined dimension allows you to link a financial dimension to an existing table. Microsoft Dynamics AX® 2012 supports system-defined dimensions with the following tables:
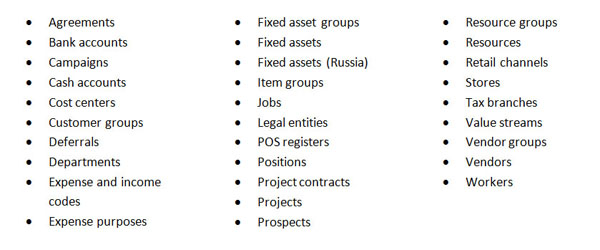
*NOTE: Some tables are linked to license or configuration keys and may not be available in your installation. Also, note that this list was generated from R2, so some values are not available in the original release of AX 2012.
Walkthrough: Configure a System-Defined Dimension
1. Open General ledger > Setup > Financial dimensions > Financial dimensions.
2. Click New to create a new financial dimension.
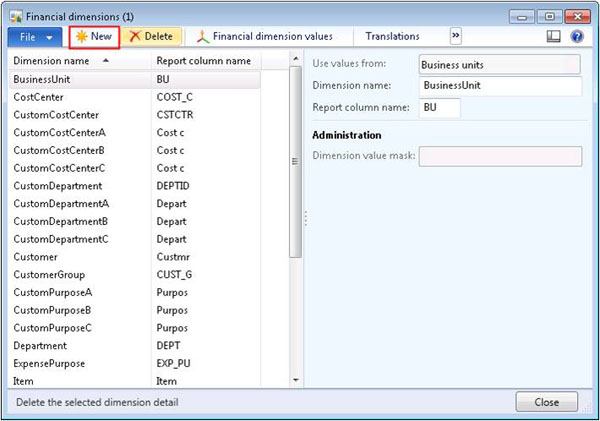
3. In the Use values from the drop-down box on the right hand side, select Item groups.
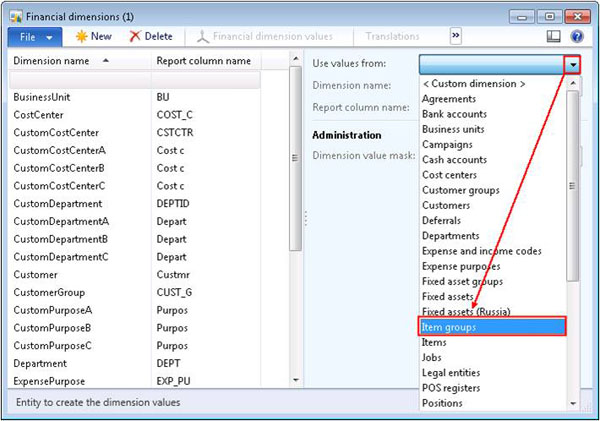
4. The Dimension Name field will automatically populate with a default name of the object. You can override this description if you prefer.
5. Optionally, you can type an abbreviation for the dimension in the Report Column Name field. This value is used when generating financial statements in AX. For example, you could type IG for item group.

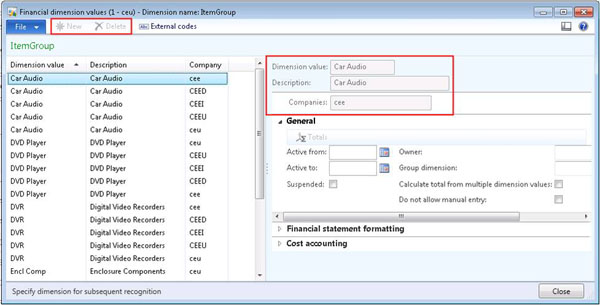
6. Click Financial Dimension Values.
Notice that the values are already populated with item groups from the system.
You may also notice that there appears to be duplicates of many values. This is due to the same item group existing in multiple different companies.
I will also point out that the New button is disabled, and you cannot modify the value or description of the item groups. This is because they are linked to the item group table and the values must be maintained in the Item groups form.
7. Click Close to exit the form.
8. Next, open Inventory and Warehouse Management > Setup > Inventory > Item groups.
9. Click New to create a new item group.
10. Enter a unique identifier for the item group such as “Test”.
11. Type a description for the item group such as “Test System-Defined Dimensions”.
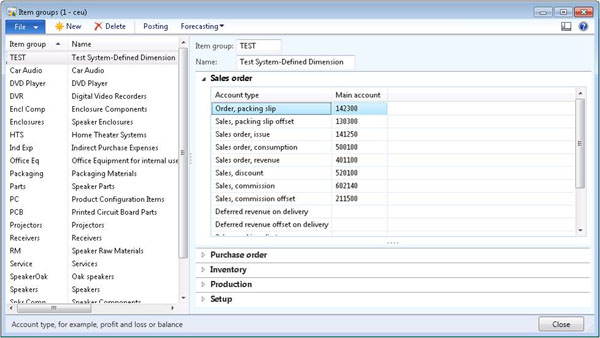
12. Close the Item Group form.
13. Go back to the Financial Dimensions form that you opened earlier, and click the Financial Dimensions Values button for the Item group dimensions that you created.
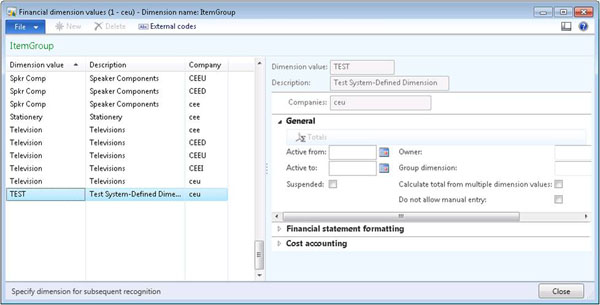
Notice that the new test item group that was created is automatically added to the list.
Custom dimensions are created in a similar fashion. However, when clicking the Financial Dimensions Values button, you must click New, to add each desired value for the dimension. This process is documented in the Financial I in Microsoft Dynamics® AX 2012 User Guide (http://www.microsoft.com/learning/en/us/course.aspx?ID=80219A&Locale=en-us), which can be found on PartnerSource and CustomerSource.
If you have created a custom table or want another existing AX table to be included in the Use Values from drop-down box, a simple modification with the creation of a new view and a few pieces of code will make this possible. A full walkthrough of this is included in the Development IV for Microsoft Dynamics® AX 2012 User Guide (http://www.microsoft.com/learning/en/us/course.aspx?id=80313a), which is available on PartnerSource and CustomerSource.
Lastly, I want to point out that many people assume that because you link the financial dimension in the Financial Dimensions form, that the value will default onto new records automatically. However, this is not the case. It is possible however, to modify the code on the form where the master data was entered to make the values default.

 RSMUS.com