If you used the Location wizard as part of Dynamics AX 2012 R2, or afterwards for standard warehousing, I think you’d agree that it is an adequate tool. However, given the added functionality of Warehouse management in AX 2012 R3 and later versions, the Location Wizard for Dynamics 365 for Operations now requires a bit more effort.
In this article, we will go through the setups required to run the Wizard; then we will run the Wizard itself. You will see the results and the additional functionality provided in Warehouse management.
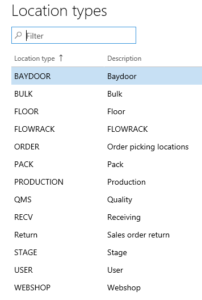
First of all, we now have what is called location types. As shown below, these represent the different kinds of types normally found in a warehouse. These “types” contain no logic, as they will be selected in later screens:
Warehouse management > Setup > Warehouse > Location types

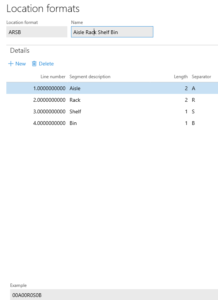
Next we have location formats. These are the formats that determine how locations are identified. You have a great deal of control with location formats; you can create formats for any location type and you can include all levels of data, such as Aisle, Rack, Shelf, and Bin. Keep in mind that you are limited to a total of 10 characters, which will include any separators you may choose to use.
Warehouse management > Setup > Warehouse > Location formats

In this example screenshot, there is a separator after the specific ID of the location, such as “02R” to represent Rack 2. At the bottom of the screen, you can see how the location number will be displayed in Dynamics 365.
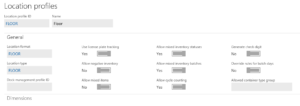
Finally, there is the location profile. This is one of the more meaningful and defining screens related to your warehouse setup. In this setup screen, we bring together the previous setups we discussed and also set rules about how the location will perform for you in your warehouse operation.
Warehouse management > Setup > Warehouse > Location profiles

Once all of these are set up, you can proceed to run the Location setup wizard. The intent of this process is to create locations in the warehouse. This process is appropriate whether creating them for the first time in a system like this, or even when converting from a previous version of the software.
Warehouse management > Setup > Warehouse > Location setup wizard

In this screen, you can do the following:
- Select the warehouse. The only selections what will come up are those warehouses that use Warehouse management.
- Select a Zone ID. This field is optional.
- Select a Location profile; the selection of the profile will include the location format. The format of the profile will then appear below.
- The location format will then allow you to insert the number of, in this case, aisles, racks, shelves, and bins. For this example, I have added 2 aisles, 4 racks, 8 shelves and 3 bins for this particular bulk location.
- Once you have the information you want, click the Create button in order to create the locations.
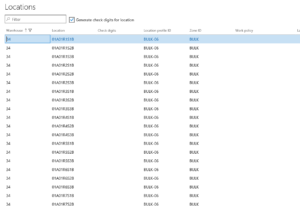
The locations will then appear in the Locations screen:

Warehouse management > Setup > Warehouse > Locations

You have now created locations according to the specifications in the setup wizard. These locations have the format and the profile you requested and also will all have the Location profile you listed with all the rules that were on that page.
This Location setup wizard will set up the locations in your warehouse and will apply the handling rules that you need with Warehouse management in Dynamics 365 for Operations.
for more information about Dynamics 365 for Operations and how it can help you better manage your warehouse, contact our experts at RSM or call 855-437-7201.
by Howard LeCover for RSM

 RSMUS.com