The concept of the task recorder is not new, however, with the release of Microsoft Dynamics 365 for Operations, the functionality has been greatly enhanced and improved upon. When you create a new task recording, task recorder will populate the steps automatically. A new option to save the recording to your Life Cycle Services page is available. Users also have the ability to add new sub-steps, modify the document, add instructions or even delete certain steps while recording. This document, once created, becomes a great training tool and also gives end users the powerful end-user process document which can be used to train new users when needed. Finally, this document can be uploaded to Life Cycle Services (LCS) and added to business process module.
The new task recorder will then help users navigate through the exact steps needed to complete the end-to-end business processes. It takes out all of the guess work for trainers and end users as AX will point the user to the exact button/field/navigation path as they are walking through the step by step process.
The task recorder can be started off from the action pane of any area page.
Let’s take a look at how to use the task recorder and its enhanced functionality.
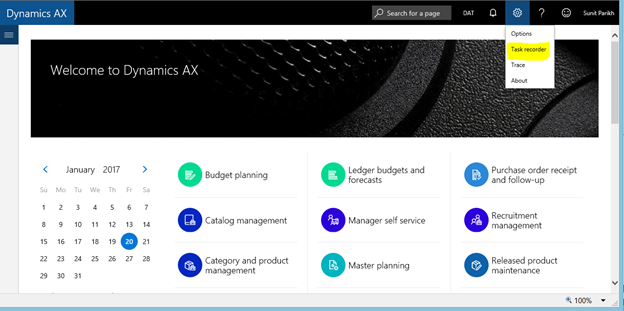
- At the top right hand corner, select the gear icon and then click on Task recorder

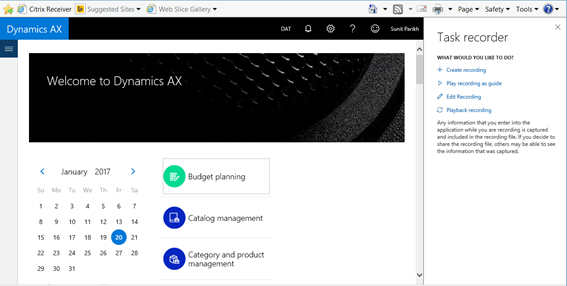
- Click on Task recorder and you will see that a new screen will open up to the right side as seen in the screen below.
- Select Create recording to start the task recorder

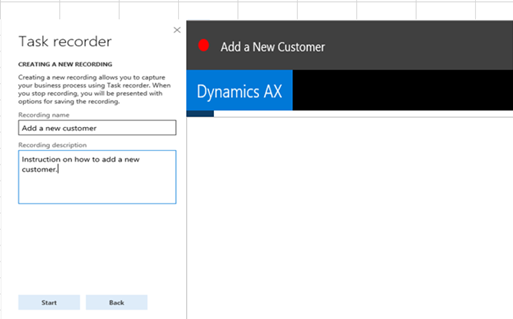
- Give it a name and description. In my example below, I am going to add a new customer. I have given a Name “Add a New Customer” and entered the description “Instruction on how to add new Customers”. Click the Start at the bottom. Users can start the recording now or add a sub task to this recording.

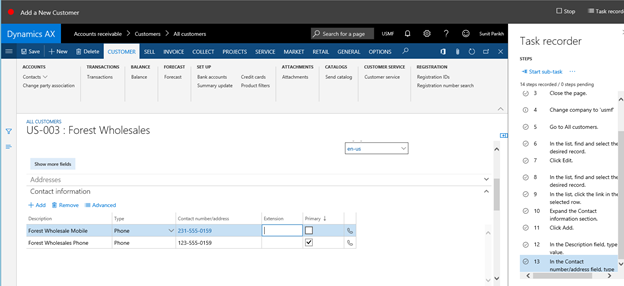
- You will notice a red dot at the top of the form to indicate that you are now recording. Create the steps that business process users are trying to document and complete the steps. Users will see that the steps are being reproduced on the right hand side of the screen.

- At any time if a user makes a mistake then user can go to that step and Right click.

- Once the steps are complete then click Stop at the top of the form.
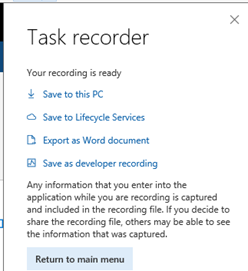
- Your task recorder form will give the options below. Select Save to this PC in order to save it as a task guide (file format .axtr). Alternatively, you can export the guide as a Word document as mentioned previously.
- Choose ‘Download a raw recording file’ to get an XML file. This will be generally used by developers for generating unit tests.
- Choose ‘Download the word document for the recording’ to generate a task recorder word document. The document will have screenshots of the recording if it was selected at the start of the recording. This document can be used as a user manual for business process.
- Choose ‘Save recording to an LCS library’ will ask you for the LCS libraries and your connected windows live ID. I am still working on this functionality to work in the machine I am working. I’ll update the blog once I get success.
- Click Return to main menu when finished.

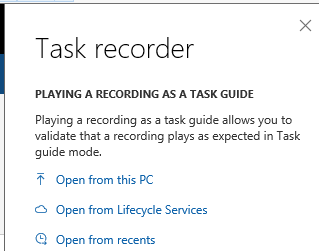
- Now that you have created a task guide, click Play recording as guide so you can go through your guide step by step. The same options are available if you select “Edit the recording” instead of “Play the recording”.

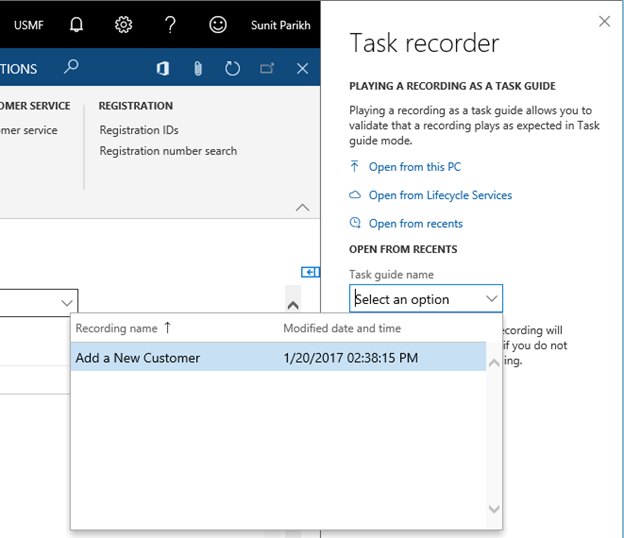
- Find your document. I selected “Open from recents”. Users will be able to see the file that we created. Select the file. Click Start Guide. This will take users thru all the steps.


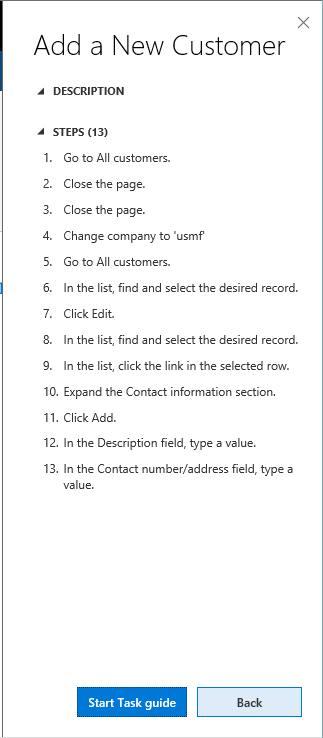
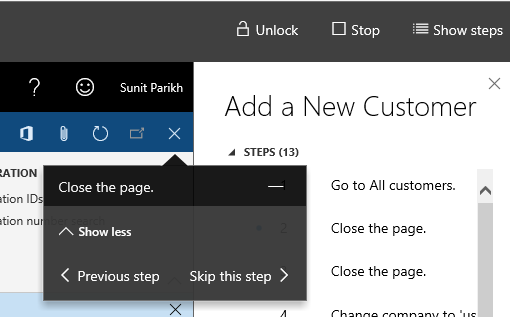
- The instructions will appear in the task recorder form. You can click Start task guide when you are ready to go through the process. You can skip the step or continue as you move along the process steps.

- Users will not be able to click different fields unless you click the Unlock button at the top, which will allow you to click anywhere. Once you go through all the steps of the task guide, you will be able to click anywhere as well. Finally, click Stop at the top of the form (screenshot above) to stop following the tasks.
The new task recorder features have been enhanced greatly and I can see that both Microsoft Partners and End Users at Clients will be able to make full use of this awesome feature that is now included with Dynamics 365 for Operations.
For more information about the innovative tools in Microsoft Dynamics 365 for Operations, contact our experts at RSM or subscribe to our Microsoft Dynamics Community News publication.
by Sunit Parikh for RSM

 RSMUS.com