NetSuite provides the user with the ability to customize their center menu with specific tabs, both native to NetSuite as well as custom tabs. The user can also customize the links on these tabs. Links on the center tabs can be added or removed on custom tabs as well as ‘out-of-the-box’ tabs.
This article outlines how to edit center tabs and links, detailing editing standard tabs as well as custom tabs. Making edits to the Reports tab from NetSuite’s Classic Center will be used as an example for this article. Users often customize some of NetSuite’s basic reports like the General Ledger or Balance Sheet and will want to access these reports in a standard spot. Similarly, they may want the unedited reports to be removed from their center tabs and replaced by the newly customized ones to avoid confusion.
Prerequisites
Customized forms or links must already exist in NetSuite before adding them to center tabs.
The user must have the following permissions:
- Custom Center Categories
- Custom Center Link
- Custom Center Links
- Custom Center Tabs
- Custom Centers
Editing an ‘Out-of-the-Box’ Tab
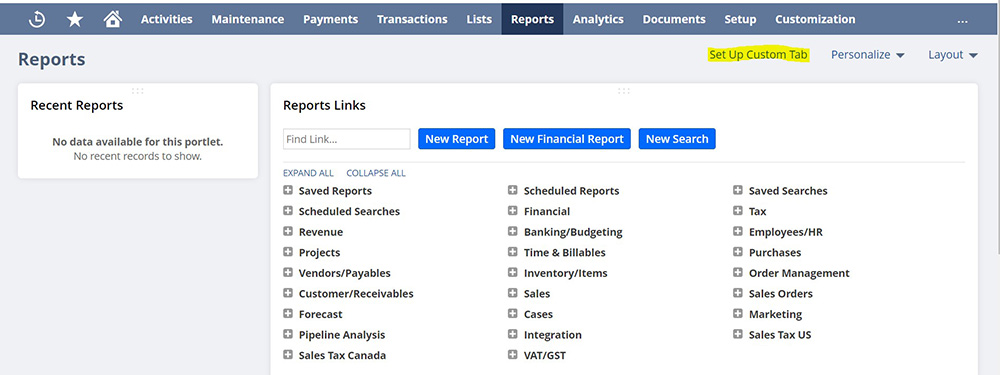
- Navigate to Reports > Reports Overview
- Click ‘Set Up Custom Tab’

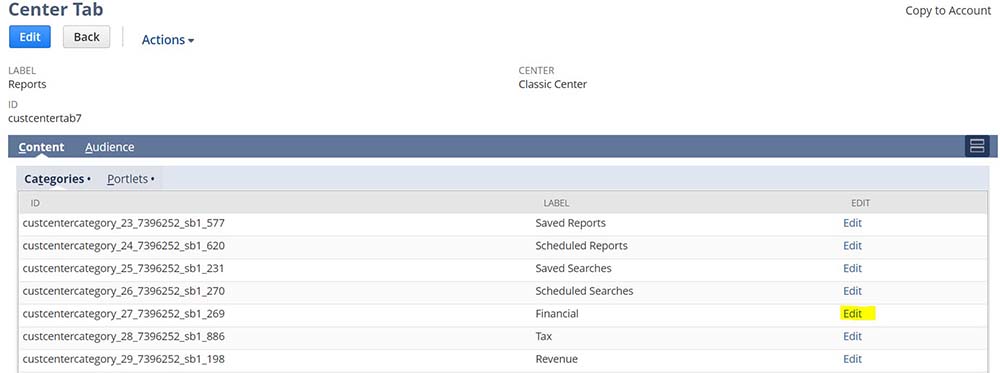
- Find the ‘Custom’ tab at the bottom and click ‘Remove’. Click ‘Save’ at the top of the screen.
- Click ‘Edit’ on whatever category you want to change.

- Scroll down and add the custom report that has been built from the list of reports.
- Drag this custom report to whichever space it should be in the list and click ‘Remove’ on the out of the box report in NetSuite. Note that this does not edit the links in a navigation shortcut group. To change these links, you’ll need to navigate to the shortcut group and edit the appropriate hyperlinks.
- Click ‘Save’
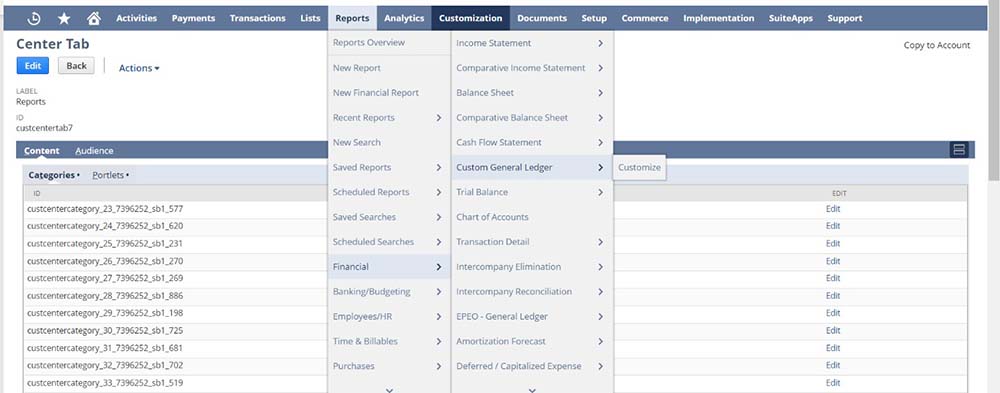
- The links under reports should now be updated.

- Note that in our example, ‘General Ledger’ is gone under the Financial subtab and has been replaced by ‘Custom General Ledger’.
Editing a Custom Tab
- Navigate to Customization > Centers and Tabs > Center Tabs
- Click ‘Reports’

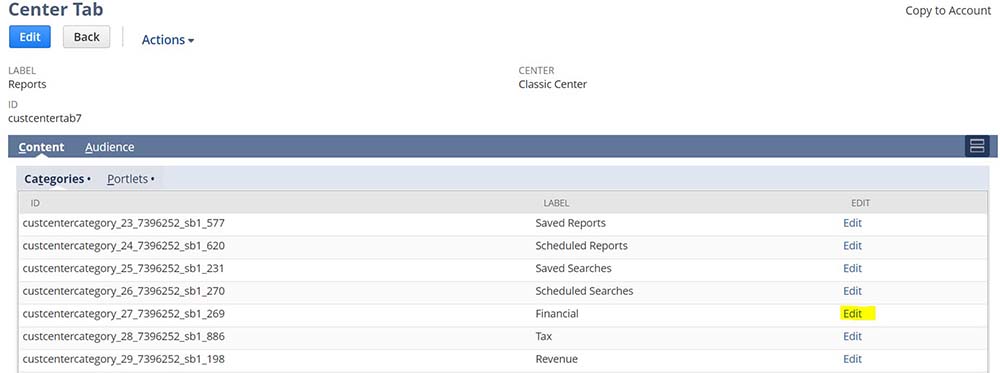
- Click ‘Edit’ on whichever category needs to be changed. Note that we chose ‘Financial’ in this example since we wanted to add a customized General Ledger report which natively falls under Reports > Financial > General Ledger.

- Scroll down and add the custom report that has been built from the list of reports.
- Drag this custom report to whichever space it should be in the list and click ‘Remove’ on the out of the box report in NetSuite.
- Click ‘Save’
- The links under reports should now be updated.
After you have updated any center tabs or links, you can go back to edit the custom tab by navigating back to Customization > Centers and Tabs > Center Tabs.

 RSMUS.com