RSMUS.com
Overview
The Transaction Line Distribution SuiteApp provides organizations the ability to distribute expenses across different subsidiaries, classifications, custom segments, departments, locations, and accounts. An example is an office space may be used by multiple legal entities where one entity receives the vendor bill and makes the payment, but the expenses for rent and utilities needs to be allocated across the entities using that office space. It also improves efficiency and accuracy in entering vendor bills and vendor credits through reusable expense distribution templates.
Prerequisites
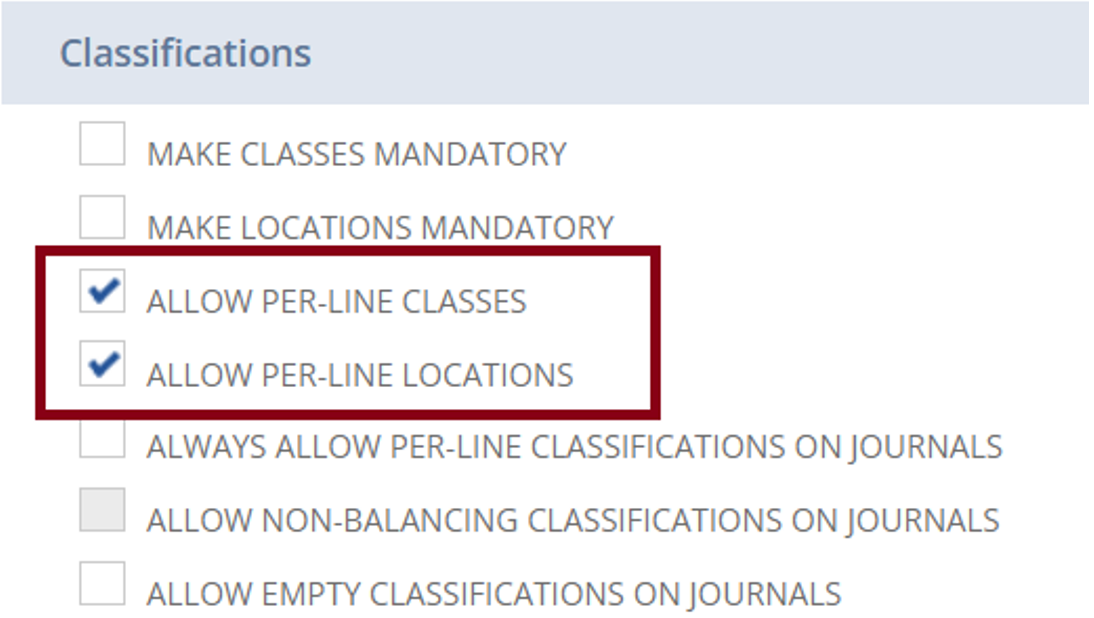
The accounting preferences in the account must be set by going to Setup > Accounting > Accounting Preferences. The following table lists the preferences that must be set in the account:
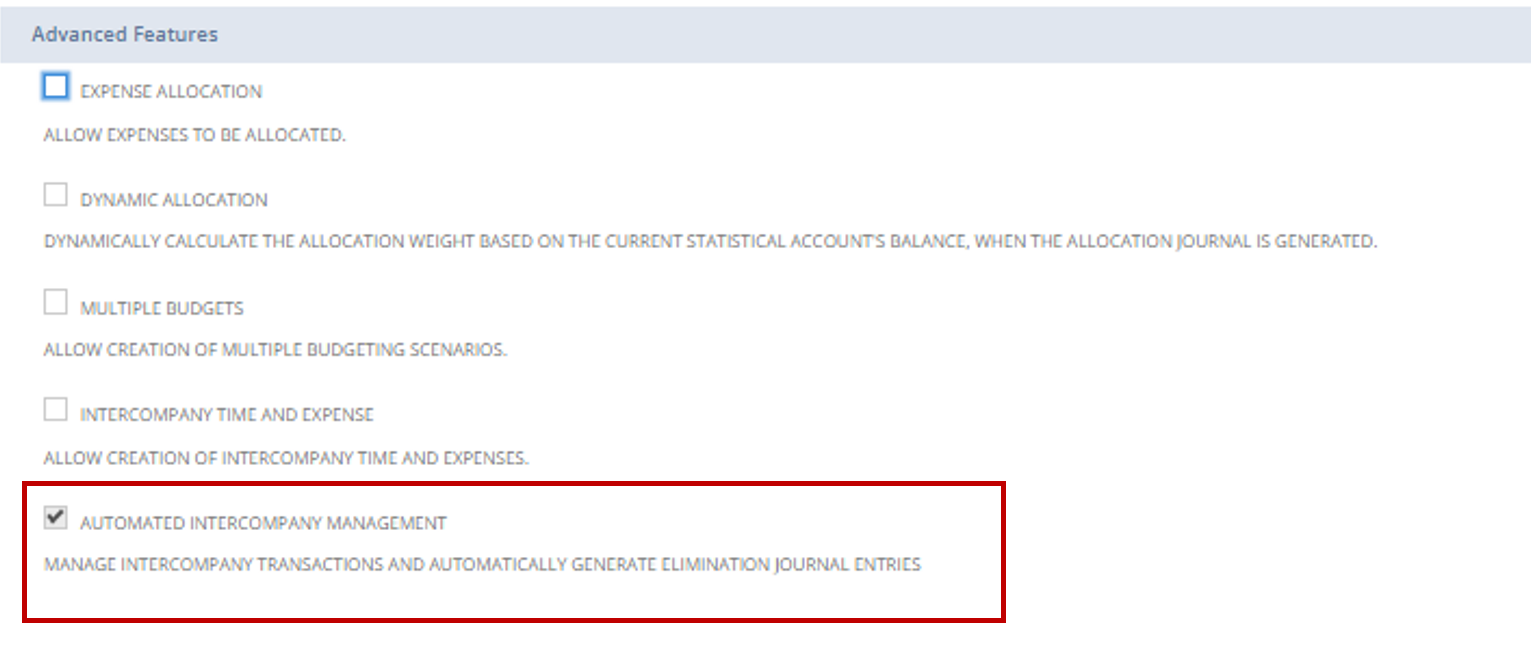
If you want to use the Intercompany distribution type on your transactions:
Enable the following features by going to Setup > Company > Enable Features

Enabling the Generation of Representing Entities
To use the Intercompany distribution type on your transactions, you must enable the generation of representing entities in your account.
- Go to Setup > Accounting > Intercompany Preferences.
- In the Representing Entities subtab, check the Automatically Generate Representing Entities box.
- Click Save.
Installation
- Go to the SuiteApps tab.
- In the Search Apps field, enter Transaction Line Distribution.
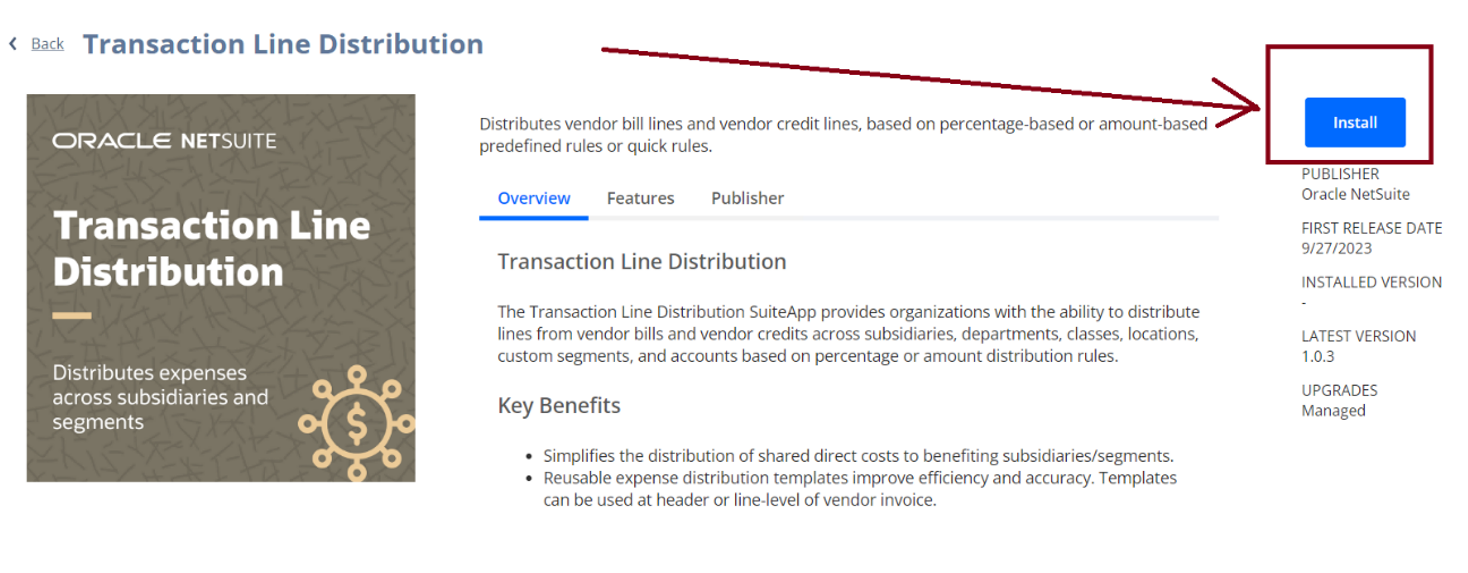
- Click the Transaction Line Distribution SuiteApp tile.
- On the top right area of the Transaction Line Distribution SuiteApp details page, click Install.
Customizing Roles and Setting Permissions for Transaction Line Distribution
- Go to Setup > Users/Roles > Manage Roles.
- Click Customize next to a standard role that will need to use this SuiteApp.
- In the Name field, enter a name for the custom role.
- In the Subsidiary Restrictions section, from the Accessible Subsidiaries option, choose Active.
- On the Permissions subtab, set the following required permissions:
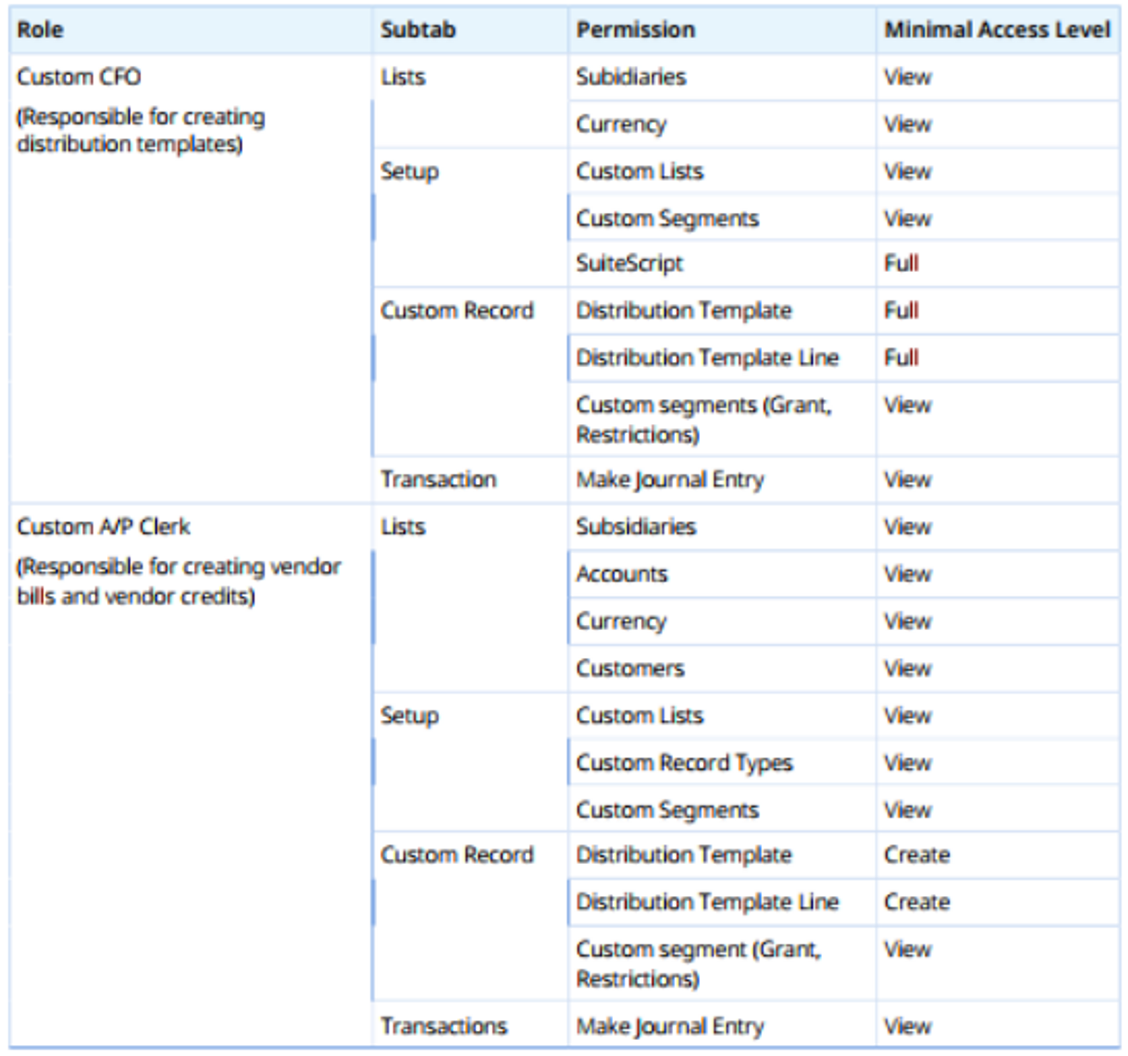
You must ensure that the custom roles created have the minimum required permissions to all classic and custom segments applied on the distribution template lines. Otherwise, there will be mismatches in the transaction distributions.
Creating a Line Distribution Schedule
Only users with the assigned Custom role with the above permissions can create a transaction distribution template in the account. For this demo I will be using the custom CFO role.
To Create:
- Navigate to Setup > Accounting > Transaction Distribution Templates > New.
- Input a distinct name for your template in the Template Name field.
- Choose the relevant subsidiary from the Source Subsidiary list for applying the distribution template.
- Pick the appropriate Dist. Rate Type:
- If the distribution basis is an amount, select Amount.
- If the distribution basis is a percentage, select Distribution weight.
- From the Type list, specify the nature of the transaction:
- Intercompany, for transactions involving multiple subsidiaries.
- Intracompany, for transactions within the subsidiaries.
- (Optional) Check the boxes outlined in red based on your template preferences:
- Distribute Taxes: Distribute the transaction line tax amount in the template lines.
- Use Source Account: Utilize accounts from the source transaction on the journal entry.
- Use Source Custom Segments: Apply custom segments from the source transaction on the journal entry.
- Use Source Class: Employ the class segment from the source transaction on the journal entry.
- Use Source Department: Implement the department segment from the source transaction on the journal entry.
- Use Source Location: Apply the location segment from the source transaction on the journal entry.
- To add a line to the distribution template:
- Choose the Destination Subsidiary for distributing the amount.
- Select the Destination Account for distributing the transaction line amount.
- If the rate type is Amount, enter the amount in the Distribution Amount field.
- If the rate type is Distribution Weight, input the percentage in the Distribution Weight field.
- (Optional) Specify values in the following fields:
- Destination Class
- Destination Department
- Destination Location
- Click Add.
- Repeat steps 7(a) to 7(f) to add more lines to the template as needed.
- Click Save.
- Click Save to finalize the process.
NetSuite’s transaction line distribution has the potential to enhance your business efficiency by automating the allocation process, thereby saving both time and resources. For further information on this feature, feel free to reach out to our team.