When sending emails out of NetSuite via workflow, one great feature is the ability to include an Email Template as the dynamic message in the body of the email. Email templates allow you to assign one blanket email message to a number of recipients while using HTML tags to dynamically display information specific to that recipient within the body of the standardized template.
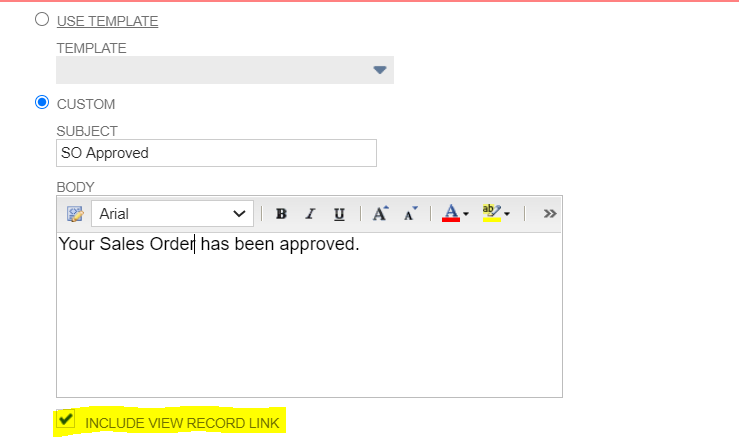
When using an email template in conjunction with a workflow action, however, you lose the ability to check the “Include View Record Link” checkbox with the email, which includes a link with the email that takes the recipient to the record in NetSuite:
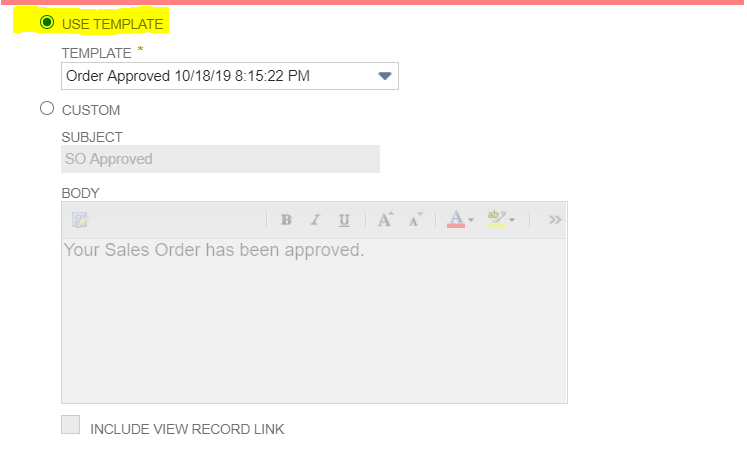
When the “Use Template” option is checked, “Include View Record Link” becomes greyed out:
In order to have the best of both worlds, we can introduce a workaround to the body of the Email Template, using a combination of record hyperlinks and a scriptable field tag. Navigate to the custom Email Template that you would like to include the View Record link by navigating to Documents > Templates > Email Templates, and select to Edit the template you intend on including in the workflow action.
In a new tab, open a sample of the record type in which you will be emailing. For example, if this email action is for a Sales Order approval workflow, open an existing Sales Order in the other tab.
One shortcut you can use in NetSuite to navigate between records of the same type is to use the address bar to replace the “id=” with the internal ID of the record you want to navigate to. For instance, in the screenshot below I am on SO271, with an internal ID of 102388. If I want to navigate to another sales order with an internal ID of 103012, I can replace the ID in the address bar and hit enter to move to this record:

Using this same trick, we can copy the address up to the internal ID, and include this in our email template to begin our own version of the “Include Record Link” within the body of the email template. Again using this sales order example, I am going to go to a Sales Order approval email template to continue the process:
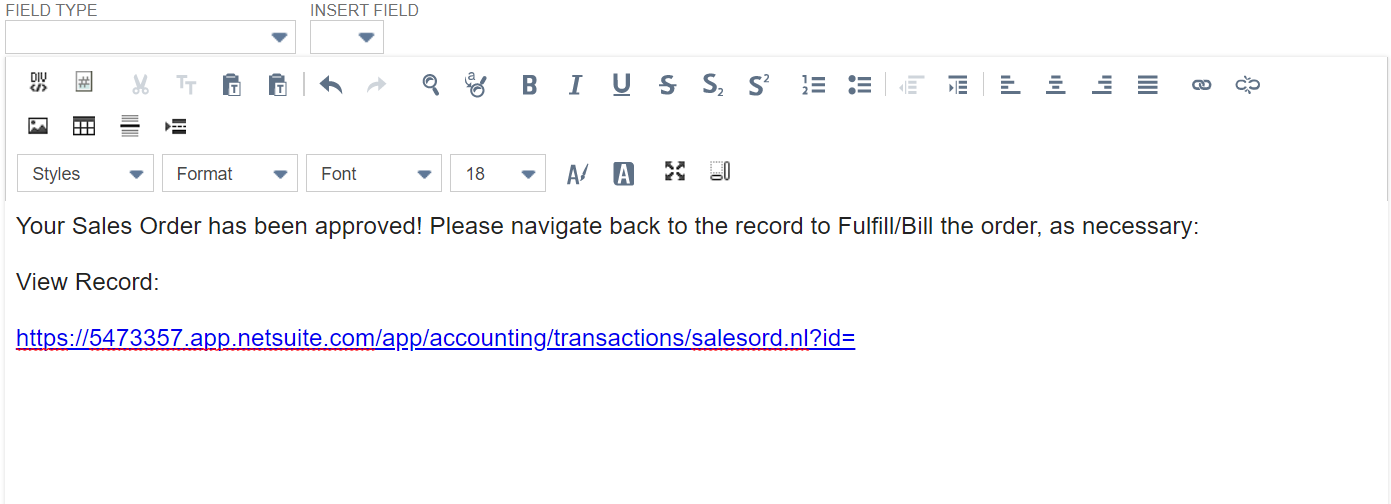
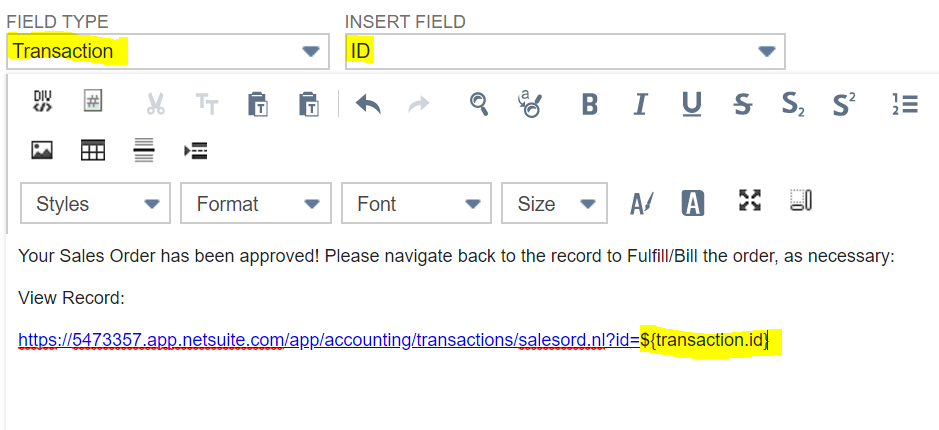
Once the address has been copied in (again, only paste up to the internal ID), we can use the Email Template tools to include the dynamic tag for the internal ID of the record within the body of the email template. First, select the “Field Type” of the record that you are on (Transaction, Entity, etc.). Next, select the “Insert Field” of “ID” to dynamically tag the internal ID.
Now just insert this field tag directly after the “=” sign in the address bar to create the View Record Link workaround!
Once this email template has been used, we can view the outcome of this workaround by going to the Communication tab of the record we emailed from, and Viewing the Email message to make sure the link works as expected:
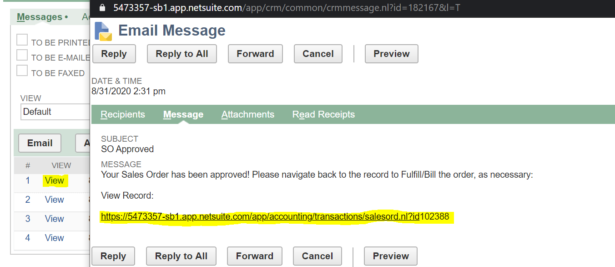
Once this link is selected, you should see be routed back to the record in NetSuite!
**Note: This link will only work if the recipient has access to the NetSuite environment, and at minimum View permission to the record type that is being emailed**

 RSMUS.com