A memorized transaction in NetSuite enables the user to set up a transaction to recur automatically in the system. Memorized transactions eliminate data entry and can serve as reminders.
Memorized transactions are created in NetSuite using a template and can be set up for posting transactions, non-posting transactions, automatically emailing or faxing customers and automatic credit card payments. Memorized transactions can be set up to automatically post or be a reminder to post. You will need to identify a frequency and specify whether or not you want the transaction to post on the creation date. From these settings, we can identify specific posting dates.
Prerequisites
The user must have the Override Period Restrictions permission enabled.
Getting Started
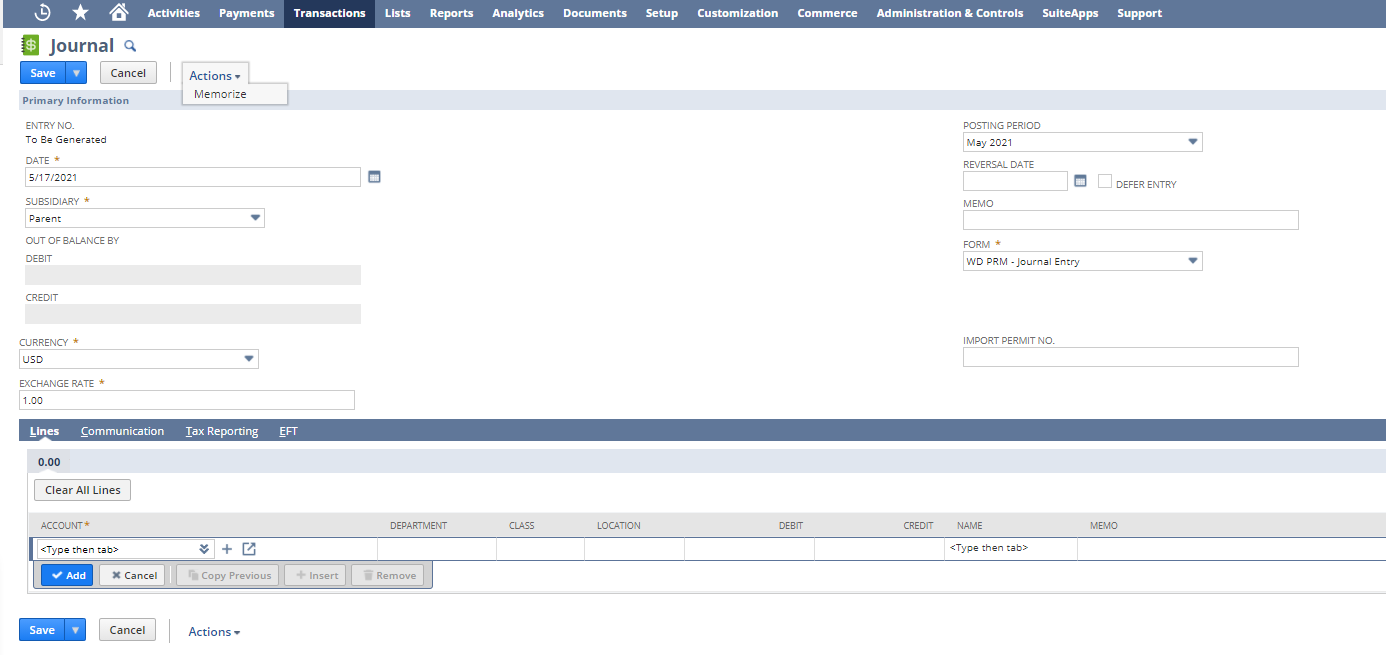
- To create a memorized transaction using a specified date you will edit the transaction you would like to memorize, ensure the appropriate information is filled in, and select Memorize from the Actions list

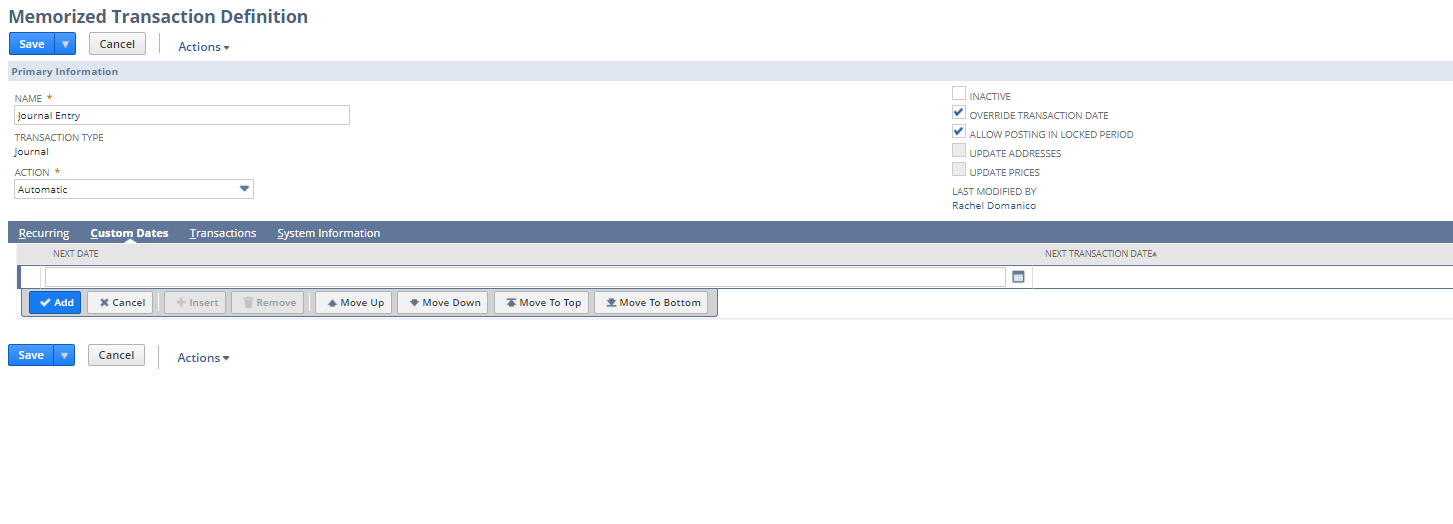
- From here you will be brought the Memorized Transaction Definition page. From here you need to select an action. The three choices are Template Only, Automatic, and Reminder. The template only means no transactions will be created just the template. Reminders will allow you to be reminded when this transaction is due and allow you to view and edit it before you save it. Automatic allows you to automatically post. You can only set custom dates for Automatic and Reminder actions.
- Once this is selected you will need to select the Override Transaction Date checkbox to the right. Also, select the Allow Posting in Locked period checkbox. Once this primary information is set up you will move below to the Custom Dates subtab.

- On the Custom Dates, subtab enter in a Next Date. The Next Date that you enter is the date on which a new transaction will be created.
Note that if you have previously entered any information in the Recurring tab this will override the information.
- Next, if you would like the transaction to post on a date after it is created then enter a Next Transaction Date.
- Once one or both dates are entered click Add.
- If you would like the Transaction to recur on other specified dates then add values into the blank row beneath the one you just added.

- Click save when you have finished adding custom dates.
After your memorized transaction is saved NetSuite will run the transaction or reminder on your set dates. You can go back and edit the memorized transaction by navigating to Transactions > Management > Enter Memorized Transactions > List and then selecting edit next to your memorized transaction that you wish to change. As noted before, if your memorized transaction is currently recurring and you want to set a custom date this will override the recurring information. This means you cannot just add a custom date on top of a recurring transaction.
Contact us for more information on this topic or others related to:

 RSMUS.com

