
 RSMUS.com
NetSuite empowers users to create approval workflows for a variety of transactions that can be as simple or as complicated as needed. Approval workflows enforce approval policy, automate email notifications and reminders, and systematically track approvals. Depending on the complexity of the approval process, building the workflow can be a tedious task. Below are some quick tips for building approval workflows in NetSuite.
Map out the full approval process before starting
Before you begin building an approval workflow, map out the entire process. Identify the different approval levels, amount thresholds, approvers, notifications needed and the tracking needed. Doing this before jumping into building the workflow will help ensure the workflow is efficient and that there is consistency between the different states. Mapping out the process will also help to identify testing scenarios for use during testing after completing the build.
Be conscious of order of operations
Order of operations is simple enough, but can easily be forgotten. For actions in a state, some order of operations are automatic based on trigger. But inside each trigger order can matter as well. A simple example is, if one action is to send an email to the next approver the action of setting the next approver needs to be before the action of sending the email. It is also import to keep order in mind when doing transitions. Correct order of transitions can simplify the conditions because NetSuite will process them in order. To change the order of an action or transition select the row and drag.
Never forget about context
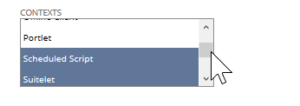
Context helps solve the problem of when the approval workflow should run; for example, should imported transactions or transactions created from a script have to be approved. If the approval workflow should only run on transactions created through the user interface then context can be set at the workflow level. If some actions should run on transactions and some should not based on how they are created, then the context can be set at the action level. Allowing all transactions to start the workflow and transition to an approval state via context allows for field setting in the first state and being in the end state for consistency to simplify reporting. To select multiple contexts at the workflow level or action level, hold Ctrl and select.
If you would like more information on this topic or others related to NetSuite, contact RSM at erp@rsmus.com or by phone at 855.437.7202.
By: Kelsey Cantrell – National NetSuite Solution Provider