
 RSMUS.com
The Static Route Management feature in NetSuite allows companies whose trucks operate on predefined routes more visibility into their operations. Once installed, clients may create custom ‘Truck’ records, create predefined routes with their corresponding stops, and manage the route shipments. This combination of information, along with sales orders, creates ‘Route Records’, and these are malleable to adjust to changing conditions.
Installing the Bundle
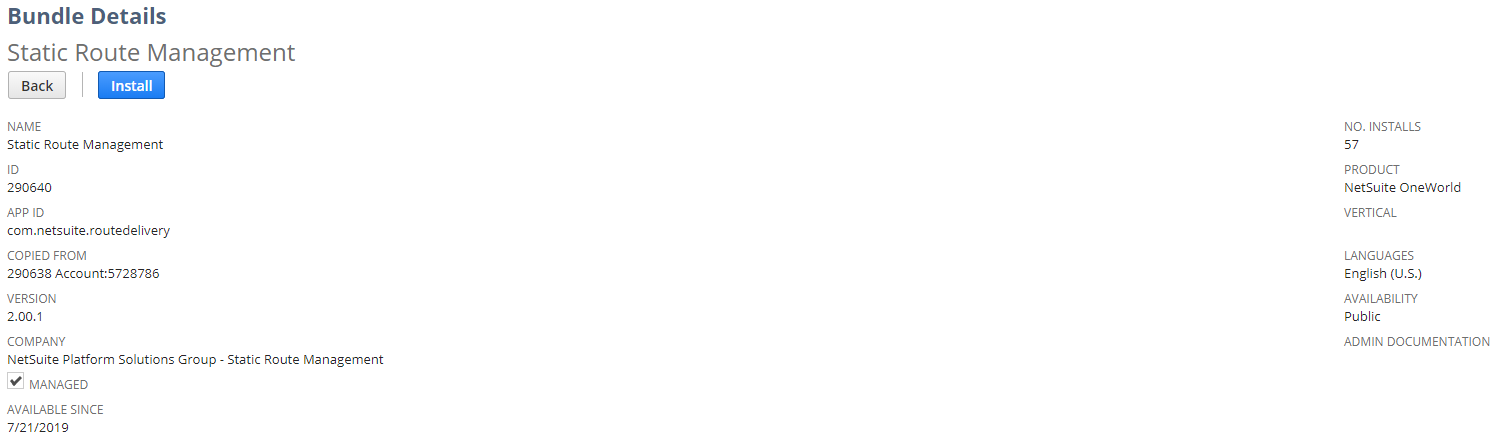
Search with keywords “Static Route Management” and download bundle ID 290640. Click Install.
Enabling Features
Next, ensure that the following features are enabled under Setup>Enable Features:
- Custom Records
- Client SuiteScript
- Server SuiteScript
Creating Truck Records
Now, we are ready to create our truck records. These are virtual representations of the trucks that will stop along a predefined route.
Head to Lists>Route Management>Trucks>New
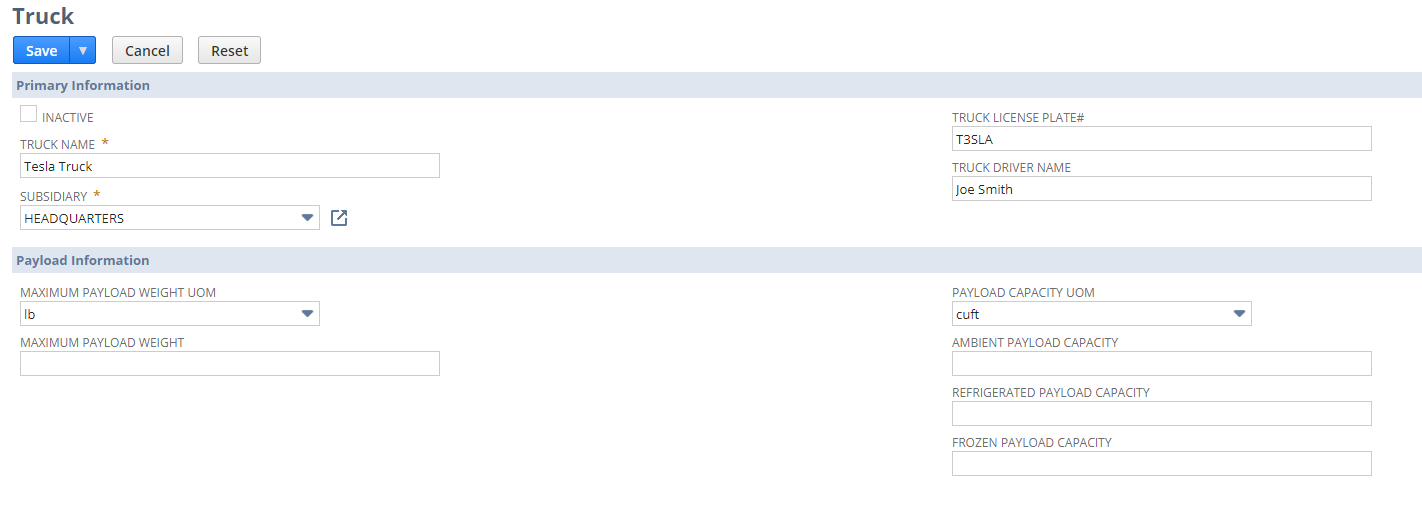
Fill in the required fields of Truck Name and Subsidiary, at the minimum. The rest of the fields can be filled out to help with the identification of the particular truck record. Keep in mind that just like any other form, this Truck form can be customized to add custom fields. Click on “Customize” when in Edit mode to do so.
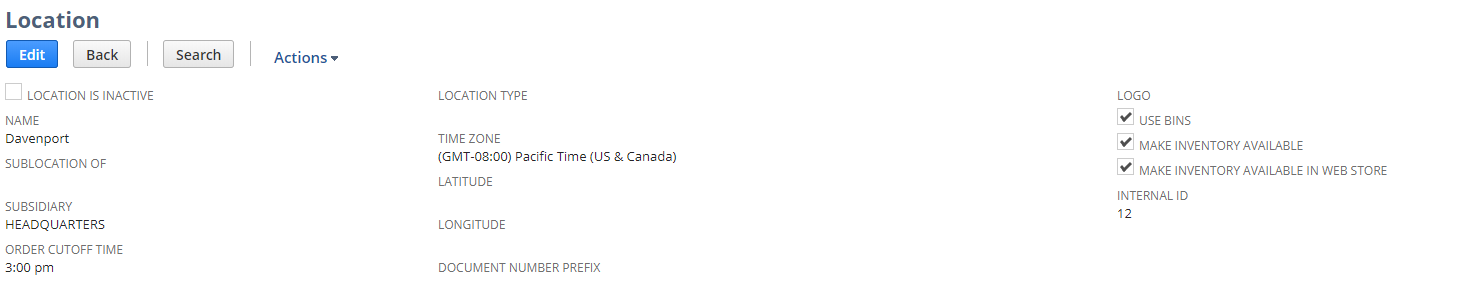
Location
If we take a look at the Location segment, we will see that a custom field of ‘Order Cutoff Time’ has been added to the form from the bundle. This time represents the cutoff time at which a sales order can be entered to be shipped out on that day. For example, if we enter the cutoff time at 3:00pm for the Davenport location, orders entered at 3:05pm will be shipped out on the NEXT available day of the proper shipping route.
Routes
Next, we can create a route. Head to Lists>Route Management>Routes>New
Give the route a name. For the sake of our example, our Tesla truck will stop at three cities along the “Quad City Route”: Bettendorf, Rock Island, and Moline. It will start at the Davenport location.
The “Delivery Days” multi-select list represents on which days this route runs. Again, if the cutoff time is reached by the time a sales order is entered, and approved, it will be assigned to the next available day on the route.
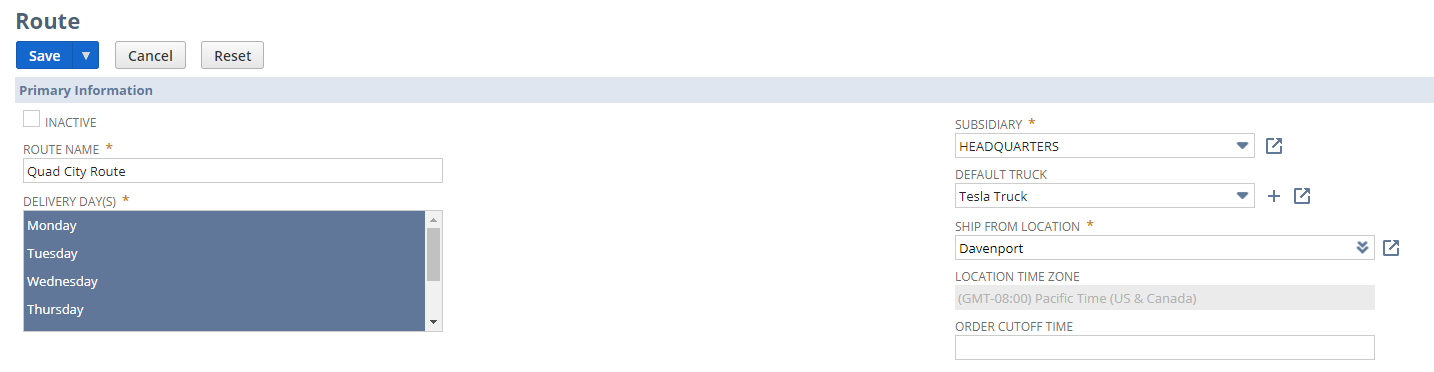
After that, stops can be added. Enter the Route Stop # in the order that the truck will stop along its route.
The customers that are added must have a valid address on their record. Select the Delivery Address from the dropdown, and the estimated delivery time of the window the truck is expected to stop.

Customer Records
It has been mentioned that Customer records must have a valid address to be chosen as the Delivery Address on the route. Notice also that the bundle has created a new “Route Delivery” tab on the customer record.
After choosing the Delivery Address Label and default location, the Route that we have created appears on the Customer Route Details. When looking at the Moline customer record, under the Route Delivery tab, we can now tell that Moline will be the third stop along the Quad City Route. This is helpful at a quick glance to see which routes will run when to Moline’s 18th Street address. These values must be selected for the route to flow through to the Sales Order.

Entering Sale Orders
When creating Sales Orders for the companies that belong on the truck stops, ensure that the Location segment is showing and a value has been selected. For our example, we will make sure to select Davenport as that is the city from which the Route starts.
Managing Route Shipments
Once the three sales orders have been entered for each of our three stops, the Manage Route Shipments Lists>Route Management> Manage Route Shipments page shows valuable information. Apply the filters of the Davenport location at the top of the form and select the Quad City Route. Make sure to click on Apply Filter after to make the routes refresh.

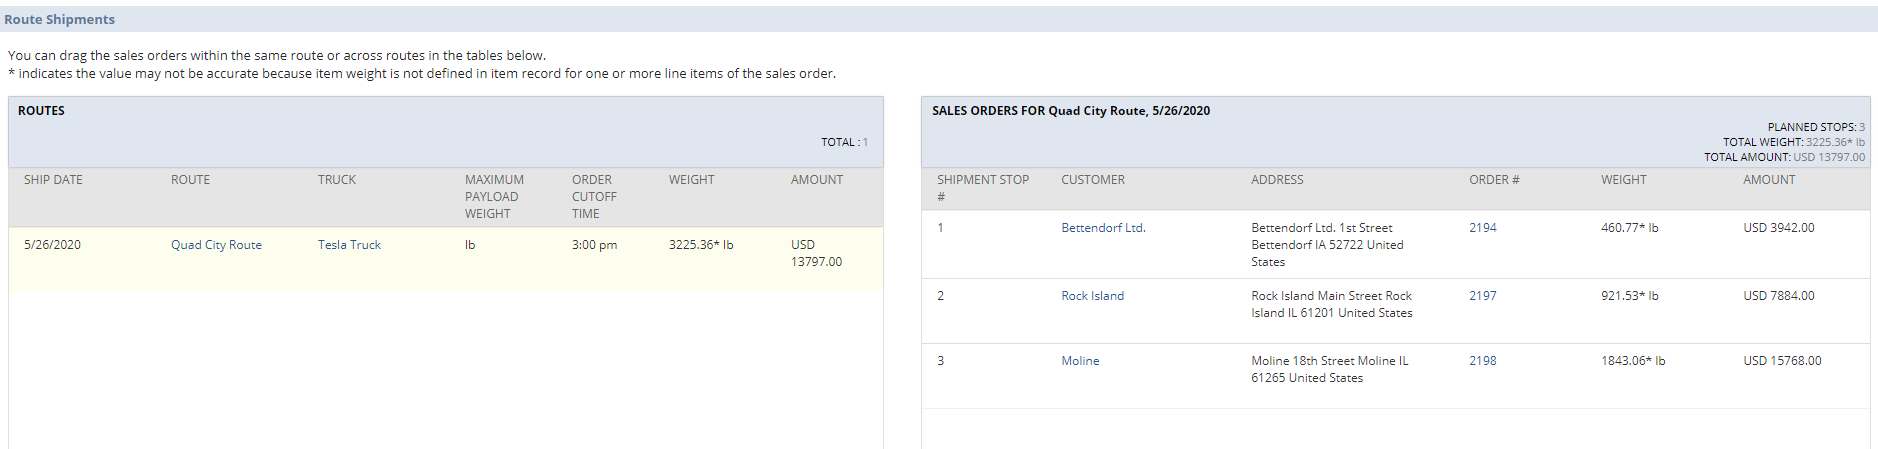
The Route Records will then show. Notice that the Shipment Stops on the right side of the screen can be dragged up and down, to reflect potential changes along the stops.
So, on May 26th, this page tells us that the Tesla truck will run along the Quad City Route and make three stops, Stop #1 to Bettendorf, shipment weight of a total of 460.77 lbs and amount USD 3942, then Stop #2 to Rock Island for 921.53 lbs and USD 7884, then Stop #3 to Moline for 1843 lbs and USD 15768.
For companies with multiple trucks and a number of different routes, the visibility to see for each day which routes are running, stopping along at which customers’ addresses, from which Sales Orders can be a powerful visibility tool.
*Take note that the weight is configured on the item level.
If you would like more information on this topic or others related to NetSuite, please reach out to RSM’s NetSuite professionals by contacting us at NetSuite@rsmus.com or call 855.437.7202.
RSM Staff
RSM empowers middle market companies worldwide to take charge of change. Our unique middle market perspective makes RSM the natural choice for growth-oriented, internationally active organizations seeking relevant insights and tailored, innovative solutions for a complex and changing world. With a global reach spanning more than 120 countries, we instill confidence in a world of change by bringing the full power of RSM to make a lasting impact on our clients, colleagues and communities.