Overview
NetSuite WMS allows for the automation of wave releases for sales and transfer orders. Once the orders have been released in a wave, they then become available to be picked, packed, and shipped by the warehouse it was designated to.
On the WMS Wave Release Schedule Record, you can specify elements such as the warehouse location if you have multiple warehouses or the amount of orders you would like to be released in each wave.
Scheduling the WMS Wave Release can be a little tricky so here you will find the step-by-step process and the Do’s and Don’ts of executing the wave release schedule properly.
How to Schedule a Wave Release Record
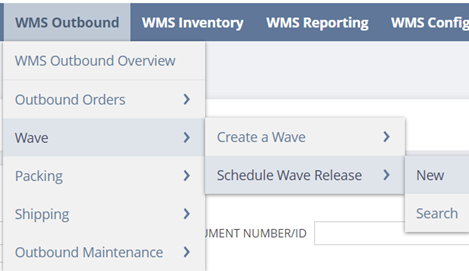
- Navigate to WMS Outbound > Wave > Schedule Wave Release > New

- On the WMS Wave Release Schedule Record:
- Do Enter
- Location
- Picking Type
- Status
- Transaction Type
- Wave Priority (If Applicable)
- Wave Order Limit
- Release Day
- Release Frequency
- Do Enter

-
- Do Not Enter
- Run Time Start
- Run Time End
- Note: The start/end time will be set on the script deployment
- Do Not Enter

- Click ‘Save’ on the WMS Wave Release Schedule Release
Configuring the WMS Wave Release Schedule Script
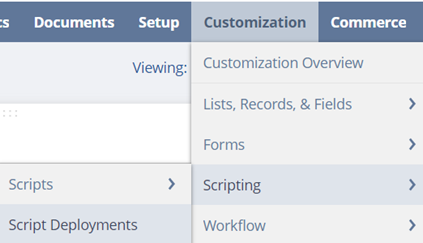
- Now navigate to Customization > Scripting > Script Deployments

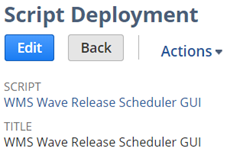
- Find the script titled ‘WMS Wave Release Scheduler GUI’

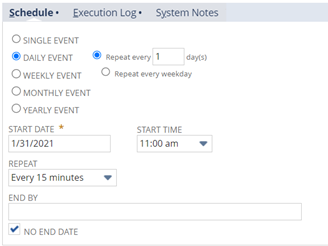
- On the script, set the start time in which you want the wave releases to begin. This start time will be the time the script uses, not the run time start/end on the record.

- Ensure the ‘WMS Wave Release Scheduler GUI’ is set to the ‘Scheduled’ status

- To monitor if waves have been created, you can navigate to:
- WMS Wave Release Scheduled Record > Release Status Subtab

- To monitor the execution of the script, navigate to the ‘WMS Wave Release Scheduler GUI’ deployment record, click the ‘Status Page’ hyperlink under the See Instances field

Note: Email alerts will not work in the Sandbox environment
To learn more tips and tricks and how you can leverage NetSuite’s WMS wave releases, contact our team!

 RSMUS.com