On August 2, 2019 the release wave 2 features for Dynamics 365 CE early access became available. I am super excited to discuss some of these new features in my next couple of articles. Please note that updates will mostly affect the Unified Interface, most of them will not affect the classic interface. In this article I will be discussing the following topics:
-
- Generic User Experience Updates
- Enhanced Email
- Business Card Scanner
- Customization of Opportunity Close Dialog Box
- Make Price Lists Optional
- Document Library visibility on main forms
- Auto populate fields in lead form
- Qualify Lead Experience
- Display notes from originating lead in qualified opportunity
This release wave (just like any other) has three kinds of functionalities;
- Updates to existing user experiences (which are updated automatically)
- Updates to existing user experiences which are updated by the admin & maker
- Updates to admin and maker functionality
Please note that not all functionality will be available for preview, only the existing user experiences will be available after you opt-in for early access. You can find the full list of user experience updates here.
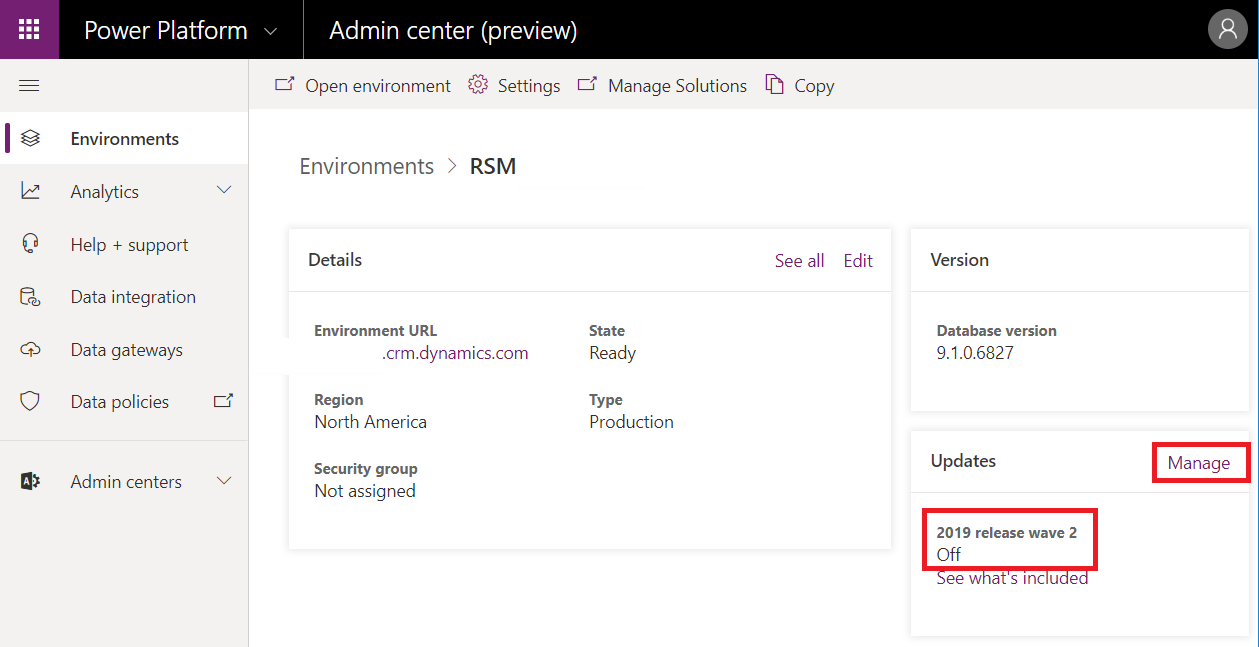
In order to opt-in and enable these features, admins will have to navigate to environments in the powerplatform admin center, open the environment they want to enable and click ‘manage’ (under updates)on the right side of the screen . I would highly recommend using a sandbox environment for this, and not a production environment. (What I ended up doing was making a copying my production environment into a sandbox.) Once the updates have been enabled, admins will be able to see the progress, also under the ‘Updates’ section on the right hand side. More details here.
Generic User Experience Updates
View Updates & Record Hierarchy
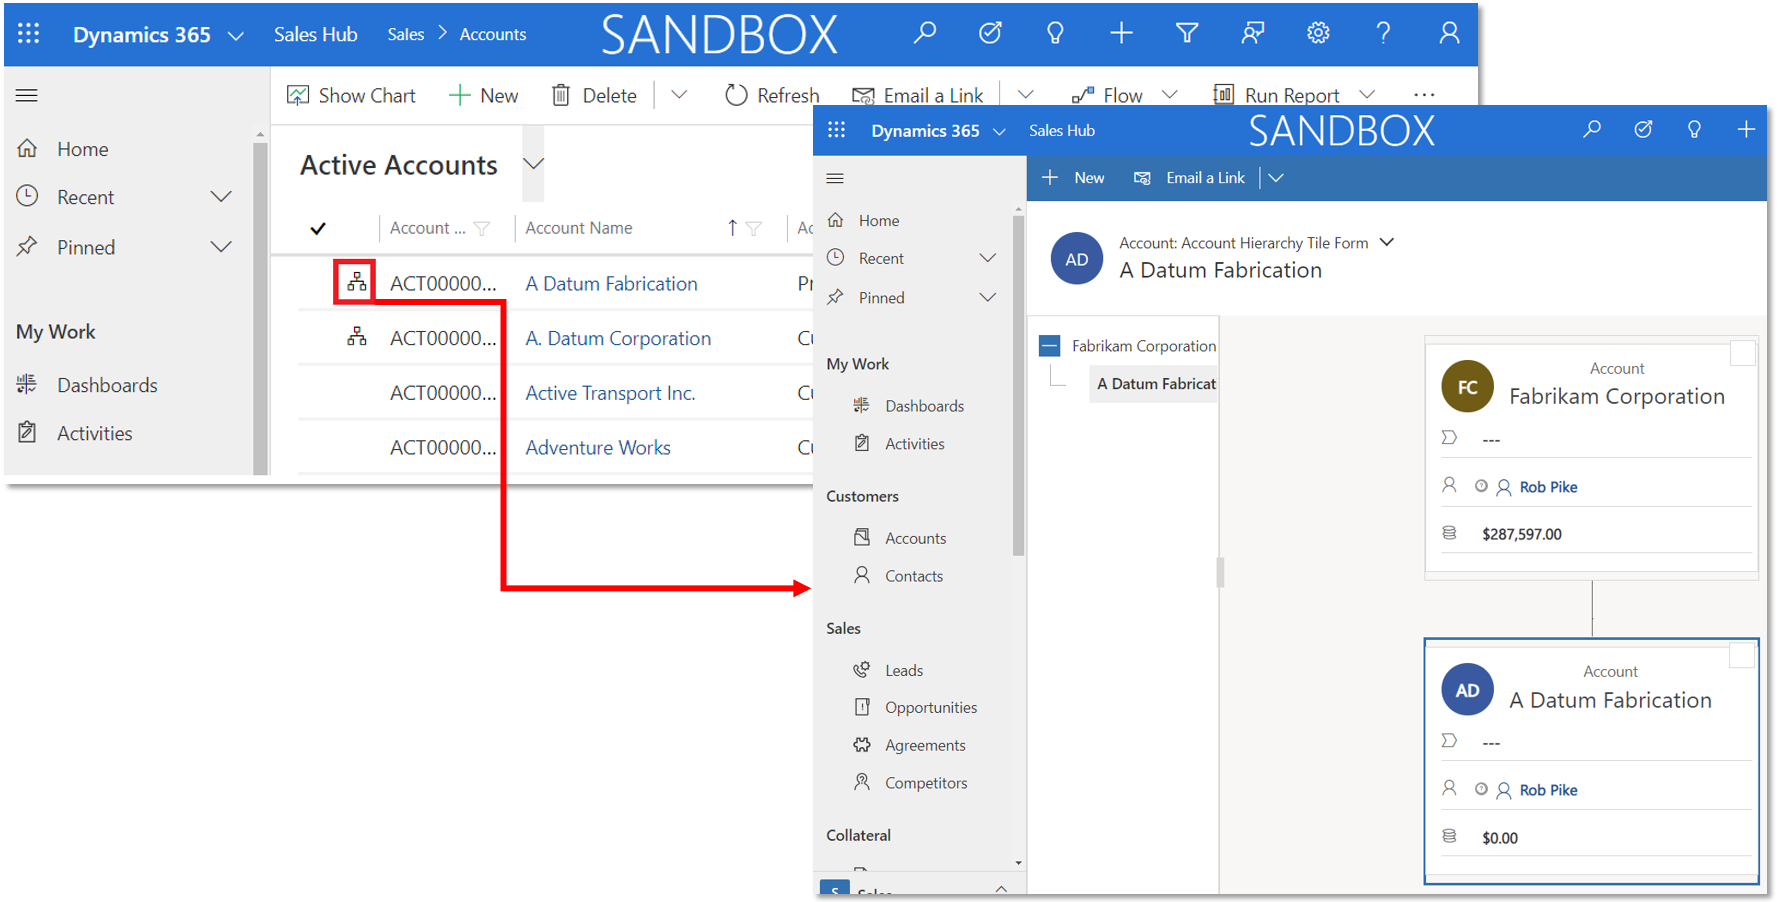
Immediately after logging into the environment I noticed some differences in Dynamics 365. The list view of records looks a little different, the font size is smaller which allows for more records on the page and I also noticed that the hierarchy functionality is now available in the Unified Interface! When navigating to accounts, I was able to pull up the hierarchy view for accounts – big win!
Note: This functionality is also available for contacts without having to navigate to the account first to pull up the org chart.
The Sales Insights settings in the Sales Hub App is now also available via the Sales Insights settings area. This used to only be accessible under the Settings area in the Sales Hub, but is now accessible through both areas. This is where you can configure the AI setup for the assistant, relationship analytics, connection insights etc.
Enhanced Email
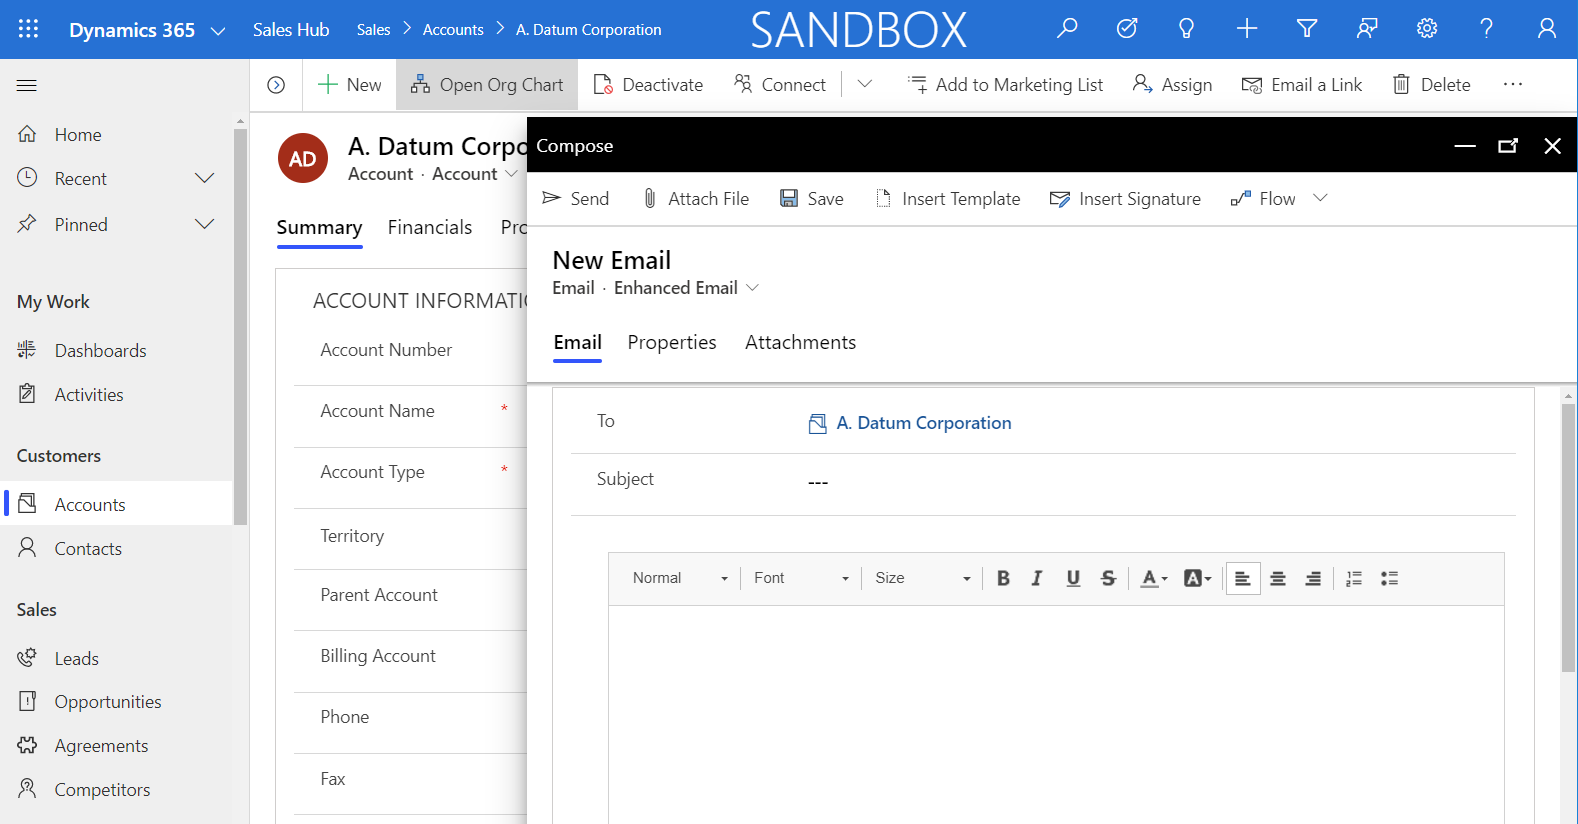
When checking out the Sales Hub app settings I found ‘Enhanced Email’ has been added. You can turn this feature on from here.
This feature enables the email compose window to open in a pop-up window when a user creates a new email from the timeline section. This allows users to stay on the record page they are working on. Users can also navigate to other Dynamics 365 records while composing the email. Lastly, they have the option to make this the email window full screen if needed.
There are three tabs on the enhanced email window;
- Email: this is where the to field, subject field and the body of the email reside
- Properties: CC, BCC, Regarding, Owner, Due Date and Status Reason fields
- Attachments – A view of all attached files. Attachments need to be added from the ‘Add Attachment’ button on the command bar.
Business Card Scanner
This is one of the new features I am very excited about. The business card scan feature allows users to quickly capture information from a business card into Dynamics 365. Users can access the business card scanner by navigating to the Sales Hub app and using the quick create form to create a new contact or lead. The business card scanner sits on top of the quick create forms for leads and contacts, but admins can change the location by editing the quick create form.
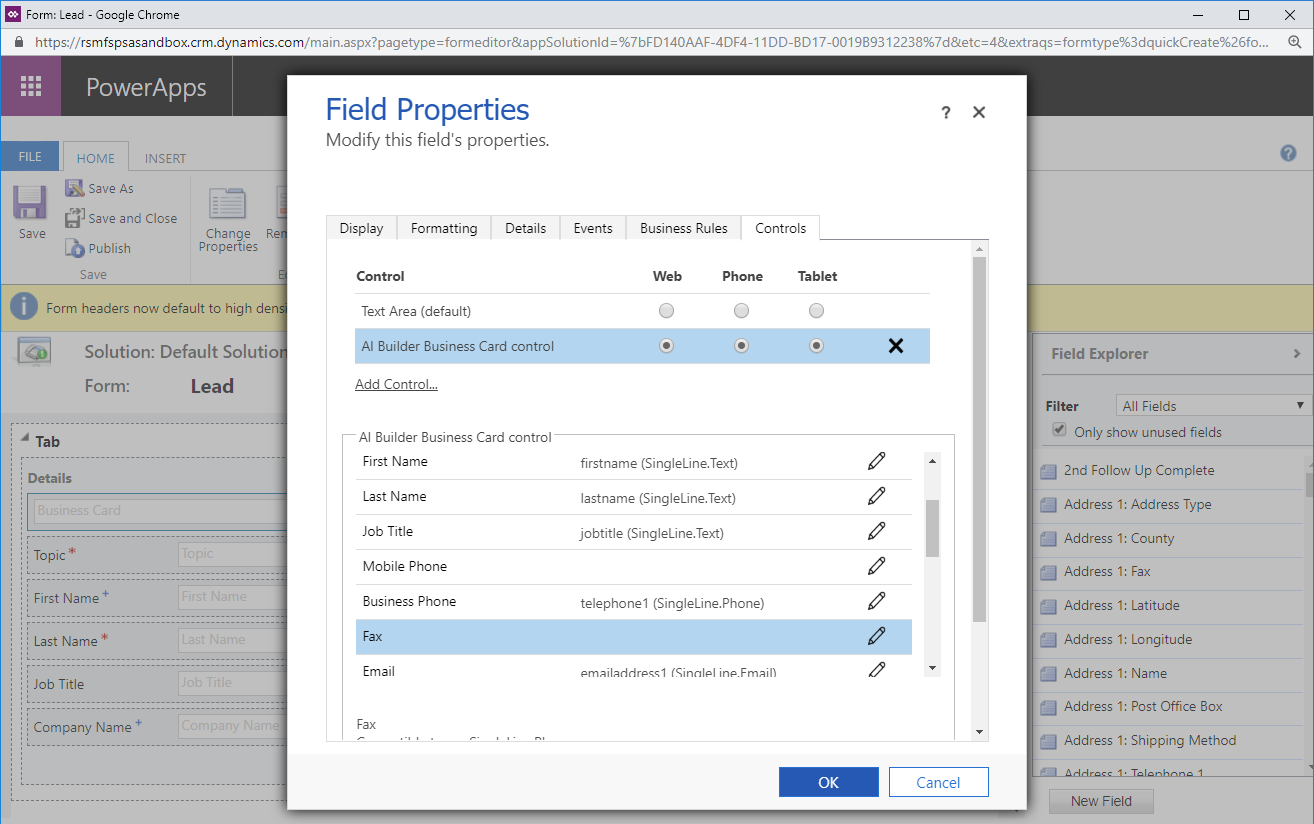
System admins can configure the business card scanner allowing the scanner to populate alternate fields. To access the configuration for the business card scanner, admins will need to open the related quick create form. (I.E Contact or Lead form).
From here select the Business Card field and click ‘Change Properties’ to open the field properties. Click on the controls tab to change the Business Card Controls and map additional fields. An additional setting to retain the business card image after scanning is located under system settings: Settings>Administration>System Settings – Open the Sales tab to turn this on or off.
Customization of Opportunity Close dialog box
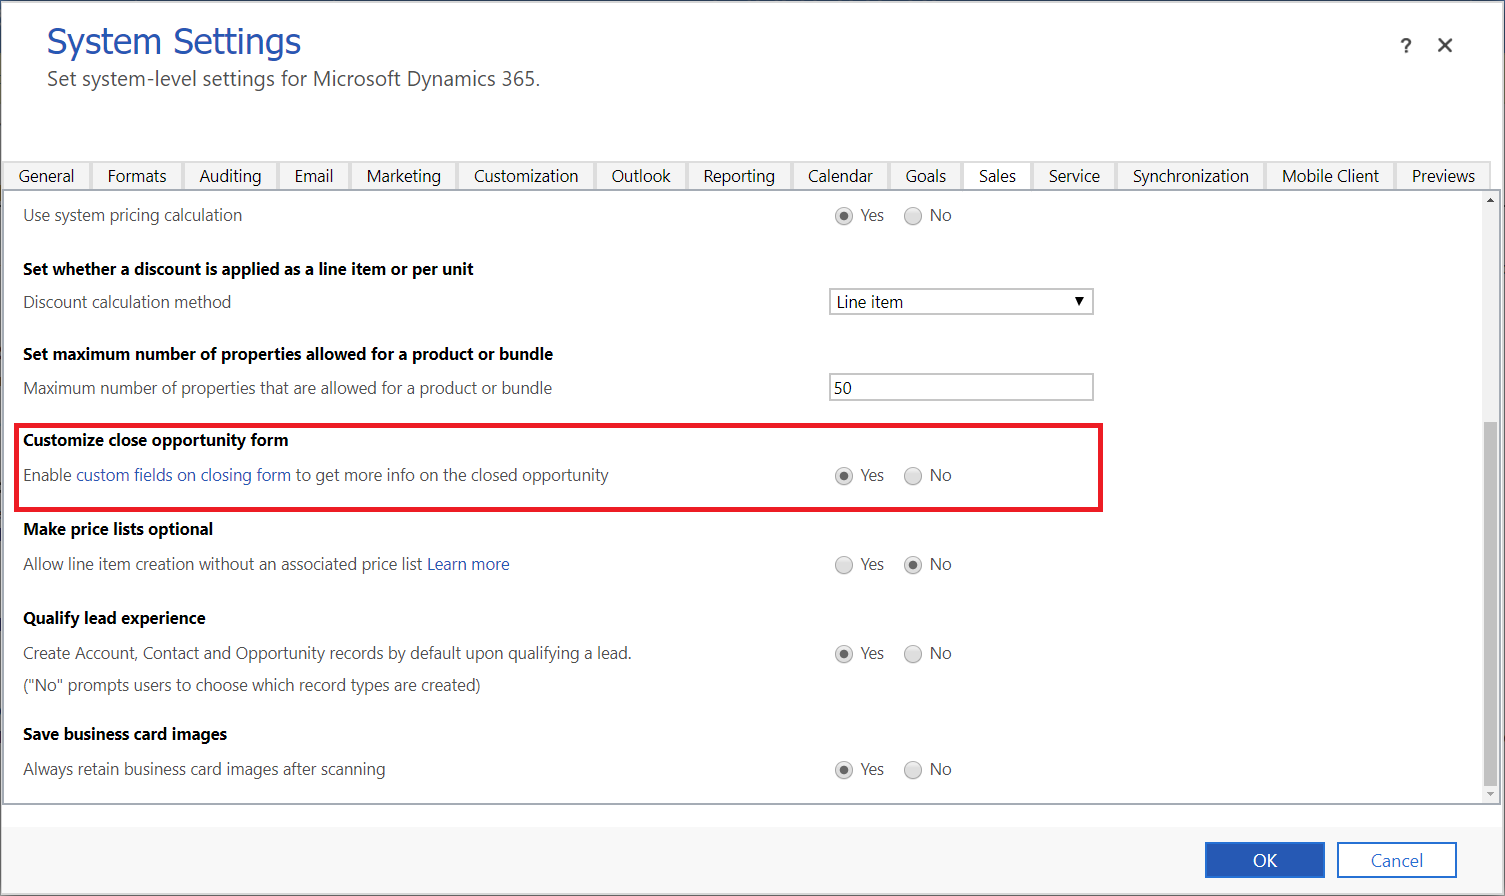
Up until now system admins were not able to configure the opportunity close dialog box, but this has changed! System administrators can turn on the ability to configure the Opportunity close dialog under system settings. Navigate to Settings>Administration>System Settings to open the system settings in Dynamics 365. Then open the Sales tab, where they need to set the ‘Customize Opportunity Close form’ to yes.
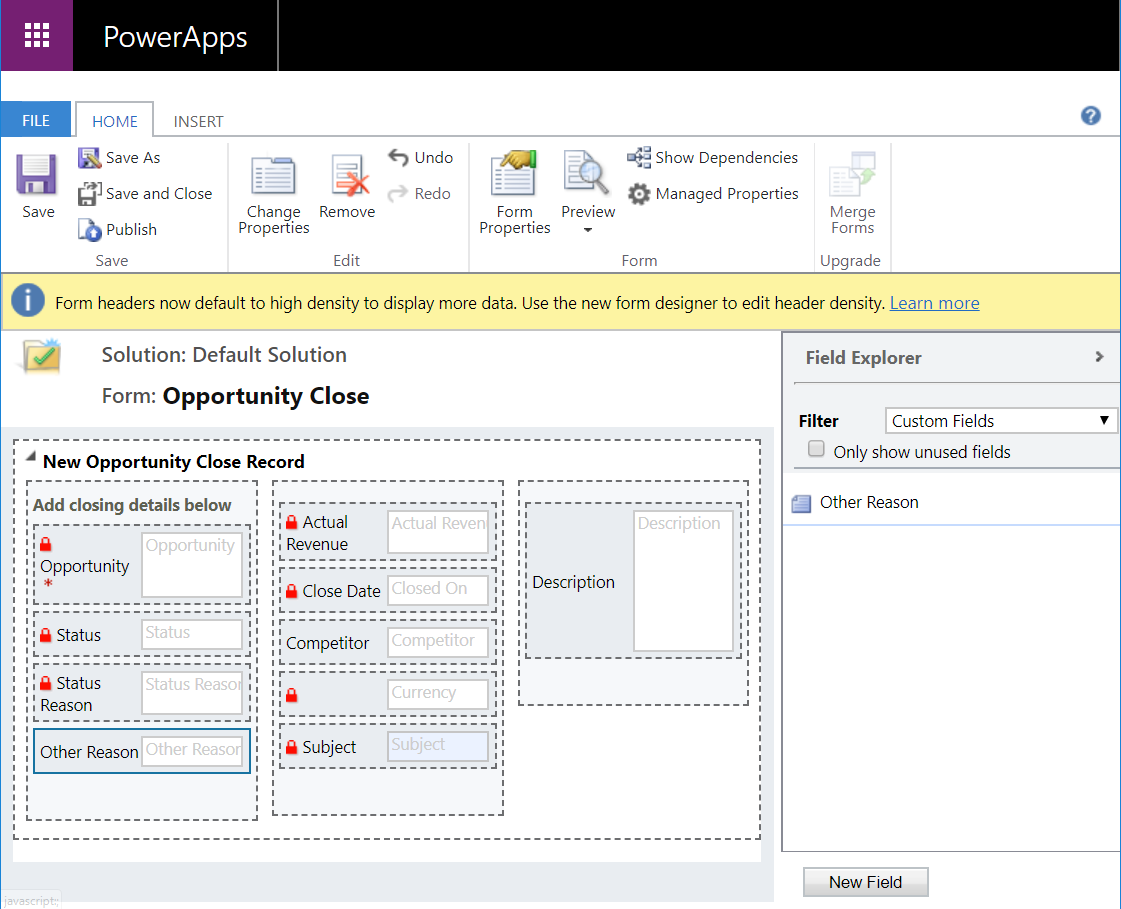
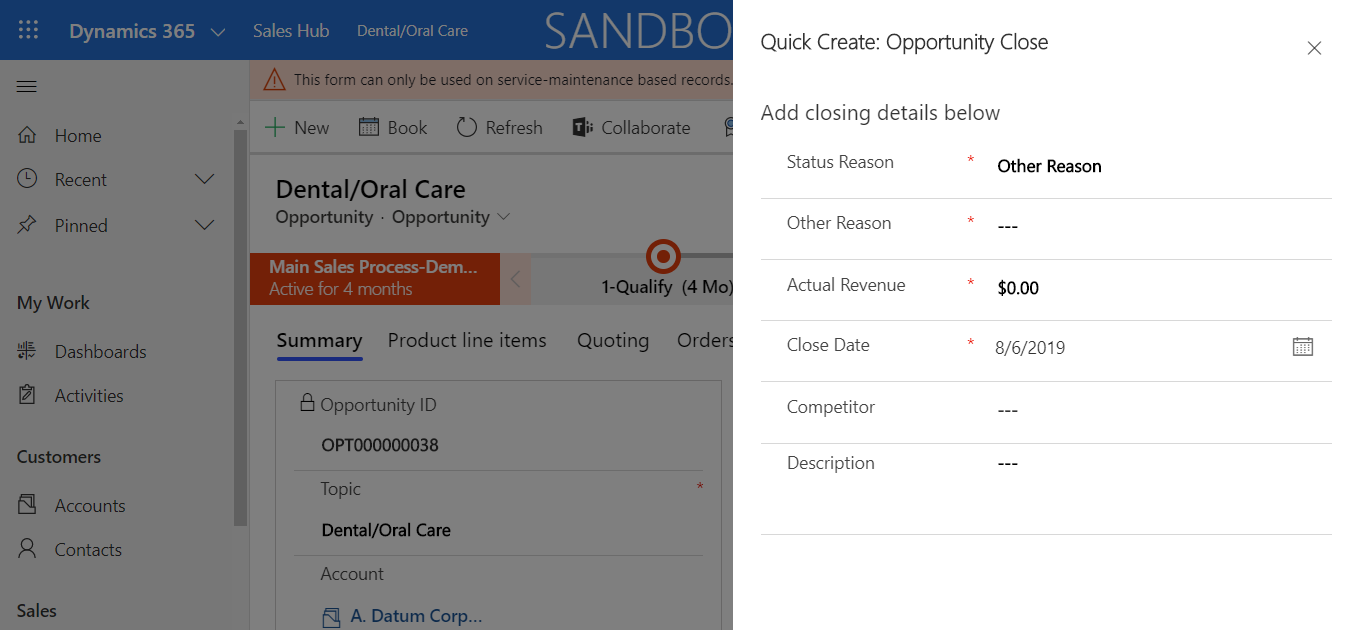
Once this has been enabled system administrators can configure the Opportunity Close Dialog box by opening the default solution, (Settings>Customization>Customize the System) navigating to the Opportunity Close entity and opening the quick view form. (This is the form that will be used when users will close an opportunity as lost.) From here admins are able to create new fields, add fields to the form, create business rules, etc.
I added a status reason of “other” and a new text field ‘Other Reason’ to capture this data on the Opportunity Close form. A business rule shows the ‘Other Reason’ field when the status reason is set to ‘Other Reason’, and hides the field when a different option is selected.
Make Price Lists Optional
Admins now have the ability to make price lists optional. This is a feature that works in the classic and unified interface. This feature can be turned on or off from two different places:
Classic Interface: Navigate to Settings>Administration>System Settings. Under ‘Set price lists option’ select yes to enable this feature.
Unified Interface: Open the Sales Hub App, navigate to the App Settings area>Product Catalog Settings. Under ‘Make price lists optional’ select yes to enable this feature.
Documents visible in for contact, opportunity, lead and account main forms
I noticed that a tab called ‘Files” has been added to the mail forms of the above entities. If your Dynamics 365 instance has the SharePoint integration enabled, this is where the SharePoint library can be accesses without having to navigate to Related>Documents from within a record. This feature will be automatically enabled.
Auto populate fields in Lead form
This functionality will auto populate contact and company-related fields in the lead form when an existing contact or account record is selected. Selecting an existing contact will automatically populate the first name, last name, job title, business phone, mobile phone and email in the lead record.
Selecting and existing account will automatically populate the company name in the lead record. This feature will be automatically enabled.
Qualify Lead Experience
Remember in CRM 2011 when users had the ability to choose which records were created (account, contact, opportunity) when qualifying a lead? This feature brings back that functionality. A pop-up window will open allowing users to choose which records will be created on qualifying a lead. This feature can be enabled by navigating to Settings>Administration>System Settings>Sales Tab
Display Lead Notes in Opportunity Record
This feature will show notes/attachments from the originating lead displayed in the timeline of the qualifying opportunity record. This feature will be automatically enabled.
This concludes the first article on the Dynamics 365 – 2019 Release Wave 2, be sure to check in next week for part 2, where I’ll be covering the below topics:
- Timeline Enhancements
- Knowledge Authoring Templates
- Inline Image Editing for KB Articles
- Knowledge Search Updates
- Quick Create Form: Save & Create New
- Quick Create Form: Save & Create New
- View Inline Images while reading email
- Header Enhancements
This article was originally published on https://d365goddess.com/dynamics-365-2019-release-wave-2-part-1
Check out the video below to see some of the new functionality in action!

 RSMUS.com