
 RSMUS.com
At some point throughout the year, you may discover that a vendor has been set up in GP with the wrong Tax Type and 1099 amounts are missing in the Vendor Summary window or on 1099 reports for the vendor. Usually, when processing the Year End Close you will find that the vendor does not appear on the 1099 Edit List or that the 1099 Amount field on the Payables Transaction Entry window is unavailable when entering a payables invoice.
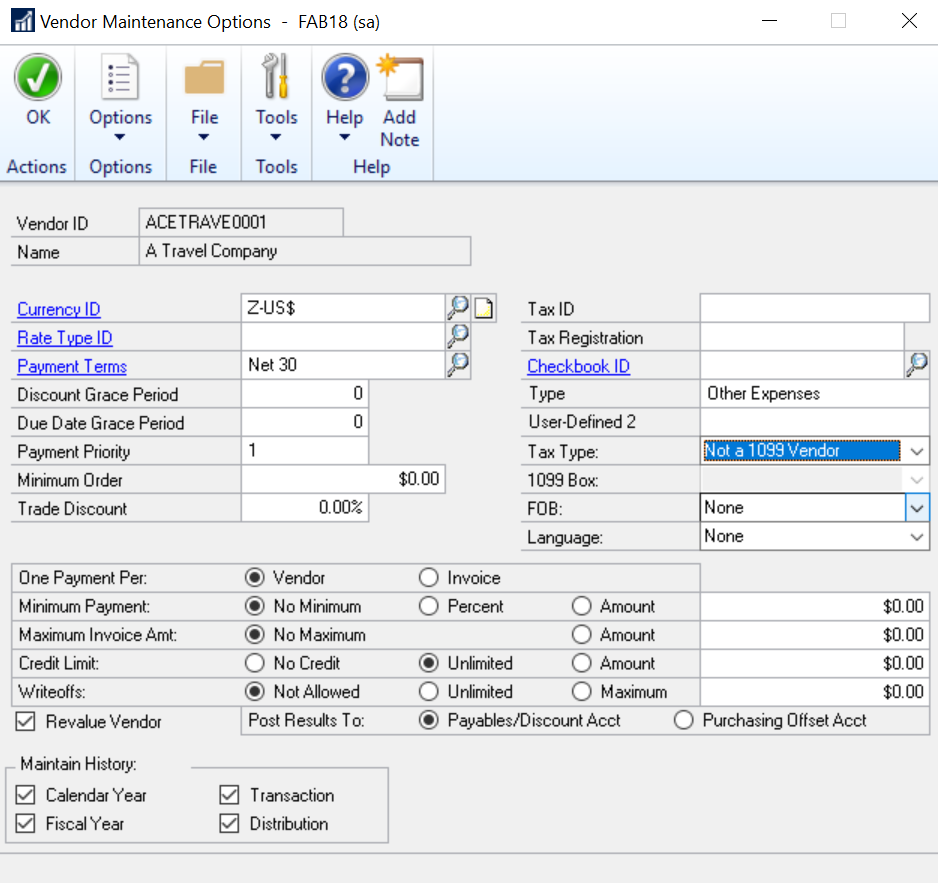
Fortunately, it is possible to change a vendor’s 1099 status at any point during the year and enter the 1099 amounts for any transactions paid to them before making the change. You can change the vendor’s 1099 status on the Vendor Maintenance Options window by updating the Tax Type field to something other than ‘Not a 1099 Vendor’.
Vendor Maintenance Options
To access the Vendor Maintenance Options window, go to Purchasing>>Cards>>Vendor. Select the vendor, and click the Options button.
After you have updated the vendor’s Tax Type, you can update the 1099 amounts for any transactions already posted and paid prior to making the change.
Option 1
Edit the 1099 summary amounts using the ‘1099 Details’ window
(Cards>>Purchasing>>1099 Details)
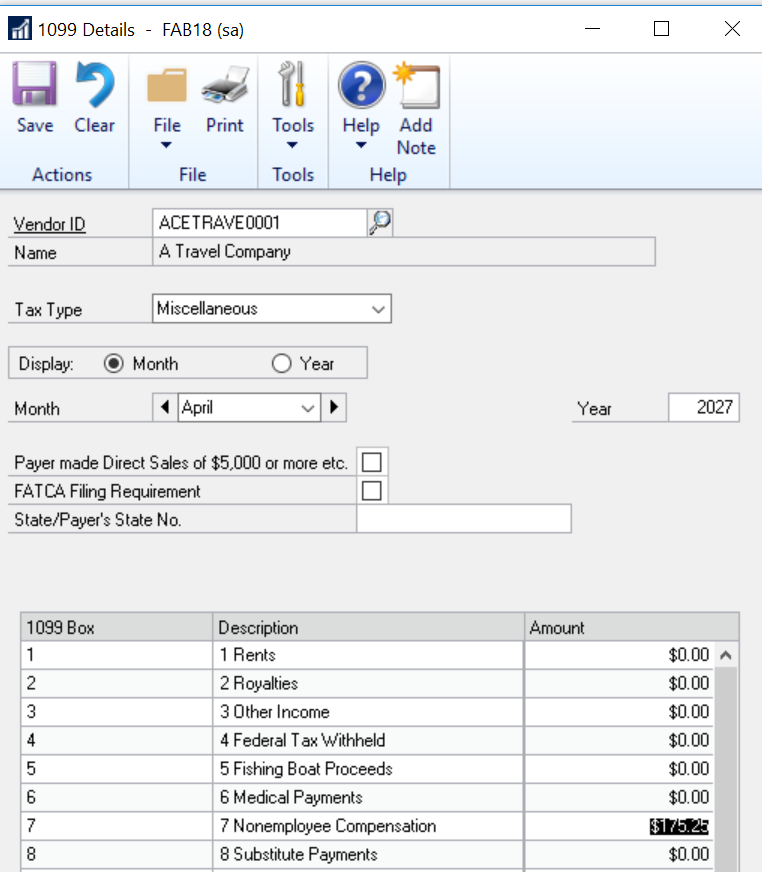
On this window, select a vendor and the month you wish to change. In the scrolling window, you will see every available 1099 box. Find the desired box and type in the correct 1099 amount. Remember, the amount of printing on the 1099 is cumulative of all 12 months, so you will want to verify the cumulative total. Click SAVE, and proceed to reprint the 1099 (Tools>>Routines>>Print 1099). You will see the revised amount on the 1099 statement. Making adjustments using this window has no bearing on the vendor’s balance, history, or status. It also has no effect on the General Ledger. Rather, it simply changes the amount that prints on the 1099.
Option 2
Edit the individual transactions using the ‘Edit 1099 Transaction Information’ window
(Transactions>>Purchasing>>Edit 1099 Transaction Information)
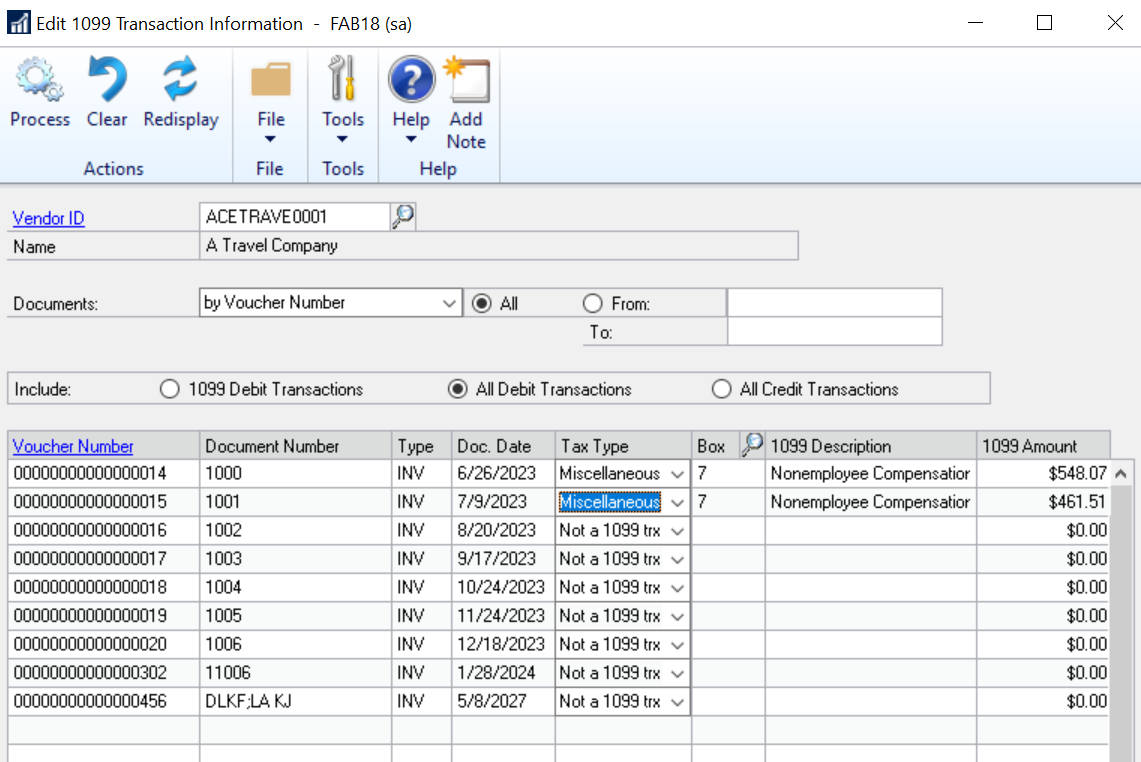
On this window, select a vendor. Now mark to include 1099 Debit Transactions, All Debit Transactions, or All Credit Transactions. Once you select the desired option, click the Redisplay button. For each transaction that appears in the scrolling portion of the window, you can change the 1099 Tax Type, specify the 1099 Box, and even change the 1099 Amount. Click the Process button to update the transactions. This process will also update the open and history tables for these transactions.
Note: You can use this window not only to ‘add’ 1099 amounts but also to reduce 1099 amounts. Again, these changes have no effect on the vendor’s balance or on the General Ledger.
RSM offers access to Certified Microsoft Professionals, help desk and phone support, knowledge and experience with third-party products and dedicated account management. To learn more about who we are, go to http://rsmus.com/who-we-are.html or contact our professionals at erp@rsmus.com or by phone at 855.437.7202.