I recently got asked how IT can manage and deploy the updates for Microsoft Dynamics GP for several client workstations without having to go into each computer. We are always looking for ways to easily manage these kinds of things and rightfully, we should do so. It doesn’t only streamline business processes but demonstrate effectiveness and not to mention cut down costs and saves a ton of time that can be used on more valuable tasks and projects, not to say installing updates aren’t valuable, it is an important task, consultants perform for our client base. So, to cut the long story short, how can you then manage and deploy automatic updates within Dynamics GP.
This can be done by setting up the following:
- Login to Dynamics GP client on the server
- Go to Microsoft Dynamics GPToolsSetupSystemClient Updates
- Enter a name for the update you are deploying, be as descriptive as you can
- Make sure to check Updates clients at next use box. The next time a user logs in to Dynamics GP after this is set, the user will be prompted to run the update.
- Set the location of the UNC path to the update file. This will be servernameshare_namefilepath

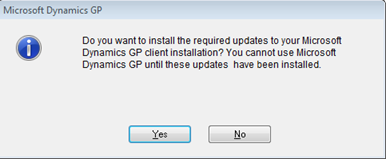
The next time users log in to their Dynamics GP, the user will be prompted with this message to run the update. Click Yes to install the update.

If you like this tip, then consider subscribing to our Dynamics Community News publication. In this publication, RSM offers timely technology announcements and special promotions for Microsoft Dynamics users. To learn more about our support services for Microsoft Dynamics ERP, contact our professionals at erp@rsmus.com.
By: Layla Doctor – Illinois Microsoft Dynamics GP partner

 RSMUS.com