
 RSMUS.com
With the introduction of word templates in Microsoft Dynamics CRM 2016, it allowed for easier reporting and the ability to really customize that data pulled out of CRM. However, if you’ve searched the internet like I have, there is not a lot of information on how to update an existing template. If you have an existing word template in Dynamics 365 CRM, and the template needs updated, let’s say with new fields added in CRM, you don’t need to know how to update XML to make the updates. It’s much simpler than that.
These steps will apply to Microsoft Dynamics CRM 2016 on-premise or online and Microsoft Dynamics 365 on-premise or online environments. These steps will also apply to an existing word document you wish to create a word template with by adding the Custom XML part.
To generate the Custom XML Part of the data you want to add to an existing template:
- In your CRM environment, navigate to the Templates area under Settings
- Click on Document Templates
- Click + New to create a new Word Template
- Select the primary entity you will be pulling data from to use in the word template
- If you’re updating an existing template, make sure to choose the same primary entity as the exiting
- If you’re creating a new word template for an already created word document, select the necessary primary entity the word template will be ran from.
- If necessary, select any necessary relationships that you’d like pull from the related entities of the primary entity
- Download the template and save on your local PC
- In Windows Explorer, navigate to the location the template was saved
– I recommend creating a folder and putting the document in this folder. You’ll see why in the next couple of steps - Rename the file and replace the file extension from .docx to .zip

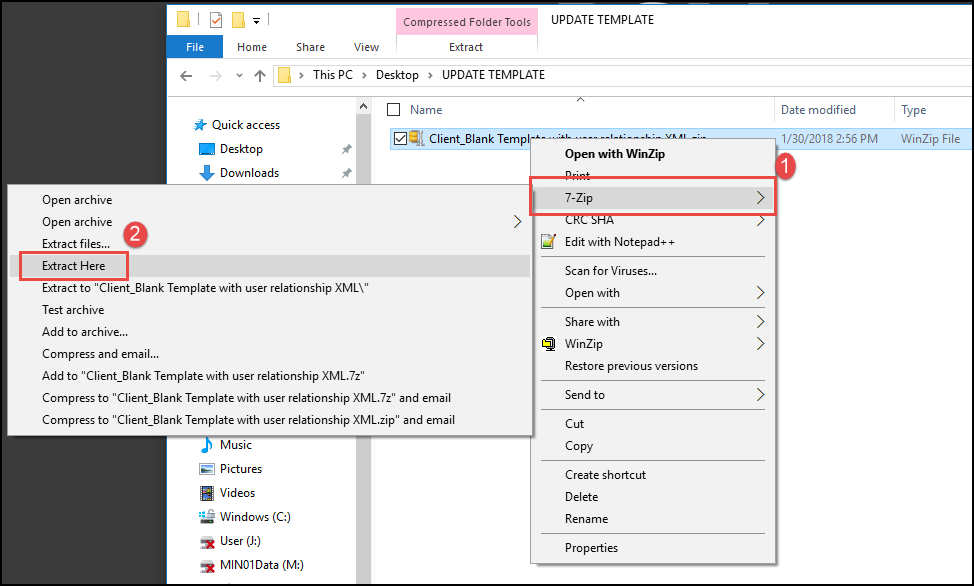
- Right click on the file and use a compression tool such as 7-Zip or WinZip to extract the file in the folder the file resides in
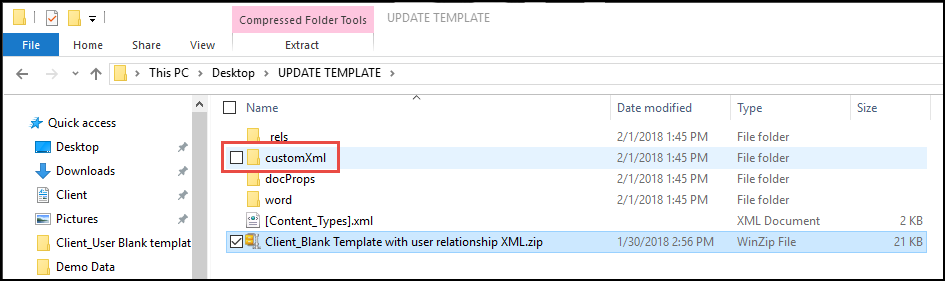
- You should now see the extracted files like the example
- Take note of this file location
- On your PC, navigate to and open the word template that needs updated
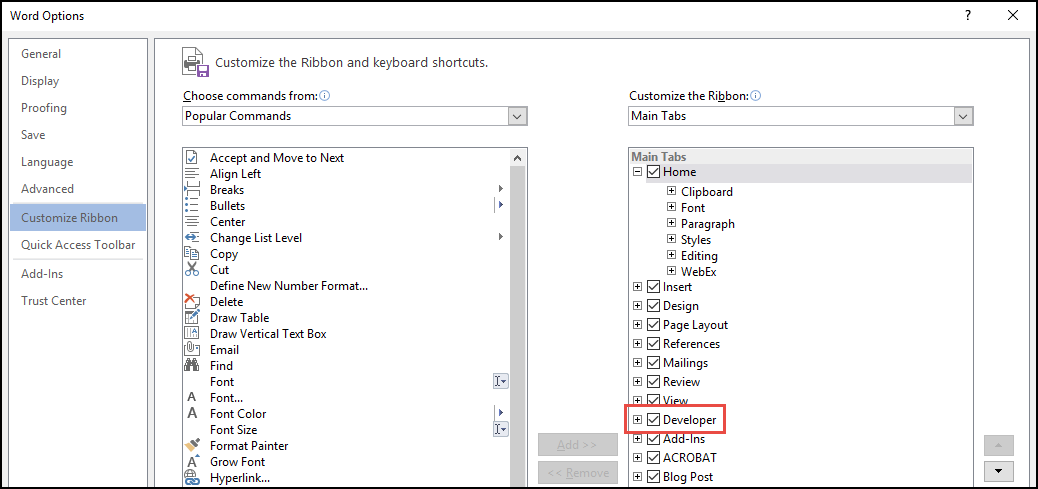
- You will need to enable the Developer tab in Word to bring in the Custom XML Part. If you have already enabled the Developer tab in Word, skip to step 18. If you have not, continue with the below steps to enable
- In Word, navigate to File > Options > Customize Ribbon.
- Check the box next to Developer
- Click ok
- You should now see the Developer tab in the ribbon
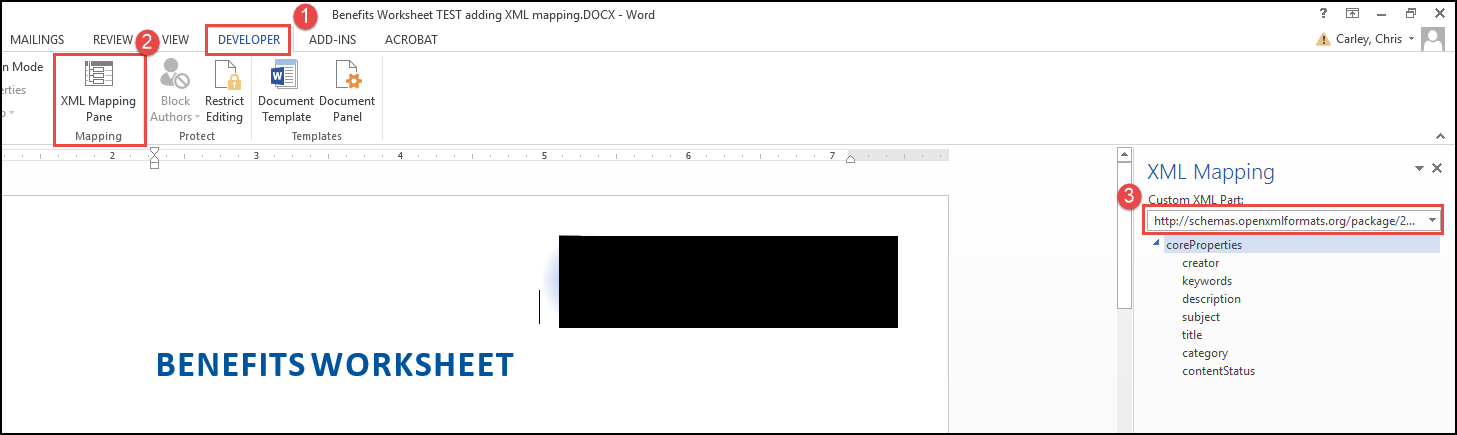
- Click on the Developer tab > XML Mapping Pane
- The XML Mapping pane should appear
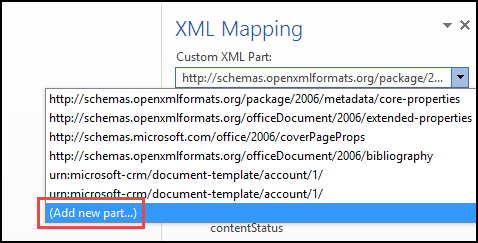
- Click the drop down under Custom XML Part
- Click Add new part…
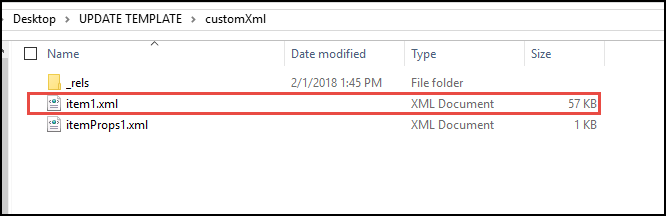
- Navigate to the file location from Step 10 and open the customXml folder
- Select the xml file. If you have two, select the one that is larger in size and click open.
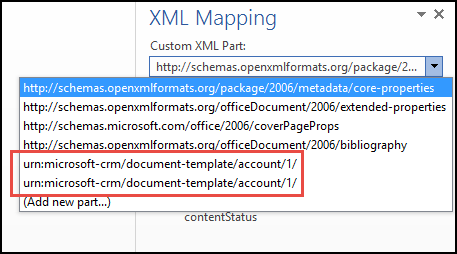
- In the Custom XML Part drop down, you should now see two parts that start with urn. One is the original one from when the template was created, the other is the new one with the latest fields and/or relationships.
- Add the updates to the word template and save the document
- Upload the updated template to CRM and test your updates

Hopefully this helps others out there, like me, who weren’t able to find much on this topic.
To learn more about how you can take advantage of this and other Dynamics 365 features, visit RSM’s Microsoft Dynamics 365 resource. To make sure you stay up to date with the Microsoft Dynamics Community, subscribe to our Microsoft Dynamics Community Newsletter.
For more information on Microsoft Dynamics 365, contact us.
By: Chris Carley
RSM Staff
RSM empowers middle market companies worldwide to take charge of change. Our unique middle market perspective makes RSM the natural choice for growth-oriented, internationally active organizations seeking relevant insights and tailored, innovative solutions for a complex and changing world. With a global reach spanning more than 120 countries, we instill confidence in a world of change by bringing the full power of RSM to make a lasting impact on our clients, colleagues and communities.