
 RSMUS.com
Recently, a client requested something in their Business Central integration: Show us the company for each record you are integrating.
Anyone working with Business Central and Power Automate knows the limits of the standard connectors.
Typically, we are creating APIs or modifying existing pages to access the data we need in Power Automate and this request sounds like it wouldn’t be any different. It might even require custom development in Business Central. Which, we like to avoid whenever possible.
When working with arrays in Power Automate, it is sometimes difficult to access the values within. However, there is a low-code way to add new properties to your array values. With three steps and a function, you will be on your way to becoming a master of Power Automate data manipulation!
Step 1: The Array Variable
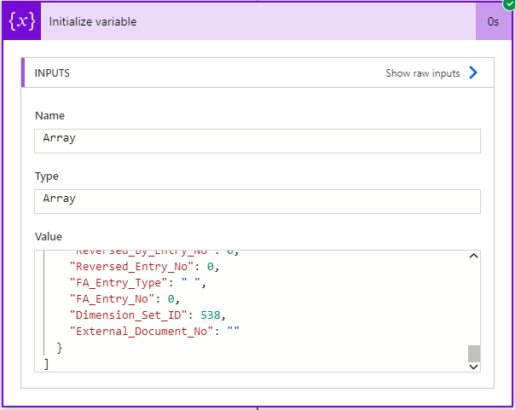
First, we initialize an array variable with the ‘value’ property from your query. This stores an object with multiple records as an array within the Flow.

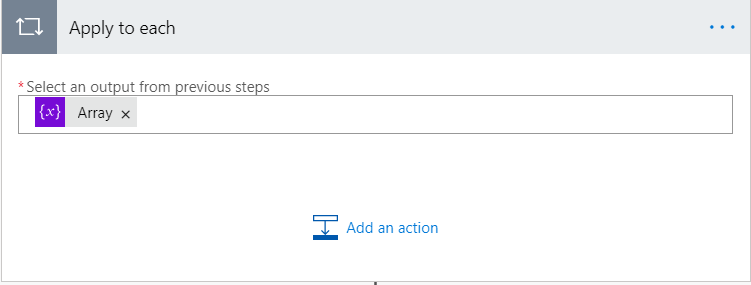
Step 2: Apply to Each
Next, we will create an Apply to each step that will loop through each record within the array we have just initialized an set. In the field labelled “Select an output from previous steps”, use the Array we have just created.
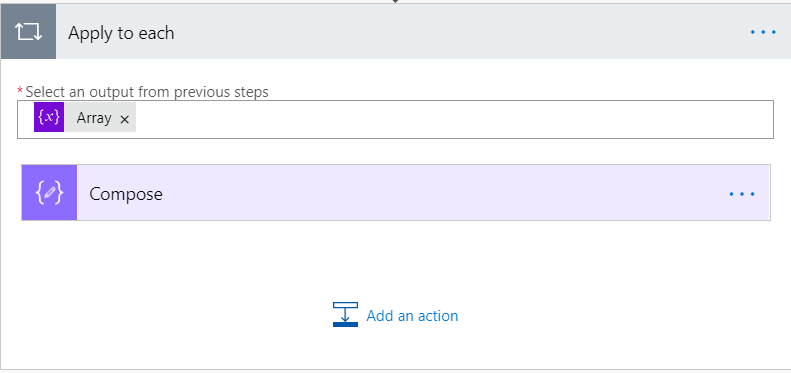
Step 3: Compose
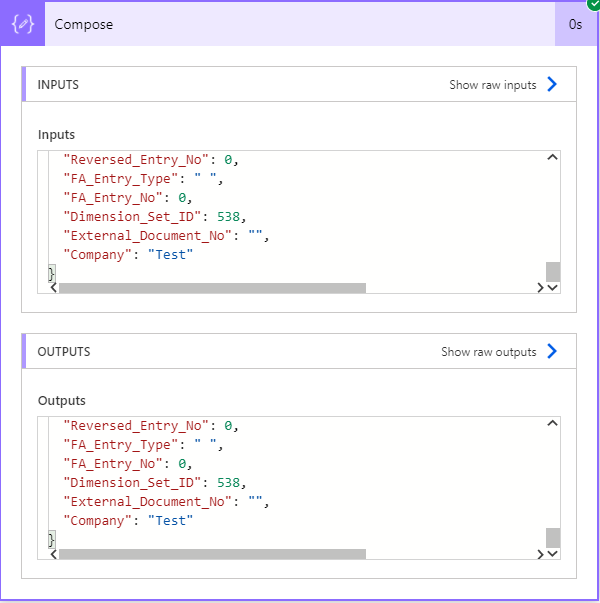
For our third step, we will add a compose step within our apply to each. You can leave the Inputs blank for now.
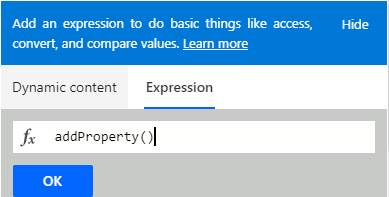
Step 4: addProperty()
For our final step, we will select the Inputs on our new compose step and select ‘Expression’ in the Dynamic content pane. First, type or paste addProperty()into the function bar.
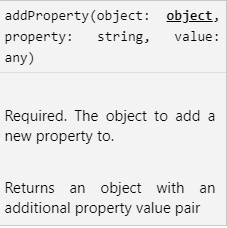
The addProperty()function requires three properties to work:
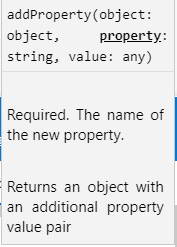
The first parameter of the addProperty() function is the object. As shown in the picture below, this is the object that we want to add a new value to. If you followed this guide, object will be item() and so our expression will be addProperty(item()).
The second parameter is the property. This is just the name of the property we are adding. For this example, I am using ‘Company’ so my expression looks like this: addProperty(item(),'Company')
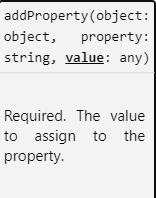
And finally, we have the ‘value’ property. This is the value we would like to add to our object. I am using a value of ‘Test’ and so my finished expression is as follows: addProperty(item(),'Company','Test')
If we run our Power Automate Flow, we can see our initial array without Company as a property:
And our compose output with the new property:
That’s all there is to it! If you encounter any errors, I would recommend the following troubleshooting steps:
- Compare you expression to mine: Check for typos, missed quotes or parenthesis.
- Double check your previous steps to see if you are using the correct values.
- Ensure your data source is returning data.
RSM Staff
RSM empowers middle market companies worldwide to take charge of change. Our unique middle market perspective makes RSM the natural choice for growth-oriented, internationally active organizations seeking relevant insights and tailored, innovative solutions for a complex and changing world. With a global reach spanning more than 120 countries, we instill confidence in a world of change by bringing the full power of RSM to make a lasting impact on our clients, colleagues and communities.