RSM recently worked on a NetSuite implementation where the client used a platform called Settle, an AP automation tool and working capital platform. The client was mainly using Settle as a financing platform for larger bills, where Settle paid the vendor and in our client’s case, Settle became the payee with additional terms as line items on their transactions. Our team has put together a step-by-step guide to show the ease of integrating Settle with NetSuite, so that this could potentially become a solution for future use cases, and included disclaimers to ensure a seamless setup process.
Step 1:
- Log into NetSuite as an Admin
- Navigate to Setup > Company > Enable Features.
- Ensure the following features are checked:
-
- SUITEANALYTICS WORKBOOK (Analytics Tab)
- SOAP WEB SERVICES (SuiteCloud Tab)
- REST WEB SERVICES (SuiteCloud Tab)
- TOKEN-BASED AUTHENTICATION (SuiteCloud Tab)
Step 2:
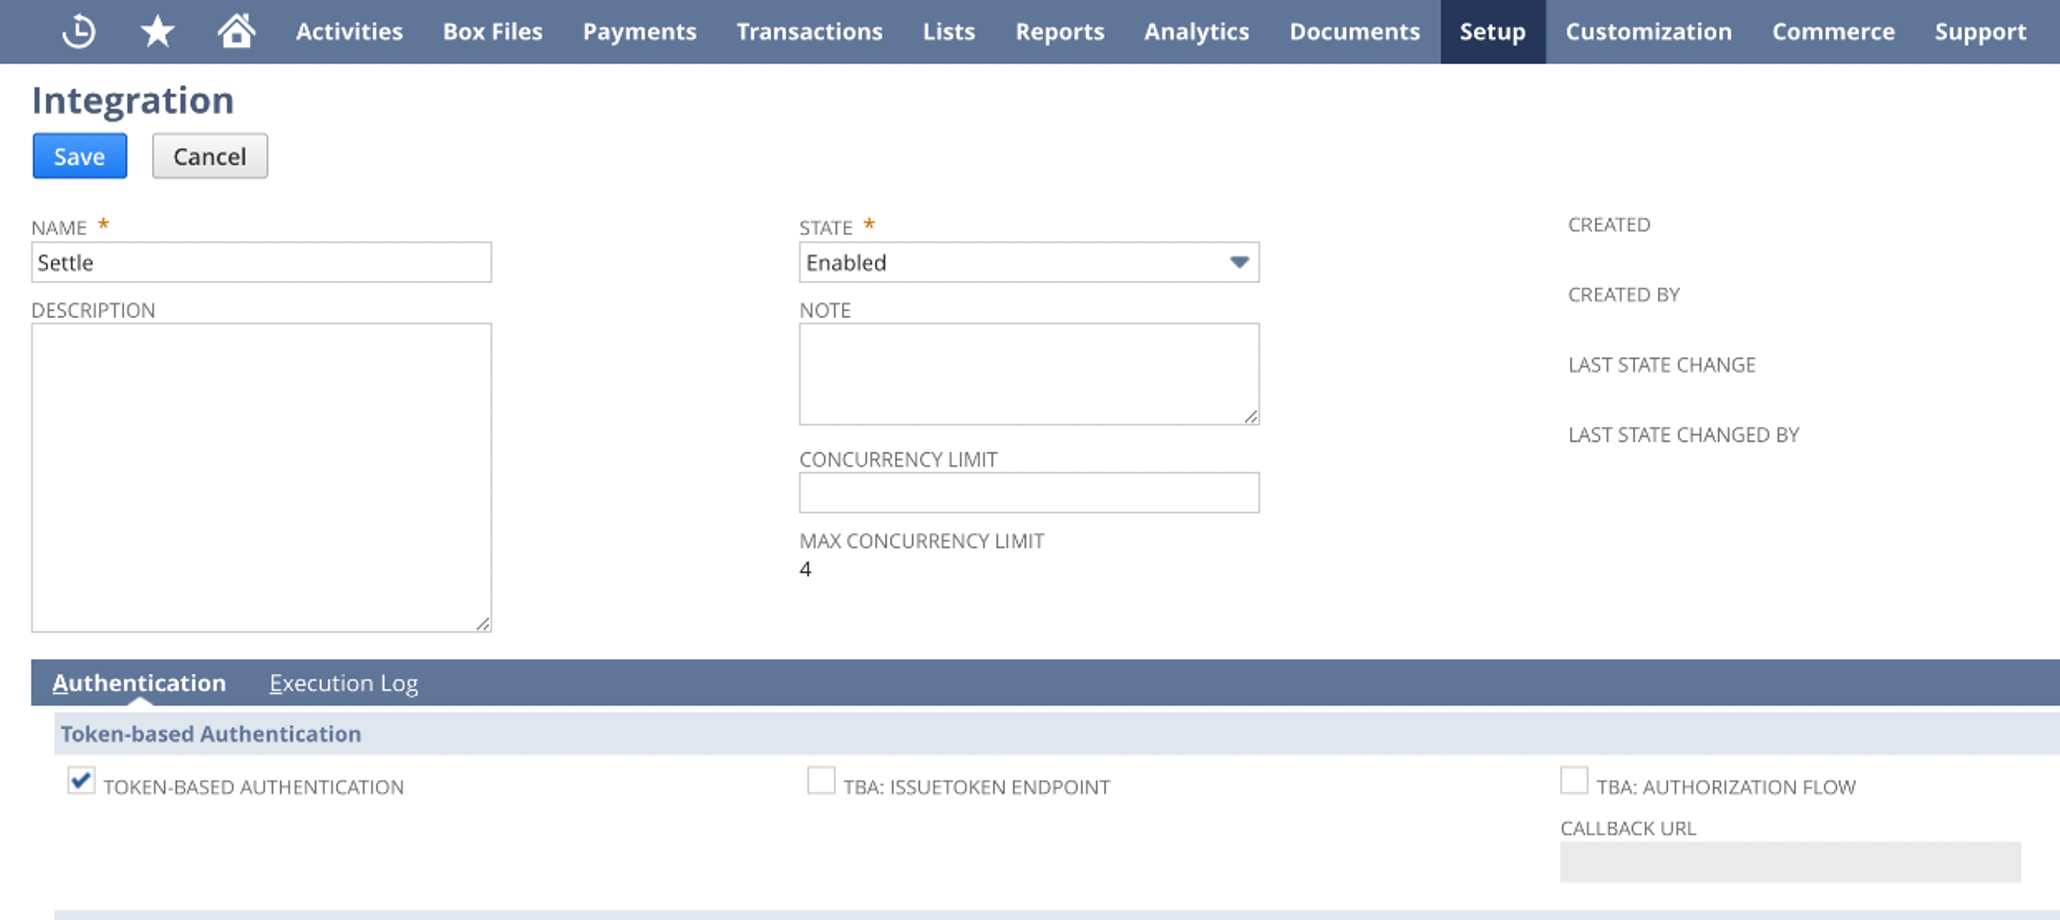
- Navigate to Setup > Integration > Manage Integrations New.
- To set up an integration, fill in the following fields:
- Name: Settle
- State: Enabled
- Token-based authentication: Checked
- TBA: Authorization Flow : Unchecked
- Authorization Code Grant: Unchecked
- Click Save.
- Disclaimer: Upon Save, copy the Consumer Key and Consumer Secret from the “Client Credentials.” You will only see these once as a secret key.

Step 3:
- Navigate to Customization > SuiteBundler > Search & Install Bundles.
- Search for the Settle Sync Role Bundle (ID: 446961) and click Install.
Step 4:
- Navigate to Setup > User/Roles > Manage Roles.
- Click Edit next to the Settle Sync Role.
- Click on the Transactions subtab.
- Search the following permissions in the search bar at the end of the list of permissions. If a result shows up, add the permission with “View” permission level. If the result does not show up, you can ignore the permission, as it is not applicable to the NetSuite instance:
- Bin Putaway Worksheet
- Bin Transfer
- Blanket Purchase Order
- Build Assemblies
- Close Work Orders
- Count Inventory
- Unbuild Assemblies
- Work Order
Step 5:
- Navigate to Lists > Employees > Employees and click Edit next to the Administrator user.
- Click on the Access subtab.
- Add the Settle Sync Role to the Administrator user.
Step 6:
- Navigate to Setup > Users/Roles > Access Tokens > New to create tokens for your Administrator.
- Under integration, fill in the integration from Step 2
- Fill in the user from Step 6
- Fill in the role from Step 5
- Disclaimer: Copy the token ID and token secret upon saving. This can only be viewed once and will be needed later during the Settle setup.

Step 7:
- Record the Account ID from your URL (string of text following the https://)
- Record your sub sidiary ID (Disclaimer: Settle can only sync one subsidiary at a time)
- Navigate to Setup > Company > Subsidiaries.
- Click View next to the Subsidiary you will integrate Settle with.
- Note the internal ID of the subsidiary.
Step 8:
- Client will log into the Settle account (up to the client’s discretion if this is done with or without RSM assistance on the line)
- Client will click on the sync icon at the top of the screen.
- Find the NetSuite icon and click Connect.
- Disclaimer: NetSuite option might not be available if Settle is currently linked with another accounting service. NetSuite might become available upon disconnecting from other service.
- Enter the following:
- Account ID (step 7a)
- Consumer Key and Consumer Secret (step 2)
- Token ID (step 6.a.iii.1)
- Token secret (step 6.a.iii.1)
- Subsidiary ID (step 7.b.iii)
- Click Create authentication.
- This completes the setup of NetSuite with Settle.

 RSMUS.com


