The April 2019 upgrade for Microsoft Dynamics 365 (D365) has a multitude of new and improved features. One of the most exciting new features is the brand new Unified Client Interface (UCI) which is the new web browser view of D365. The UCI completely removed all the functionality from the top ribbon to the left side of the page. Overall the UCI is easier and more enjoyable to navigate with but with all these improvements there’s still room for error. Several out of the box entities and most custom entities will load without an entity icon associated to it. I will demonstrate how to re-associate the entity icon within the App Designer
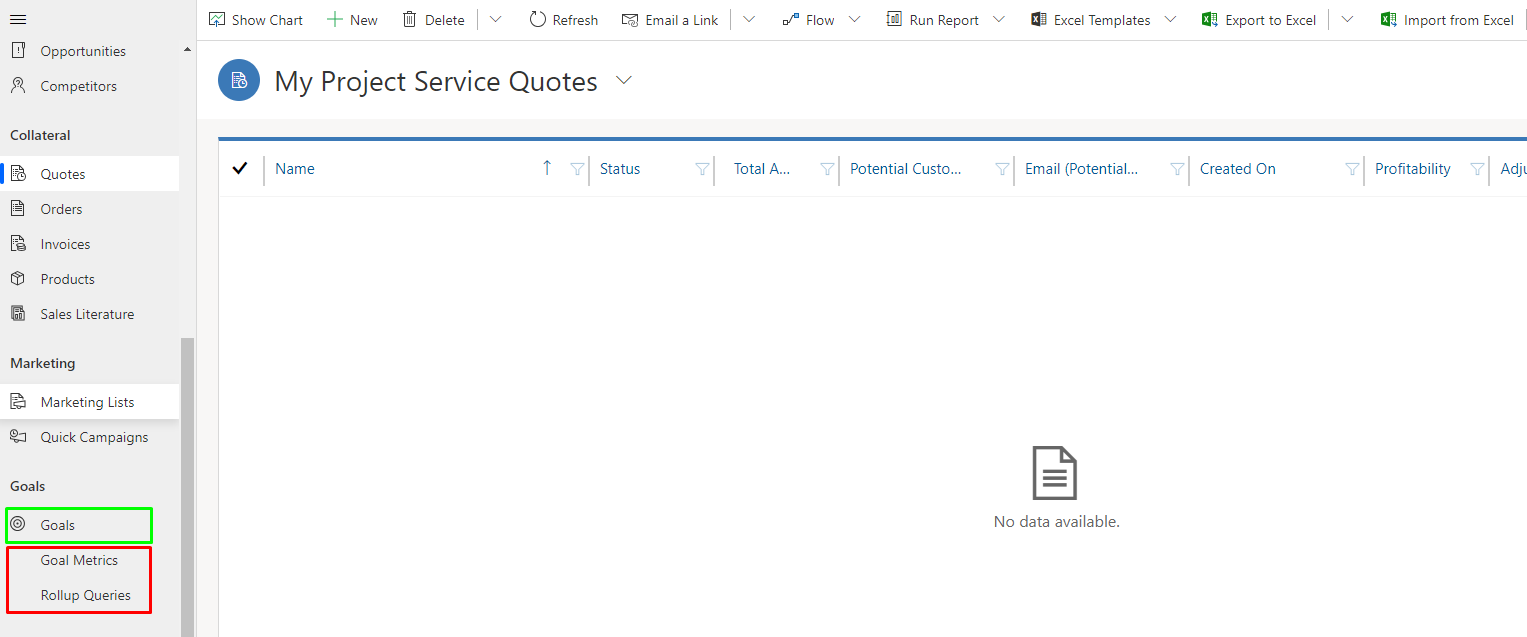
To fully understand what I mean by the entity icon isn’t associated to the entity please see the screen shot below. As you can see in Green the Goals entity has an Icon next to the word “Goals” but in Red Goal Metrics and Rollup Queries have missing icons.
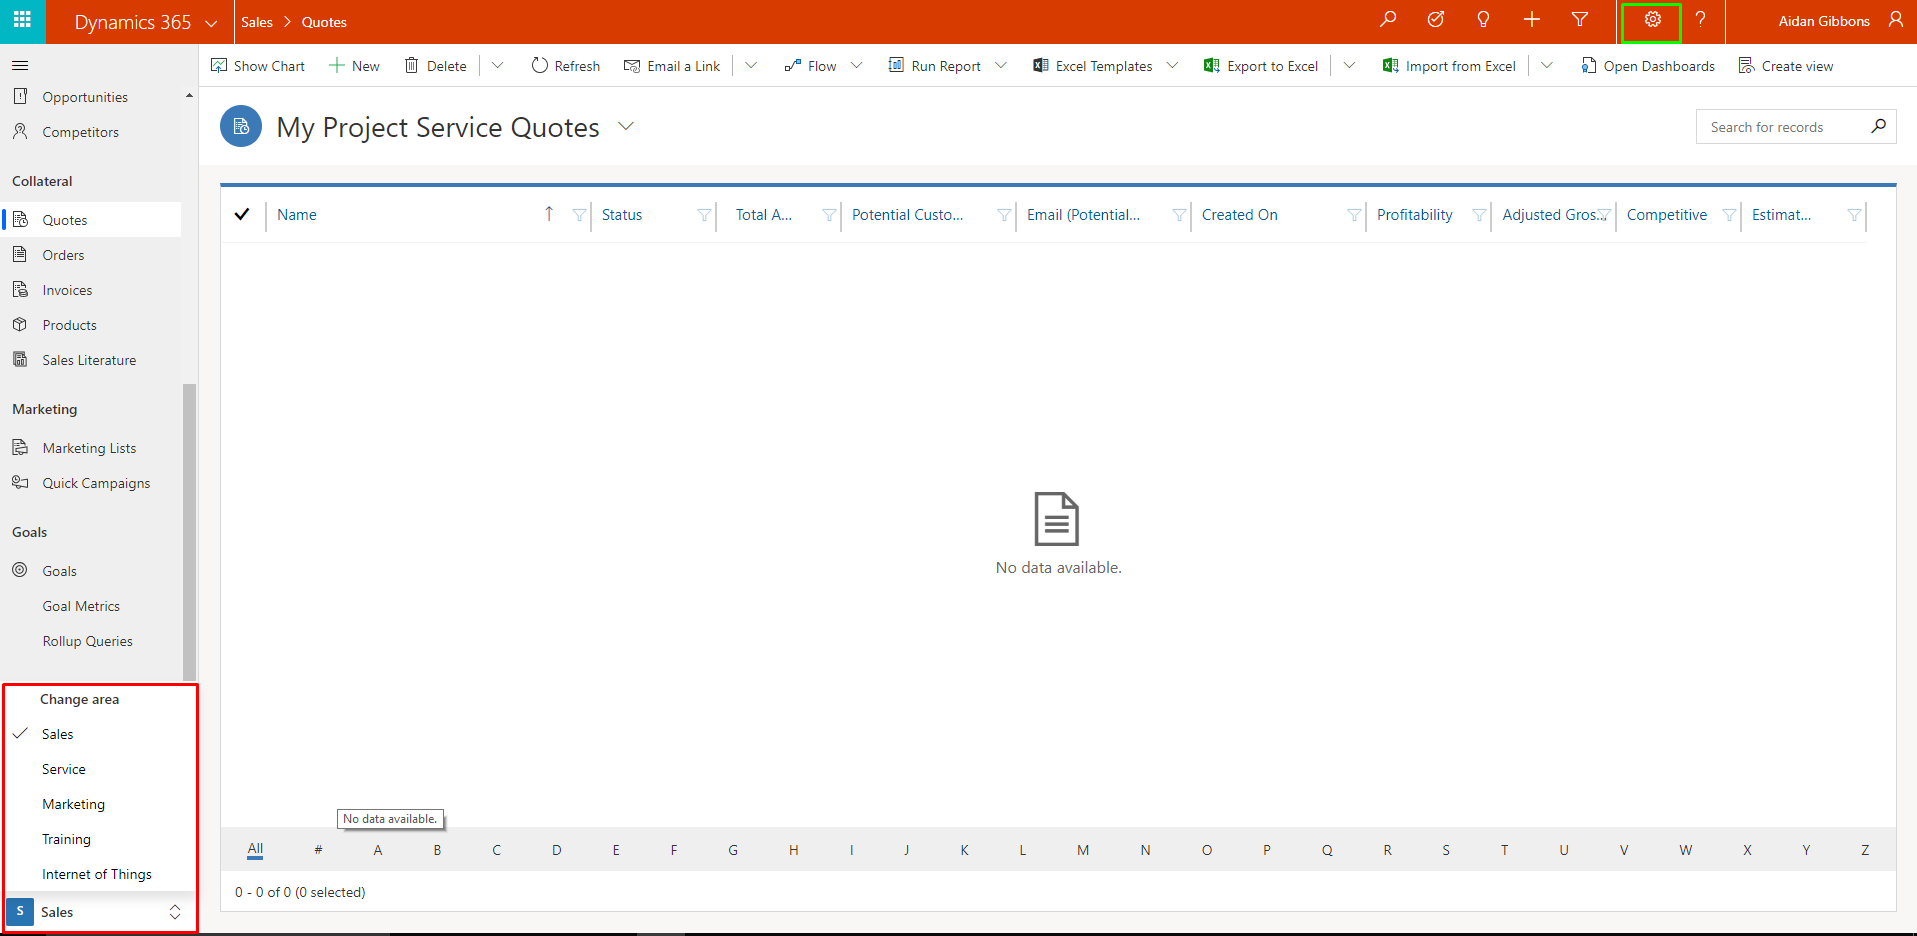
Now if you have any experience editing entities in the old web client you might be thinking that you have to customize the entity within a custom solution or the default solution but that’s no longer the case. Rather you need to go to the My Apps section within settings and customize the unified interface app with the missing icons. Additionally, as you can see in the screenshot below there isn’t a settings tab on the top ribbon. Now you have to click on the Settings icon on the top right of the main ribbon next to the users name.
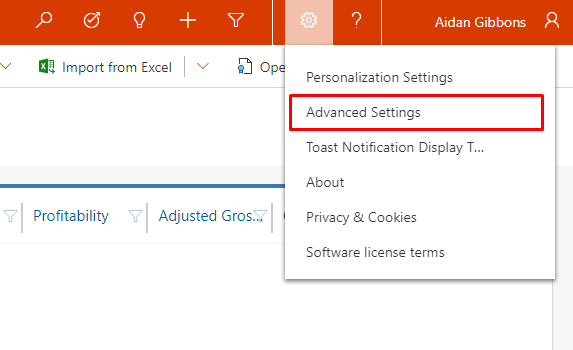
As pictured in the screen shot below after you click on the settings icon you’ll need to click on Advanced Settings.
After you click on the Advanced Settings button a new tab will load which will bring you to the settings setup as if you’re back on the old web client. As pictured below.
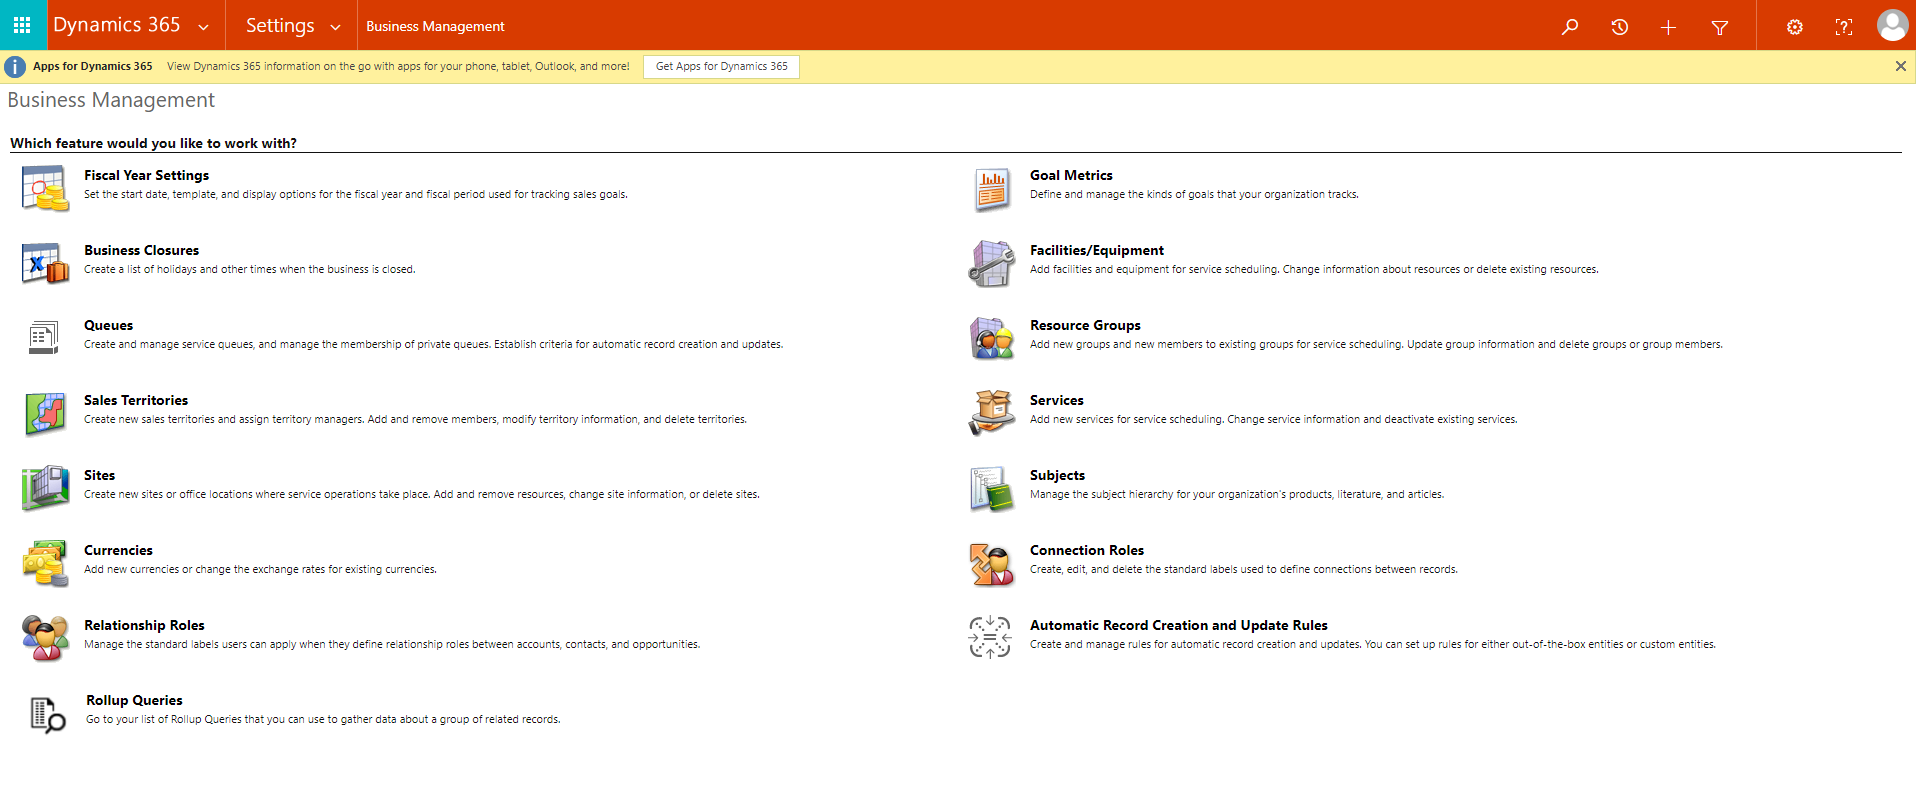
From here you’ll want to click on the carat next to settings then under Application click on the My Apps Tab. As pictured below in green.

After you reach the My Apps form you’ll see all of your apps in one location. You should notice that some of the apps are Web client while others are unified interface, regardless of the type of app they now all run on the Unified Client Interface (UCI) on Version 9.1 (v9.1).
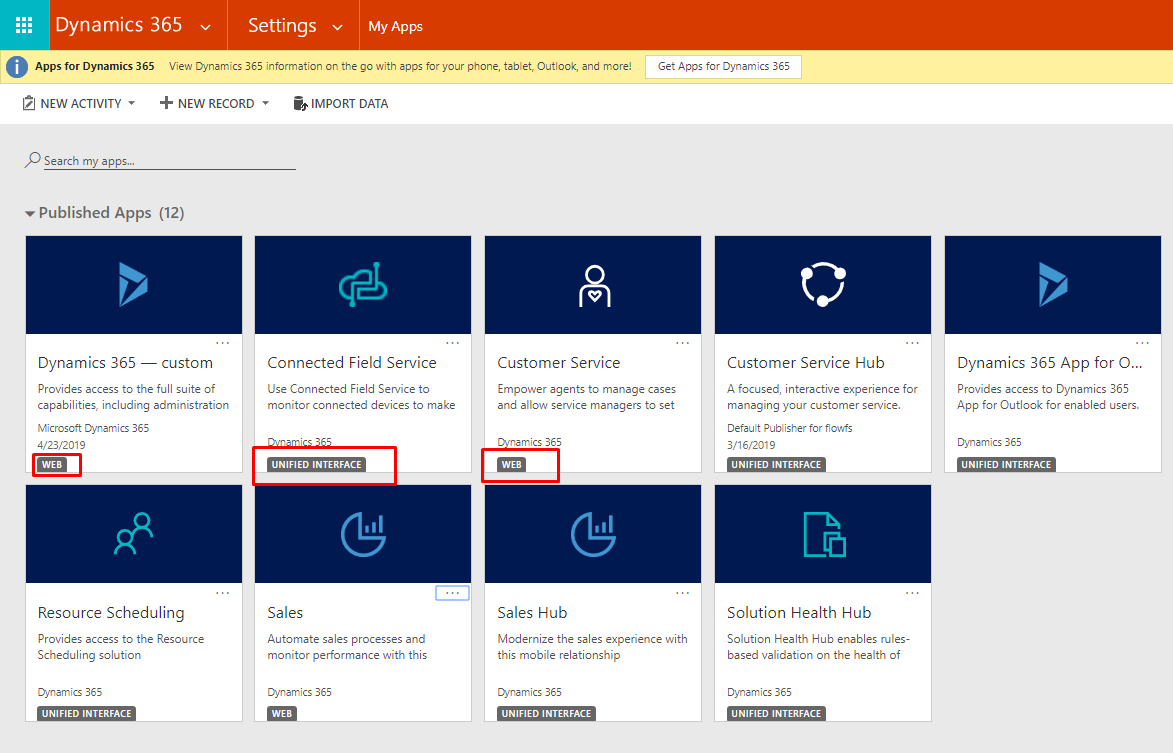
Click on the ellipsis of any app that you want to edit/view the app designer. As pictured below.
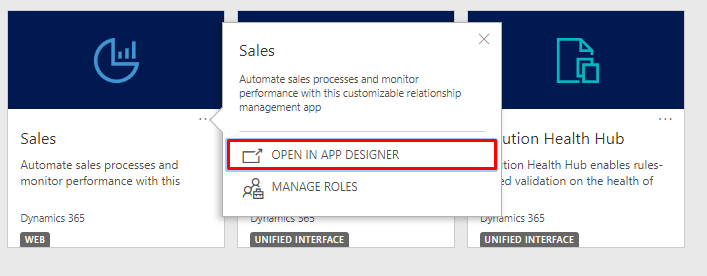
Once viewing the App Designer click on the pencil next to the Site Map to edit the site map.

This will bring you to the Sitemap Designer. Within the sitemap designer there’s 3 sections, Area located in green, Group located in blue and Subarea located in red.
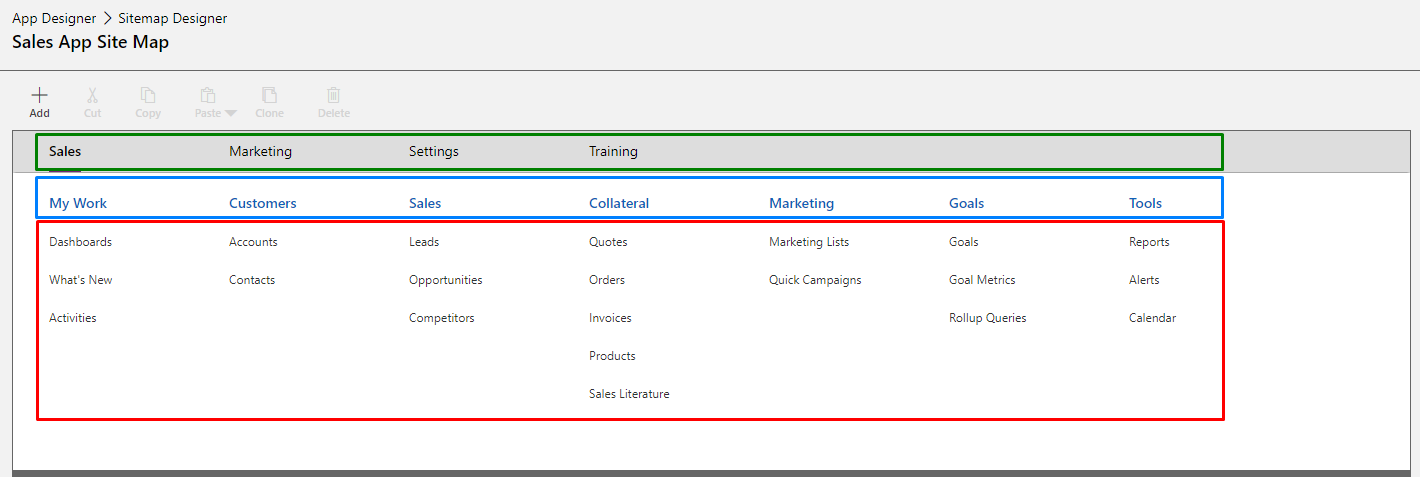
Now that you’re on the sitemap and are familiar with the setup click on the Subarea that is missing an Icon. In this case I’ll be updating the Goal Metrics Icon. As pictured below the Goal Metrics is currently using the default image but as pictured earlier that doesn’t actually pull an image.
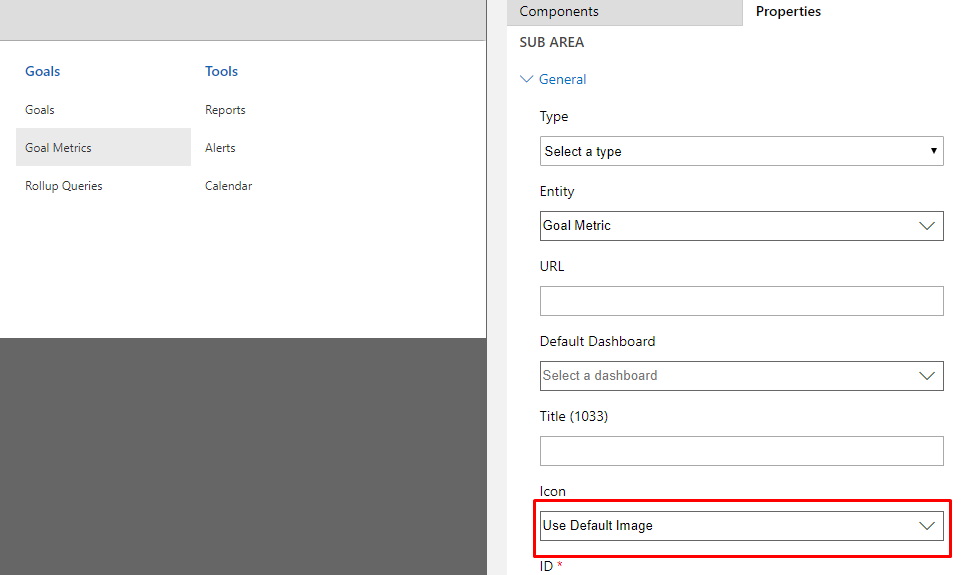
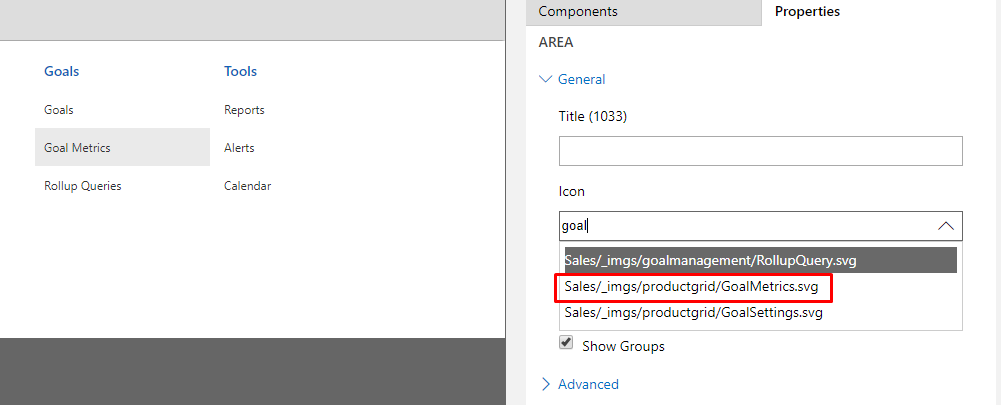
You can either click on the icon dropdown and scroll through all the possible images you’ll like to use or you can search within the same dropdown list simply by typing in the field. As you can see in the screen shot below I searched the word goal which showed me 3 images with the word goal in the name. As this Icon is for the Goal Metrics Entity I will be using the Goal Metrics image within the red box.
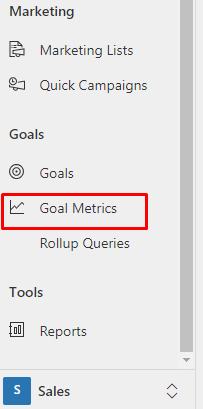
Now if this is all you need to customize within the sitemap or app designer you can click on save then Publish on the top right corner of the sitemap designer. Once published navigate back to the app that was just updated and refresh the web browser. As shown in the screen shot below the Goal Metrics now has the proper Icon.
After the completion of the steps above you should now have the ability to navigate to and edit the sitemap designer. Currently Microsoft doesn’t have details as to why some Icons aren’t loading but for the time being this is the ideal work around.
Learn More
For more information on Microsoft Dynamics 365, contact us.
By: Aidan Gibbons

 RSMUS.com