
 RSMUS.com
Microsoft has positioned the CDS current environment connector as the one to use and that connector has given us a lot of great features. However, there are some quirks that throw folks for a loop.
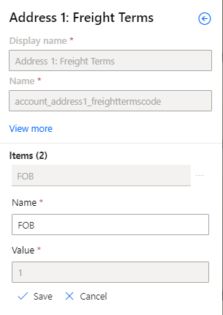
One of these quirks is around option sets. Within Dynamics CRM/CDS two parameters make up an option set: a value (an integer) and a label (text). There are two images for reference below.
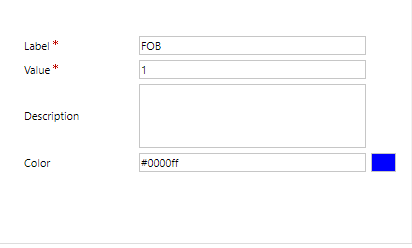
If you have experienced the issue then you can probably skip the next section. However, if you would like a visual then keep on reading.
Option Sets: The Issue
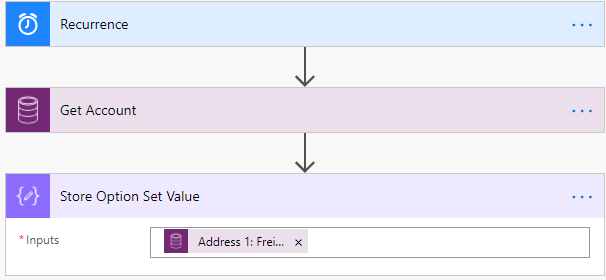
Now, I will demonstrate how an option set appears in Power Automate.
The example below has no other function than to retrieve a specific account record and store the example option set value in a compose step for review.
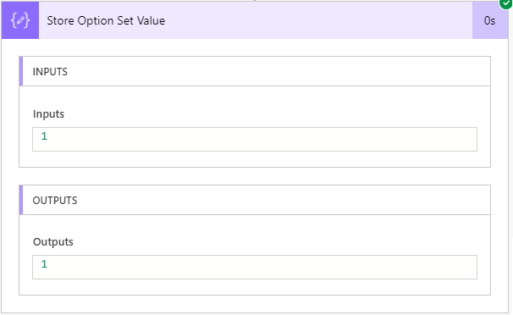
The result is an option set integer value stored in the compose step. These values can be translated using conditions or case statements. However, those unfamiliar with how option sets work might find themselves confused when a number appears where they might expect a string.
Option Sets: Finding the label
If you don’t typically look at the body section of your Power Automate Flow outputs, I encourage you to dig around. There are a variety of attributes that might not be surfaced as dynamic fields.
For example, option set labels:
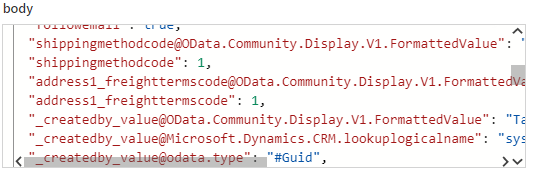
The image above is showing that there are two pieces of data for our example :
- “address1_freighttermscode@OData.Community.Display.V1.FormattedValue”: “FOB”
- “address1_freighttermscode”: 1
So, we can see that even though the new CDS connectors only give us one dynamic option there are still two being provided in the output body.
Option Sets: Using your labels
Thankfully, there is a quick and easy solution that does not involve querying the string map table or creating a maze of switches/conditions.
First, I will return to my Flow and begin by highlighting and copying (CTRL + C) the dynamic value in our step. This will give us the expression for this dynamic value.

That expression looks like this: @{outputs('Get_Account')?['body/address1_freighttermscode']}
Unfortunately, Power Automate includes some unnecessary characters for us. So, be sure to clean up the curly brackets and ‘@’ symbol (don’t change anything else though): outputs('Get_Account')?['body/address1_freighttermscode'].
Now, you will see where the field value from Dynamics CRM/CDS is stored (highlighted in blue): outputs('Get_Account')?['body/address1_freighttermscode']
That value can be replaced with the additional one from our output body:
outputs('Get_Account')?['body/address1_freighttermscode@OData.Community.Display.V1.FormattedValue'].
Be sure to copy it into a notepad or text editor so you don’t lose it!
Then, you can remove the original dynamic value and select the ‘Expression’ tab.
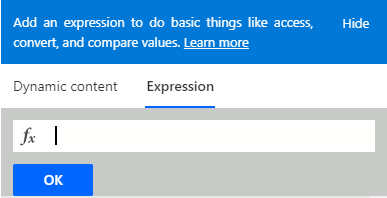
Copy your updated field and paste it into the formula bar, then click ‘OK’

Finally, we will save and run our Flow and we should see the label stored inside of the compose step.
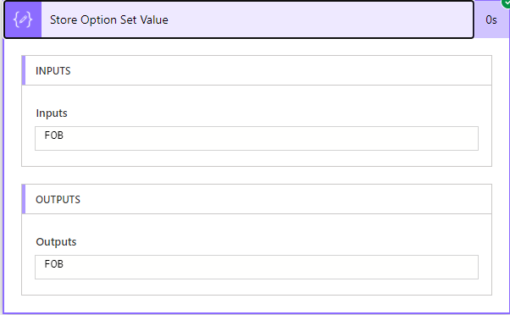
There you have it! Option set labels without any of the fuss.
If you have a quirk of working with the new Dynamics CRM/CDS connectors (or even better: a solution for them) sound off on the LinkedIn post or in the comments below. If you learned something new from this, don’t hesitate to share this post with your colleagues.
RSM Staff
RSM empowers middle market companies worldwide to take charge of change. Our unique middle market perspective makes RSM the natural choice for growth-oriented, internationally active organizations seeking relevant insights and tailored, innovative solutions for a complex and changing world. With a global reach spanning more than 120 countries, we instill confidence in a world of change by bringing the full power of RSM to make a lasting impact on our clients, colleagues and communities.