Out of the box rollup fields are very useful in Dynamics 365 Customer Engagement, but have limitations such as the inability to pull data from calculated fields, the inability to reference multiple entities at once and the fact that they won’t always display updated information. Fortunately we can overcome all of these limitations using Microsoft Power Automate.
To illustrate the potential for a Power Automate Flow to create more powerful rollup fields, consider a scenario where Dynamics 365 Sales is being used to manage sales of widgets. The Account, Contact and Lead entities each have a custom currency field called Annual Widget Budget that is used to estimate their potential purchases. The sales team manager wants a way to tell how much potential revenue each Salesperson is managing through a field called Total Managed Budget on the User record that totals the budget for records that person owns. A standard rollup field could only show data from one entity, but using Power Automate we can populate this information in a single, simple currency field.
To begin, navigate to the Power Automate Application in Office 365, go to + Create and create an Automated flow. Name your Flow and select the Common Data Service trigger When a record is created, updated or deleted. Note Dynamics 365 triggers can also work.
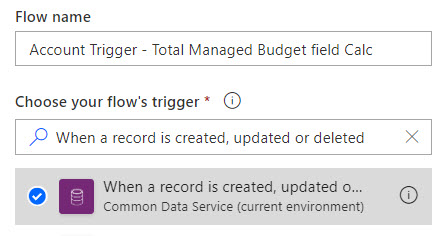
If using this trigger causes an error, create the Flow with an Update trigger then make copies for the Create and Delete triggers. Alternatively, you can redesign to use a Scheduled trigger to run periodically like a standard rollup field.
The first step is to set the Trigger Environment to (Current), the Entity Name to Accounts and the Scope to Organization. Note that using the (Current) environment setting allows you to create your Flow in your development instance of Dynamics, export it and then import it into the production instance to promote to production without making any changes to Flow steps directly. Then, be sure to rename your Trigger step so it can be understood at a glance:

Next, create an Initialize Variable step. This variable will be used to sum the Annual Widget Budget field values for all records that the User owns.

With this groundwork in place, we can start totaling the fields. Create a List Records step to return all Account records that have the same OwningUser as the trigger Account’s OwningUser. For more information on filtering on the List Records step reference this blog.
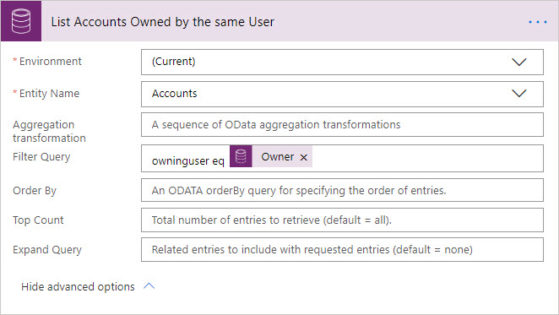
Now that we have the list of relevant Accounts we can sum their Annual Widget Budget fields. Add an Increment Variable step and select the variable Total Managed Budget and the rollup field, Annual Widget Budget. Note that using this field automatically creates an Apply to each block around the Increment Variable action. This just means that the Flow uses a loop to perform the Increment Variable step for each result of the List Records step above. After this step the Total Managed Budget variable will have the sum for the Account entity, just like a standard rollup field.
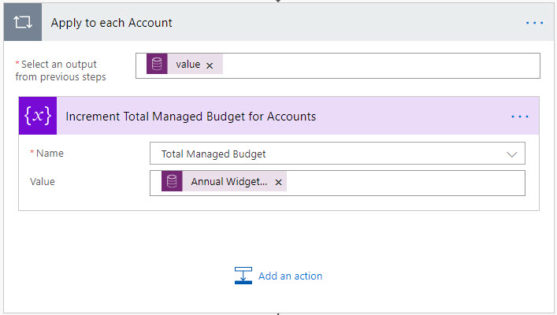
Repeat the List Records and Increment Variable steps for the Contact and Lead entities with the same owner. This will set our variable to the sum of the Annual Widget Budget field for all records owned by this User.
The last step is to add an Update Record step on the User entity. Use the Owner lookup field value from the trigger as the record identifier and set the Total Managed Budget field with the variable.

![]()
With all steps included, the complete Flow will look like this:
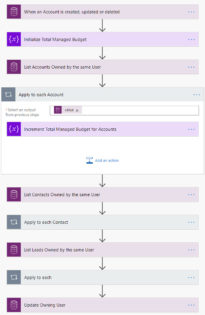
This field is now set as a multi-entity rollup field triggering on the Account entity. To enable the Flow to trigger on the Contact and Lead entities, we will make copies of this Flow and update the Trigger.
To do that, save and select My Flows in the left navigation bar. Check your Flow and Save As, updating the name to add Contact Trigger.
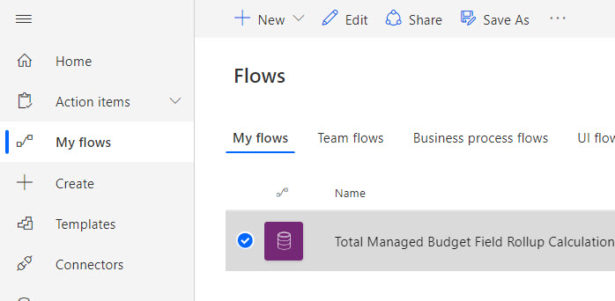
Open your copy and switch the Trigger entity from Account to Contact, then save and Activate your Flow. The rollup will now trigger on Contact.
Repeat these steps for Lead and the rollup is complete!

 RSMUS.com