I came across this little gem when I was playing around with subgrids in Dynamics 365. We all know we can use subgrids to show related records on a form. For example contact related to an account or opportunities related to an account. In my Dynamics 365 instance, I put the out of the box contact field (parentcontactid) on the opportunity record so users can see the individual at the client we’re working with on any opportunity.
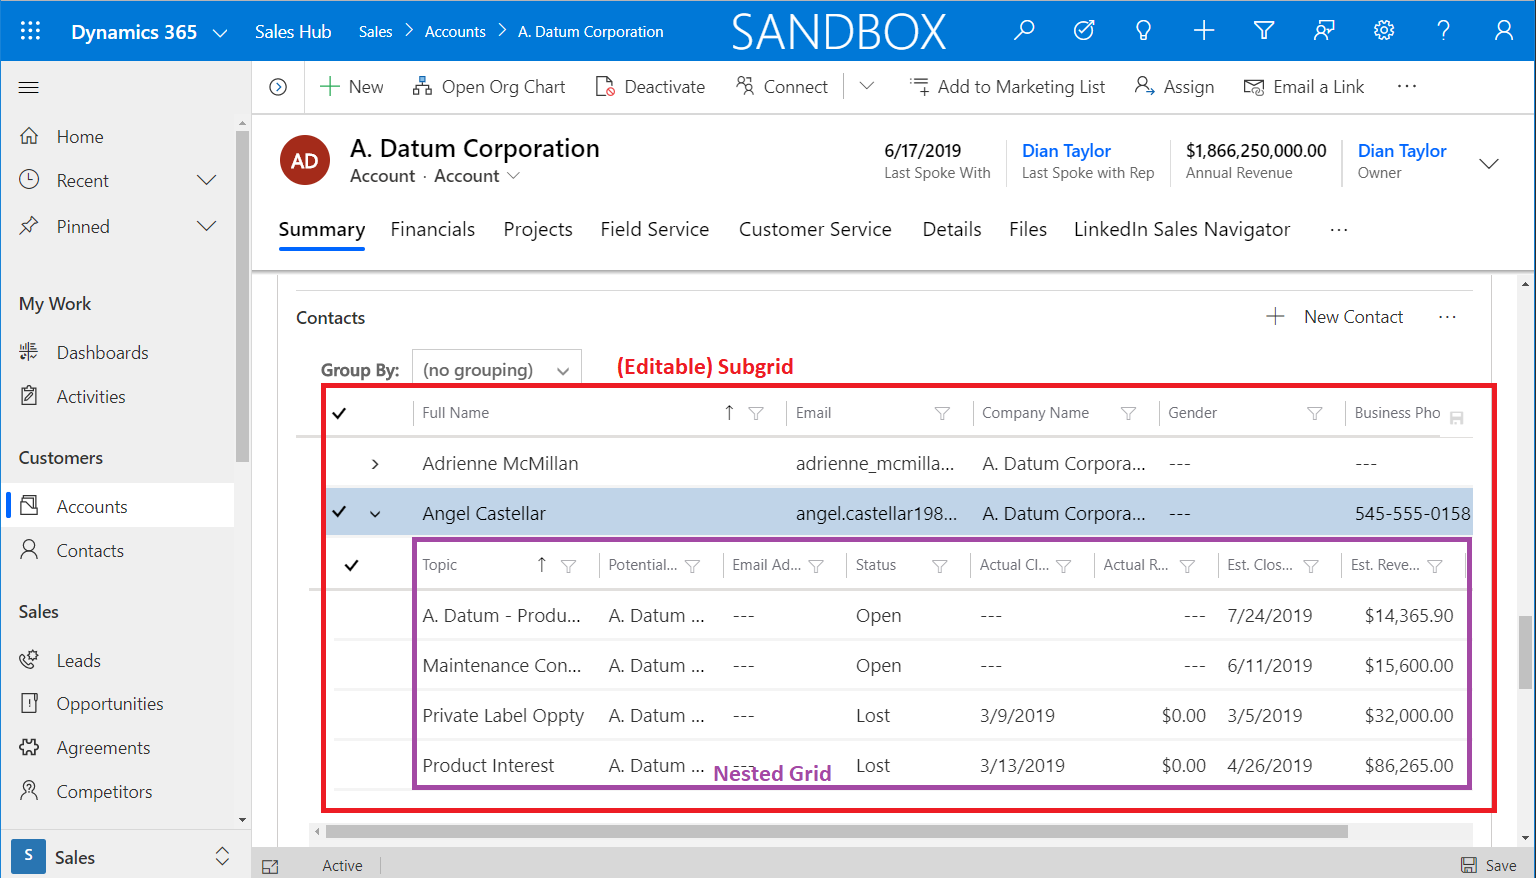
Now I like that I can see opportunities related to an account on the account form, but wouldn’t it be nice to be able to view a list of contact related opportunities from the contact grid on the account record? We can do this by using the nested grids control in Dynamics 365. These are subgrids under subgrids and the image below shows what it looks like:

Configuration
This is a configuration on the account form, so let’s open the account form by navigating to Settings>Customizations>Customize the System. This will open the default solution. Expand the entities on the left side, then expand the Account entity and click on forms. Open the form you want to modify. If you don’t have a contact grid on the account form, you can add this by clicking the insert tab on the ribbon, and selecting ‘Sub-Grid’. Under “Data Source’ choose the following:
Records: Only related records
Entity: Contacts (Company Name)
Default View: Active Contacts
If you already have the contact subgrid on the form, double click to open the grid)

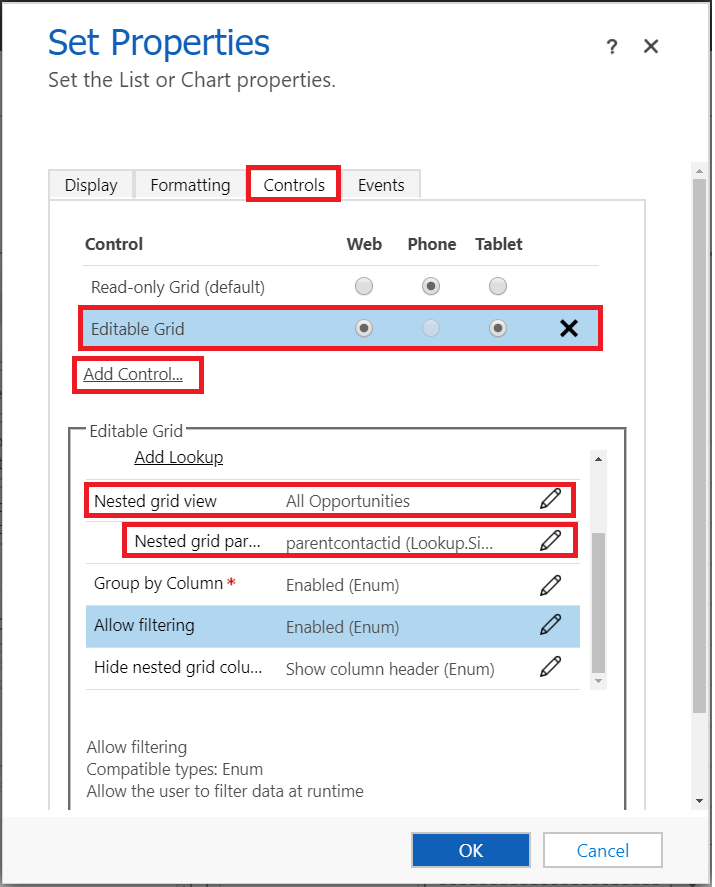
Click on the ‘Controls’ tab on the top, then click the ‘Add Control’ button and select the ‘editable grid’ option from the list. Click the radio buttons under Web and Tablet (phone is not available at this point). Click the edit icon next to ‘Nested Grid View’, select ‘Opportunities’ as the entity and select the view you want to use.
Now click the edit icon on the right side of ‘Nested grid parent ID’. This is the field we’ll use to tie it to the contact field on the opportunity. I used the out of the box field ‘parentcontactid’. You can also configure grouping and filtering from this screen if needed. Click ‘Ok’ and Save. Don’t forget to publish your changes!
I hope you enjoyed this post! Be sure to check in again next week for a new article!

 RSMUS.com