Overview
Service Level Agreements (SLAs) are typically used on Cases to track different things whether it’s a Customer Service response time or closure of the case. These SLAs are called Standard SLAs in the world of Dynamics. Any SLA on another entity in the system is called an Enhanced SLA. There’s not much out there on what’s needed to set up these SLAs on custom entities or even out of box entities in Dynamics 365.
The process is quite simple yet if you miss one thing you’ll quickly get stuck. Let me walk you through these ten steps.
Step 1
First, you’ll want to enable SLAs for the entity of your choice via the entities settings. Just click enable SLA and the system will create the needed SLA lookup fields.
(Note: After you enable this option it cannot be disabled.)
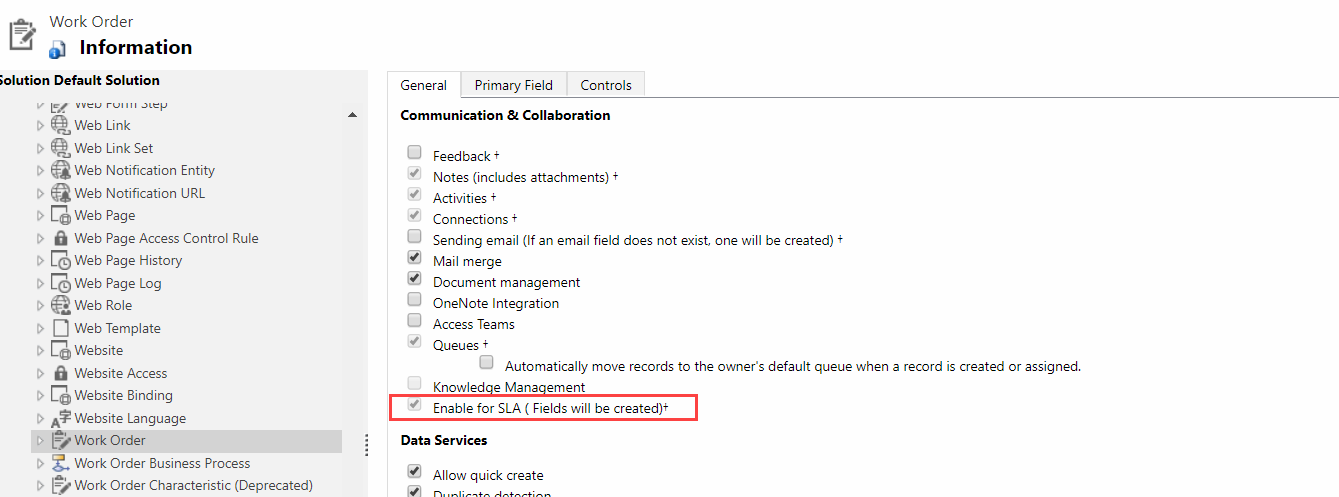
This will create two fields; A SLA Lookup and a Last SLA Applied Lookup.
Step 2
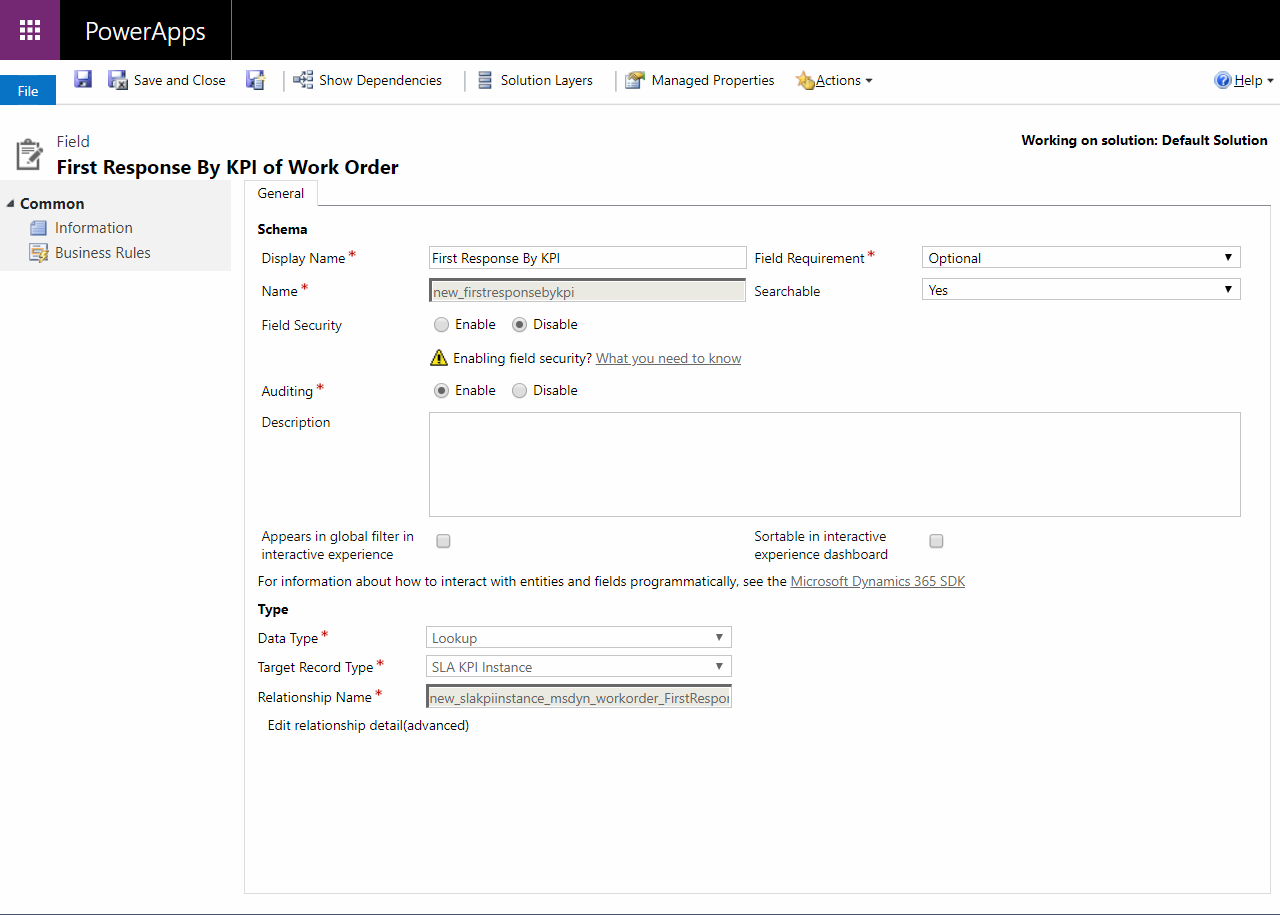
Next is creating a custom lookup field to the SLA KPI Instance entity. This is the step that wasn’t clearly noted in the Microsoft documentation I was going through. Think of the SLA KPI Instance record as the middle man between the SLA and the Entity in which the SLA is running on. Once you create this field, the process is relatively simple.
I called my lookup “First Response by KPI” to match the out of box functionality on Cases. You can name this whatever you prefer as well as having multiple lookups to the SLA KPI Instance entity if you need multiple SLAs applied to a record.
Now that the groundwork is ready, we can start setting up the actual SLA. For this example, we’ll create an SLA for the Work Order entity in which we enabled previously.
The requirement; The customer has a set response time with the customer of two hours and we would like the owner of the Work Order to respond two it by getting the System Status of the Work Order to “Open – In Progress.”
Step 3
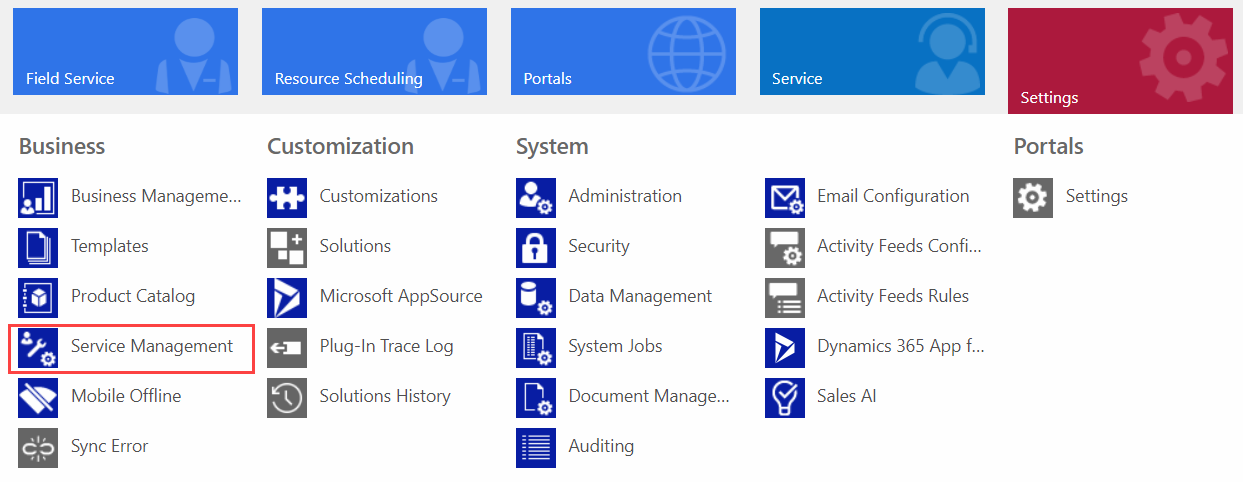
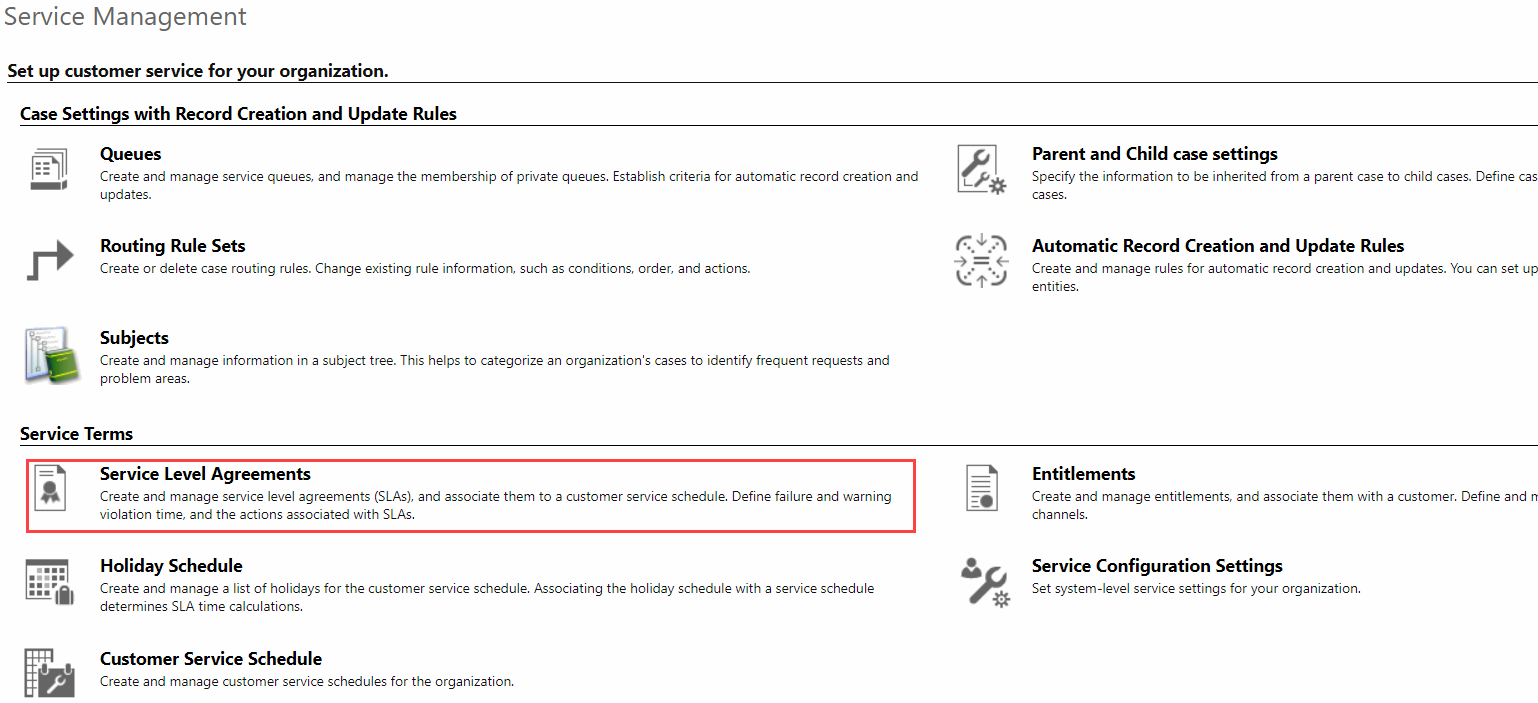
Go to Settings > Service Management, Service Level Agreements (SLAs), then + New.
Step 4
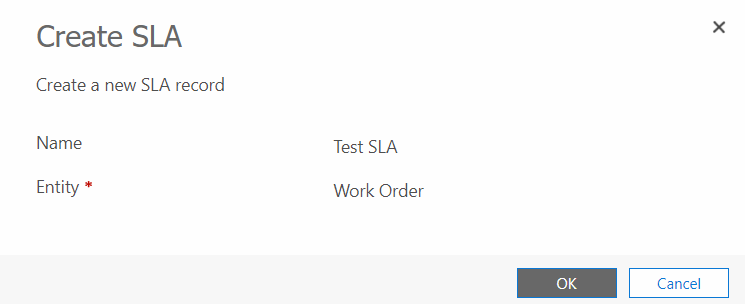
Name your SLA and select the Work Order entity. Then click Ok.
Step 5
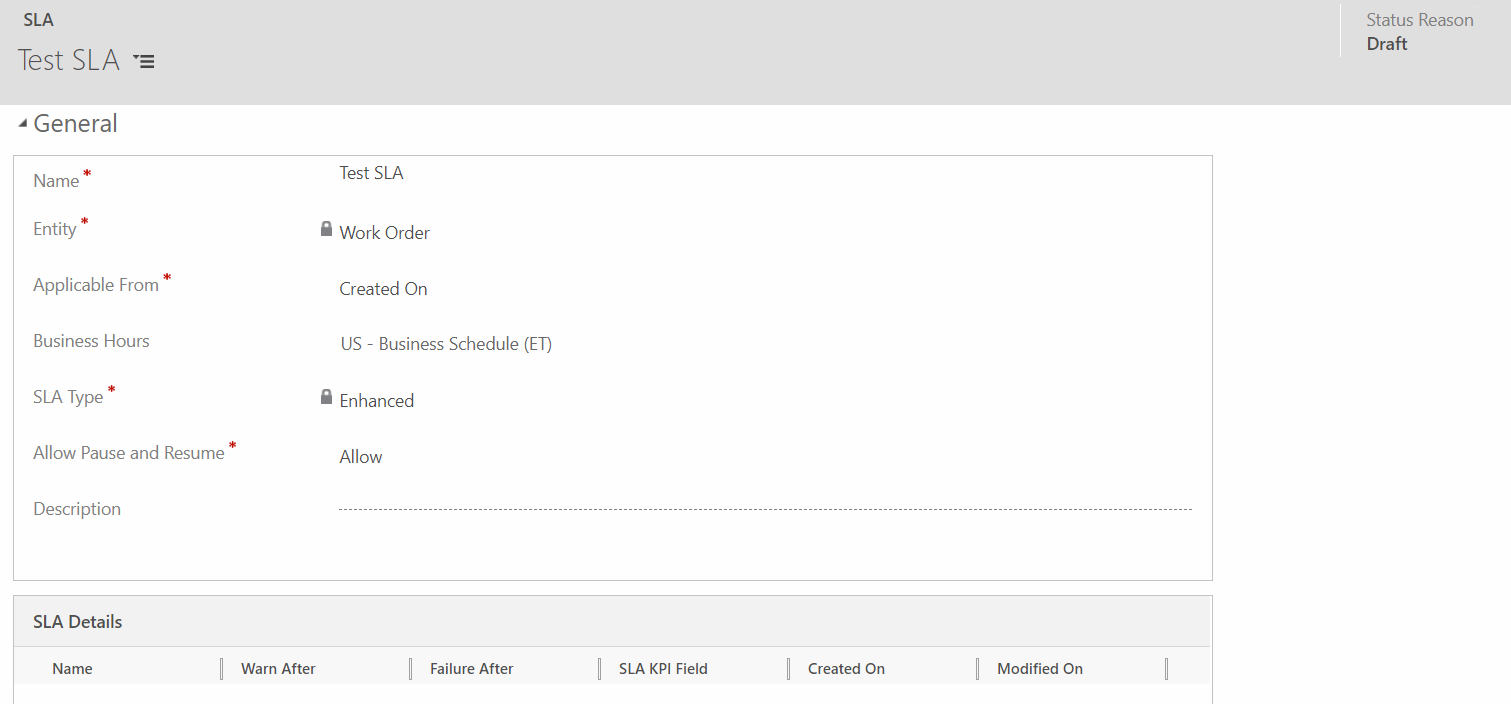
Fill out the SLA General Section. Set when the SLA will be Applicable. For this example, I will have it start on the Created On of a Work Order. Also, set your Business Hours if applicable. This will take into account the Time Zone of the SLA and Start/Pause the SLA based on your companies Work Hours and Days of the week.
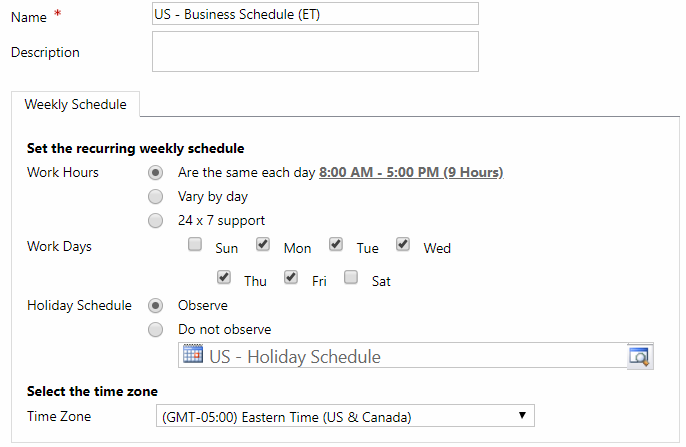
Note: When setting up your Business Hours, you can also add a Holiday Schedule if you want the SLA to observe company holidays.
Step 6
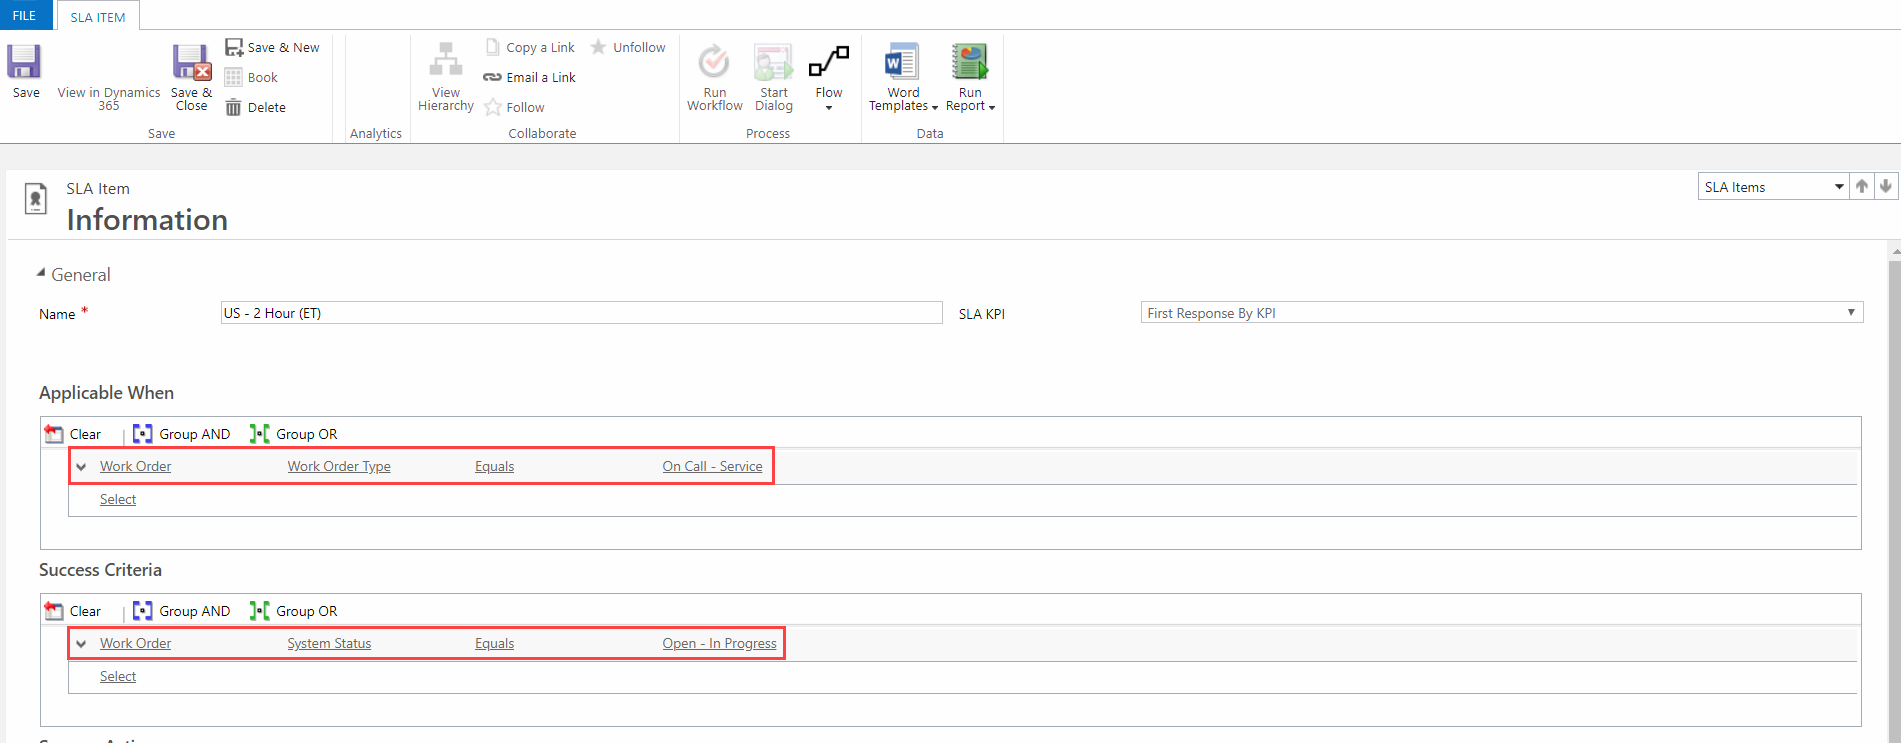
After this is the details of the SLA. Hit the + on the subgrid noted below to add a new SLA detail. For this example, I am going to walk through setting up just one SLA Detail but in theory, if the SLA needs to be more complex, the SLA can handle a variety of scenarios.
- Applicable When: Work Order Type = “On Call – Service”
- Success Criteria: System Status = “Open – In Progress”
Step 7
For the success, I added two custom fields that this customer is using for reporting purposes but you can have the success trigger anything whether it is updating the record or sending out an email, etc. This customer wanted a simple flag of whether or not the SLA was met and if so, the date and time stamp of that event.
Step 8
For the failure, we set that at two hours since the users have that amount of time to get the work order to open in progress. If not, they’ll fail and for this example, we are creating a simple email notification to the owner of the Work Order and the Users manager for escalation and accountability purposes.
Step 9
For the warning, we’ll put it at 50% of the failure SLA time and set it to 1 hour. We’ll make an additional notification which will be sent to just the user warning them that the SLA is nearing failure.

Step 10
Lastly, once the SLA is complete, save it and then activate it.
![]()
To test it, create a WO and select the needed SLA for the Customer. You could also automate this by adding an SLA lookup on the Customer and then build a Work Flow to add that default SLA for the customer each time a Work Order is created.
If you have any questions, feel free to drop a comment below.
Learn More
To learn more about how you can take advantage of the Field Service Mobile app and other Dynamics 365 features, visit RSM’s Microsoft Dynamics 365 resource. To make sure you stay up to date with the Microsoft Dynamics Community, subscribe to our Microsoft Dynamics Community Newsletter. For more information on Microsoft Dynamics 365, contact us.
By: Brian Jason Smith – Florida | Microsoft Dynamics 365 for Sales | Microsoft Dynamics 365 for Field Service

 RSMUS.com