Last month I used Microsoft Flow for the first time, and all I can say is, “Where have you been my whole life!?” First, it’s a free service that Microsoft offers. That’s right! It’s free! The service allows you to create automated flows between hundreds of applications and services. You can set up flows to synchronize files, get data, and send email notifications. You can even use Flow with applications like Power Apps, SharePoint, and Microsoft Dynamics 365. Currently, Microsoft has a long list of applications and services that Flow can be integrated with, and the list is continually expanding. Additionally, Microsoft has created templates that make it easy to quickly create a new flow. Flow users can also submit their flow to the Microsoft Flow site for public use. You may be able to find a template that suits your needs, but you can also create a flow from scratch.
I am going to start off this Microsoft Flow series by showing you how to create a new flow from a template. First, you need to make sure you have a Microsoft account, or sign up to use Flow by going to https://flow.microsoft.com/en-us/#home-signup.
Once you’re signed up, you can browse through the pre-made templates by clicking Templates on the top navigation bar. There are a lot of templates, so you can filter at the top of the screen using the Showing and Sorted by options. Additionally, you can search for a template in the top navigation bar.

Once you find a template you want to use, you can select it and customize it. I am going to create a flow that will send a push notification when I receive an email from my boss. Let’s take a look!
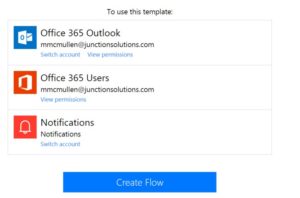
- When I select the template I want to use, Flow will ask me which account I want to use for each of the services used in the flow. At this point, I select the accounts I wish to use. I can also switch accounts here if I need to. Once I’m done, I can click Create Flow.

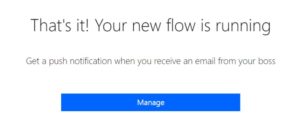
- Now the new flow is running, and I can manage the flow by clicking Manage to customize the workflow.

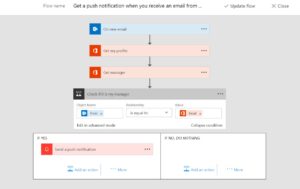
- I can select my new flow from the list and see the flow and each of the elements and conditional elements. To update the flow, I can click Update flow.

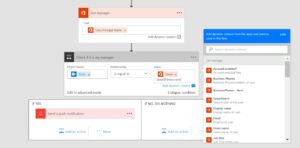
- Here, I can also add dynamic content to each of the elements in the flow. For my flow, I want to specify my boss’ email address.

- Then I have conditional elements I can set up. For this flow, if an email is sent to me from boss@boss.com, I will receive a push notification. If it’s not from boss@boss.com, the flow will do nothing.
- Next, I can click Update flow and my flow will be updated with the new value.
How easy is that? It’s crazy! In next month’s blog, I will expand on Microsoft Flow by explaining values within flows and show you how to create more flows to make your life easier. Don’t miss it!
Want to learn more? Visit academy.rsmsus.com for eLearning courses and information about our hosted training classes in Denver! Or Contact our Microsoft Dynamics experts at RSM (855) 437-7201.
by Meghan McMullen for RSM
@MeghanRSM on Twitter

 RSMUS.com