Dynamics 365 is already a robust suite, but what if you could get access to your data faster and in a user-friendly format. You can do just that by embedding PowerApps into your existing Dynamics 365 Dashboards.
What is Microsoft PowerApps?
If you are unfamiliar with Microsoft PowerApps, it allows you to create business applications with little or no coding. You can access these PowerApps from the web or on Android and iOS devices. The highlight of using PowerApps is the Connector features when creating your new PowerApp. These connectors allow you to build apps that interact with your data sources and maintain security permissions along the way, keeping your data secure, even when being accessed from the PowerApps platform. To get started making your own PowerApp, head over to https://make.powerapps.com.
Embedding your newly created PowerApp into Dynamics 365 is simple and adds yet another way for you to interact with your data in a meaningful way. To get started you must first identify which set of data you would like to interact with. For this example, I choose Fixed Assets inside Dynamics 365.
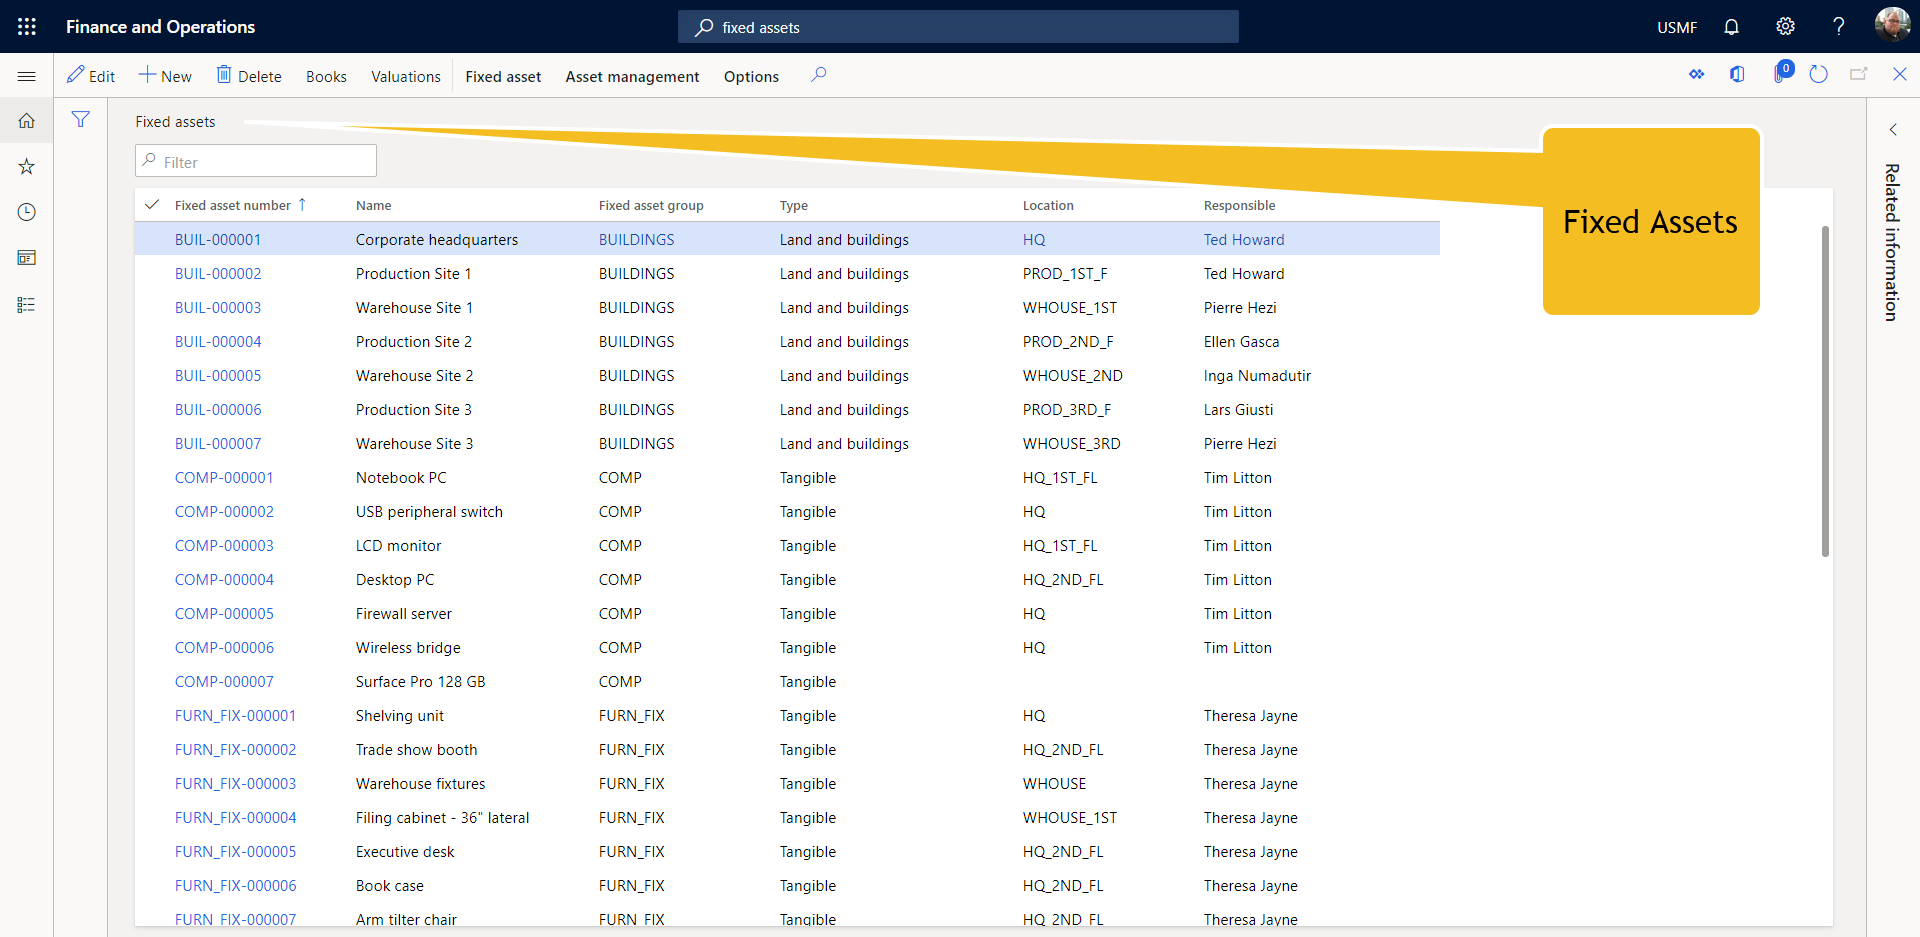
Create your own PowerApp
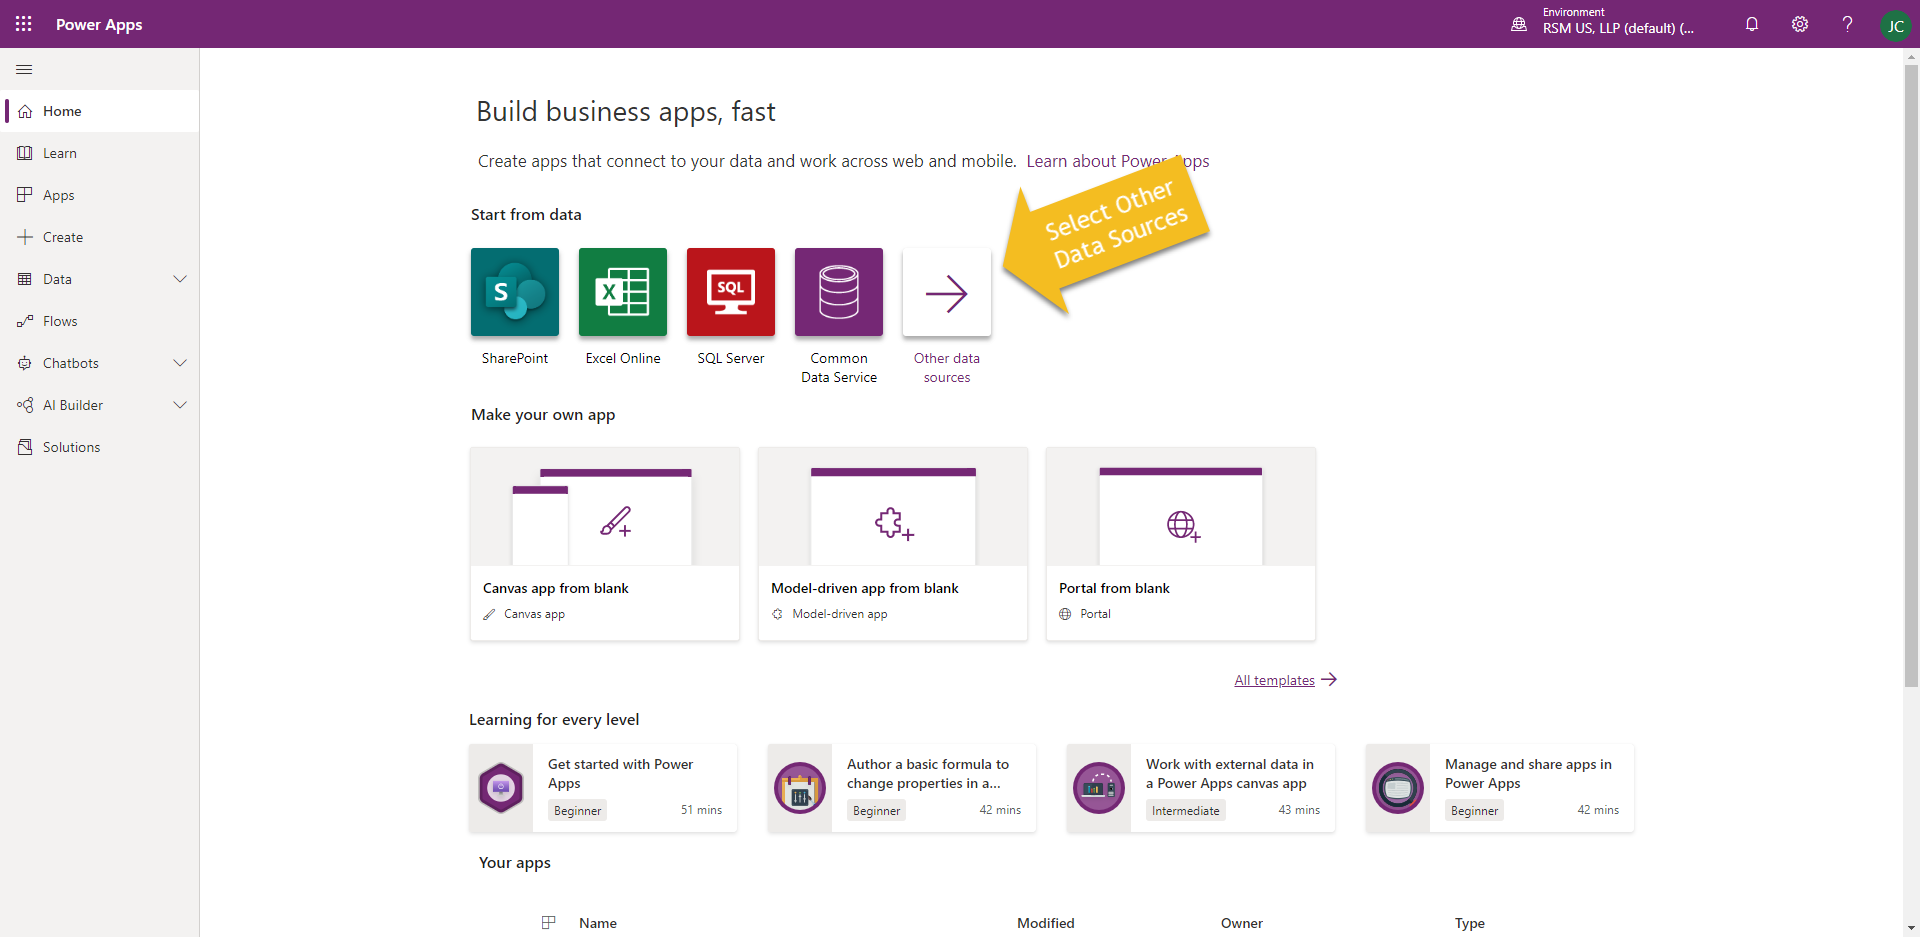
Once you have decided what data you will be interacting with, now is the time to head over to https://make.powerapp.com to get started. You will be greeted with a page letting you know all of the ways you can get started creating your own PowerApp. In this example since we are working with Dynamics 365, we are going to choose “Other Data Sources”.
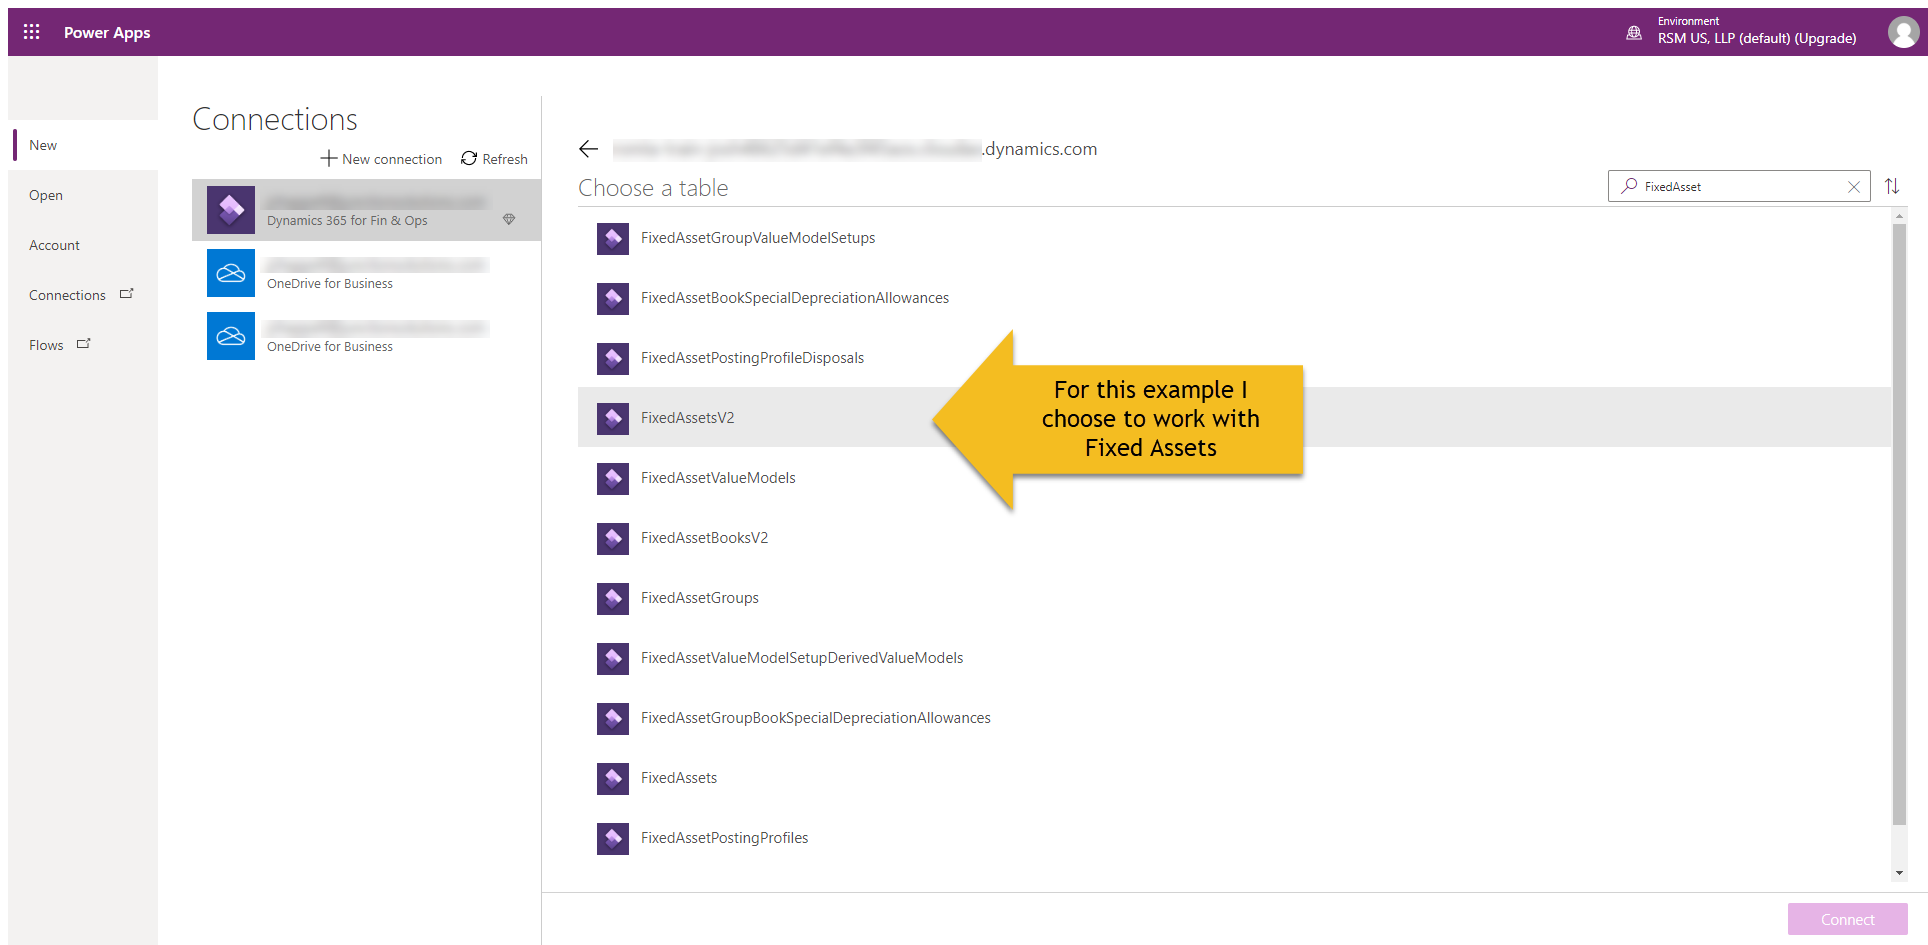
In the next section, select the D365 environment that you want to connect your PowerApp to. After you have made this selection you will see a section asking you to “Choose a Table”. This is where you will select the specific data within D365 you want to interface with. You can scroll through this list or use the search bar in the top right of the screen to look for an exact table.
After you have made a selection on what table you are going to be using, the PowerApps Studio, will automatically use the data and build you a functioning app you can use yourself or share with others within your organization. You can further customize the PowerApp to your liking using the PowerApp studio if you wish. After you have the PowerApp ready to go, you will need to save the PowerApp to the PowerApps Cloud.

Once saved, navigate back to the PowerApps homepage. There, on the navigation menu on the left of the page, select “Apps” to see a list of all your PowerApps you have created and or have access to via your organization. Once loaded select your PowerApp and select the ellipsis to the right of the PowerApp name to access the Details menu.
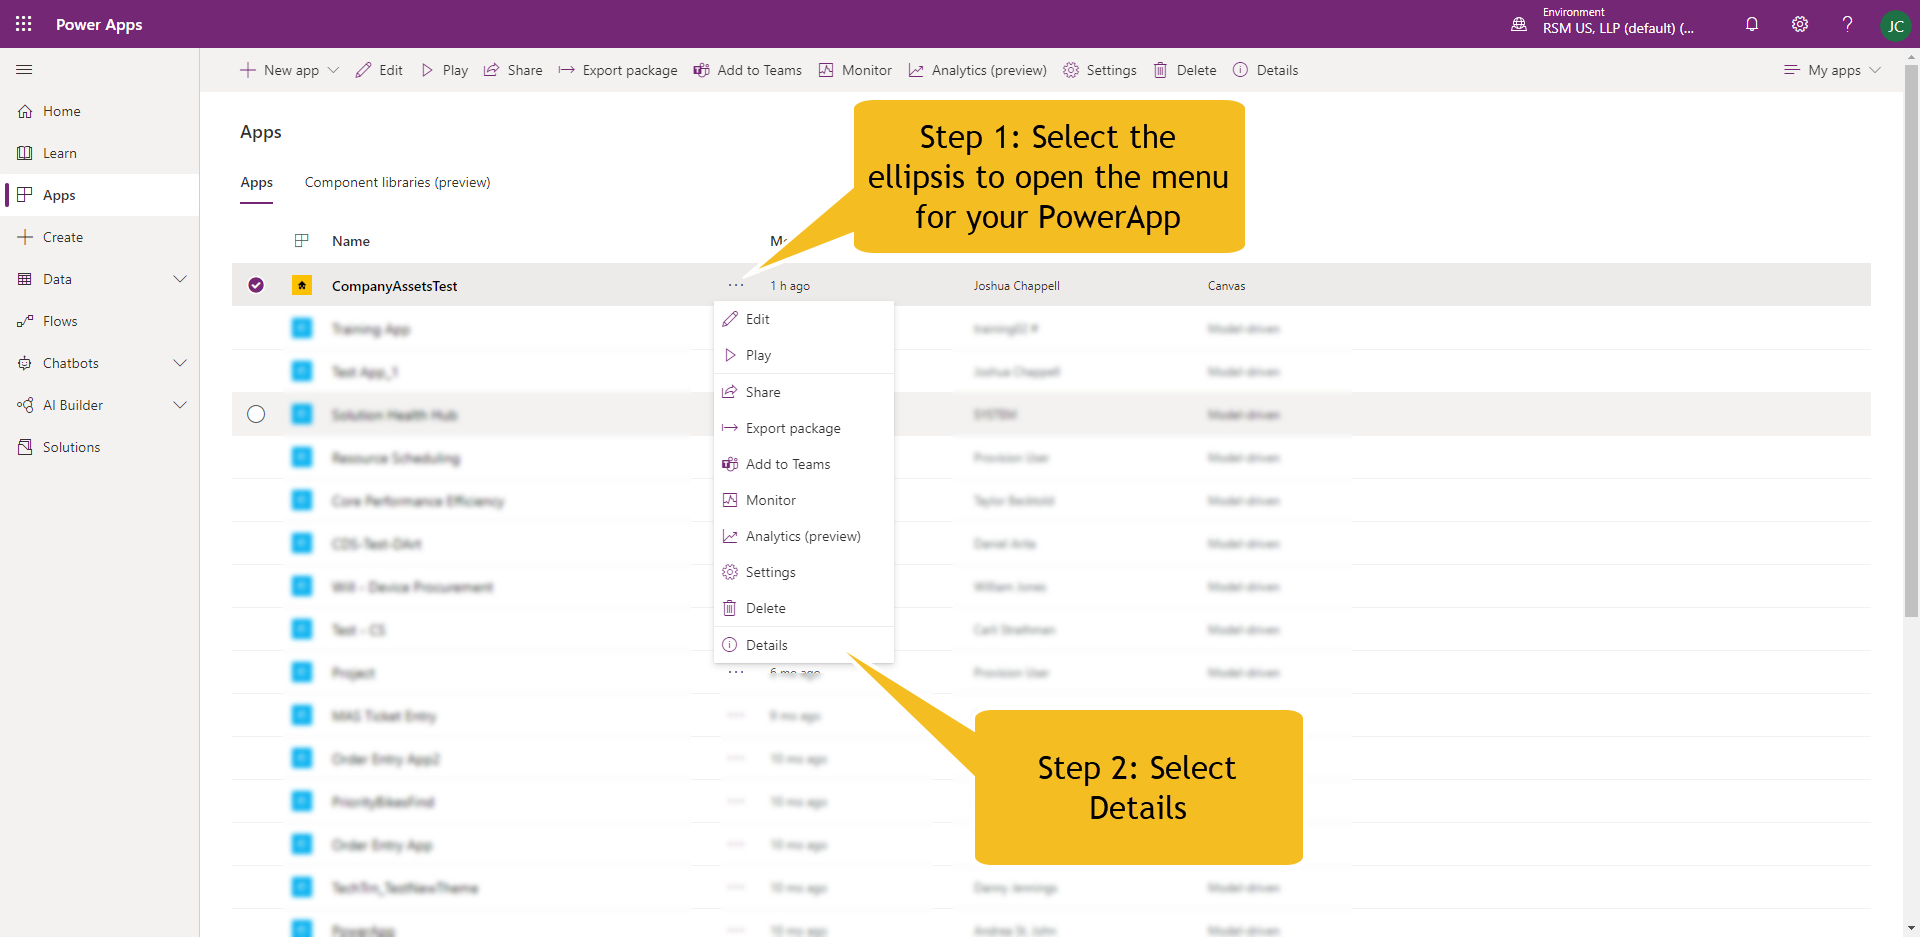
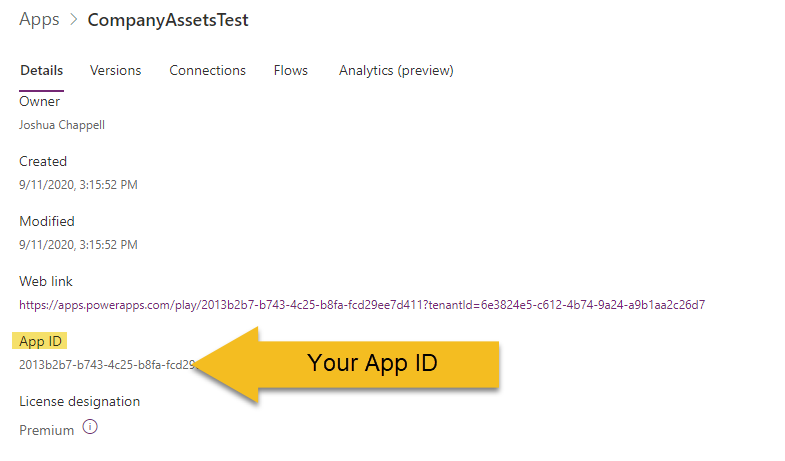
Once the details have loaded, you will be looking for the App ID located on the main page. Please notate this ID or copy onto your clipboard, as you will need it for a later step.
Add PowerApps to Dynamics 365
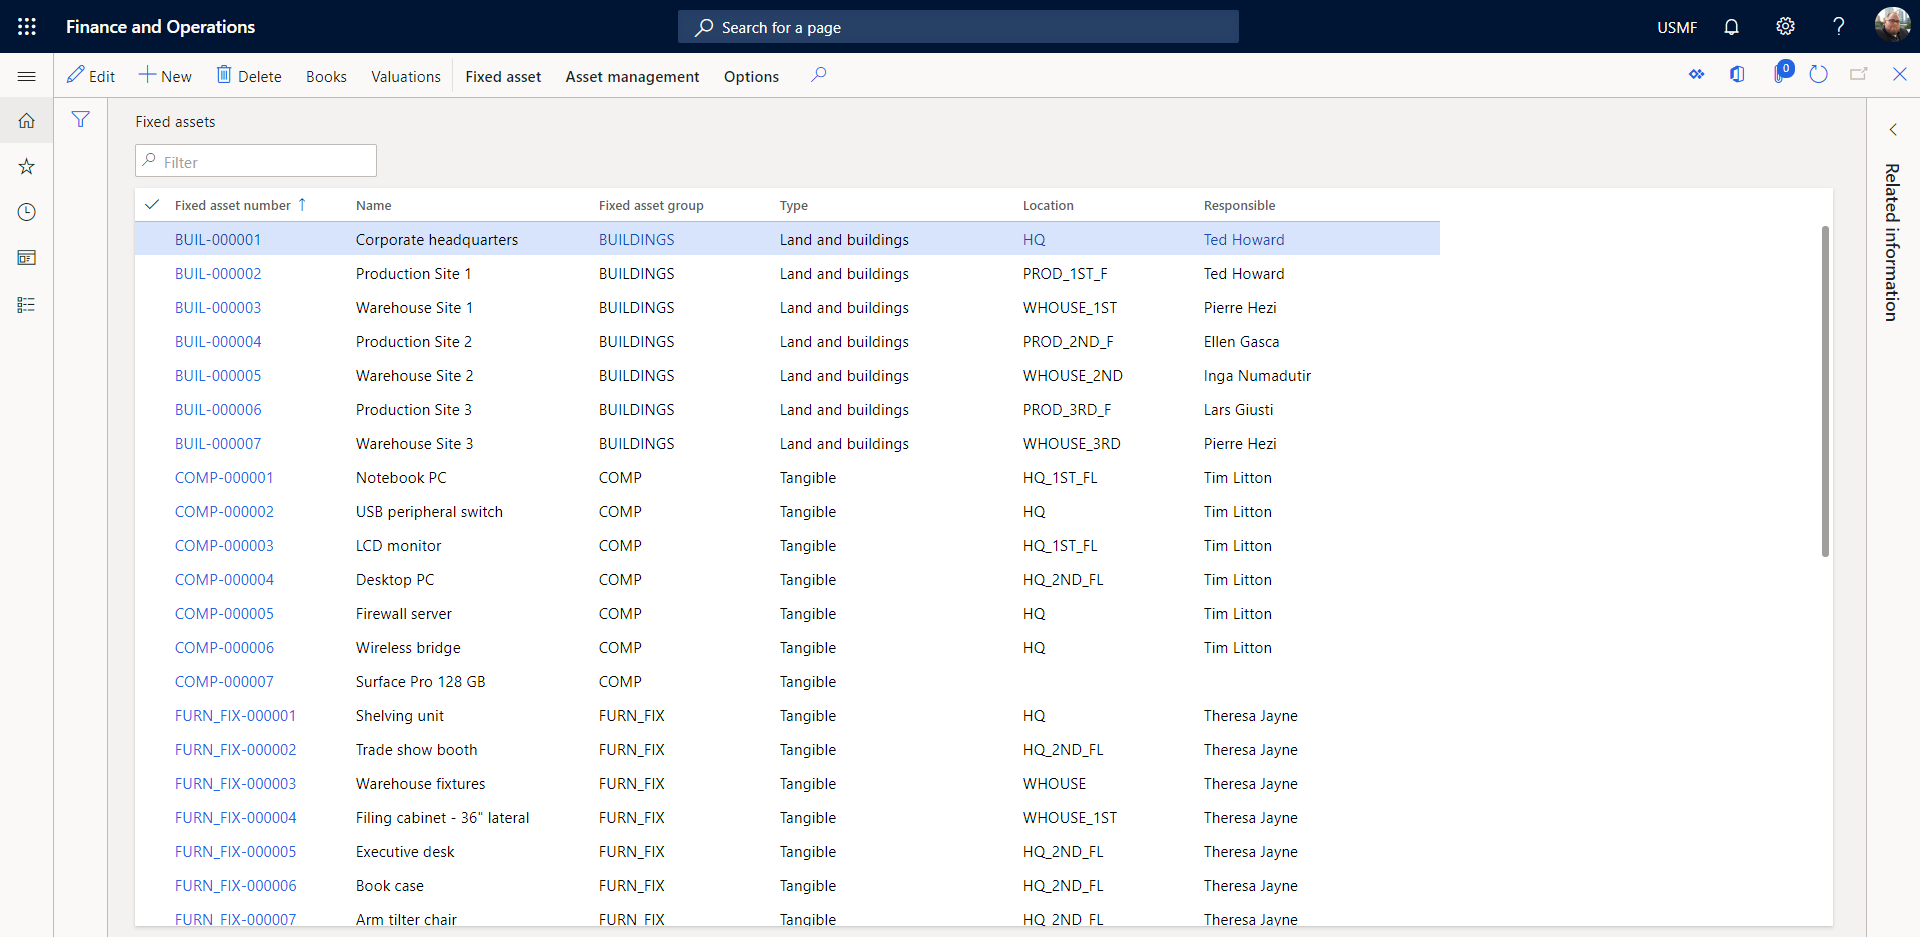
Now we are going to navigate to your Dynamics 365 environment. Once there, please navigate to the section that you first indicated when building your PowerApp. For this example, I navigate to the Fixed Assets dashboard, as that is what I indicated when I built my PowerApp.
To finish adding your PowerApp to Dynamics 365, watch this video for the final steps.

 RSMUS.com