Recently during an online implementation of Microsoft Dynamics CRM 2015, we had a client who wanted a timer to make sure that cases are staying within a certain time parameter. In addition, they wanted to make sure that cases that come through, outside of normal working hours or during holiday scheduled days, are timed differently so that the timer doesn’t run out prior to an employee looking at them in normal working hours. Let’s see how this is done.
Step 1: Set up Timer
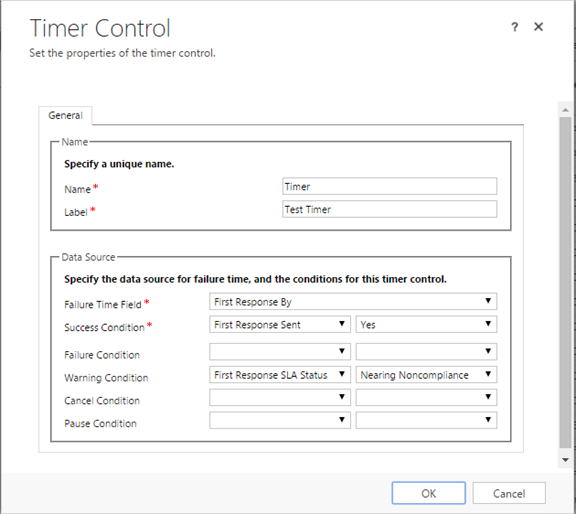
The first thing you will want to do is set up the actual timer on the Case entity form that you want to use. Do so on the case form you wish to use and click on the insert tab > timer. Once you do this, a window labeled ‘timer control’ will appear. Below is a sample of how this timer is set up.
Step 2: Set up workflow that sets the timer
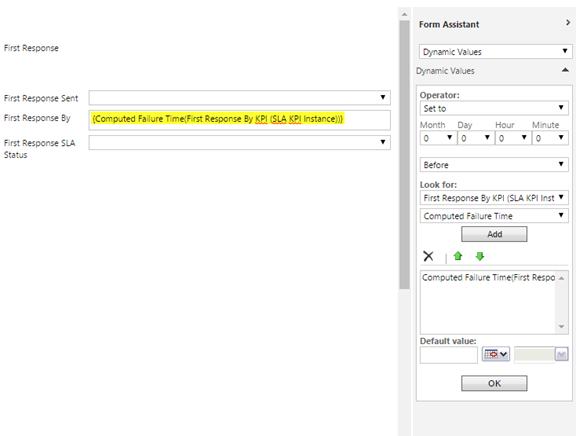
In order for the timer to work you will need to have a workflow that triggers it upon the creation of the case record. Here a screenshot below of how it is set up:

As seen in the image above there is a ‘set properties’ button, hit that and the following screen below will need to be set up as seen below:
Step 3: Go to Service Management Settings
Set up Holiday Schedule
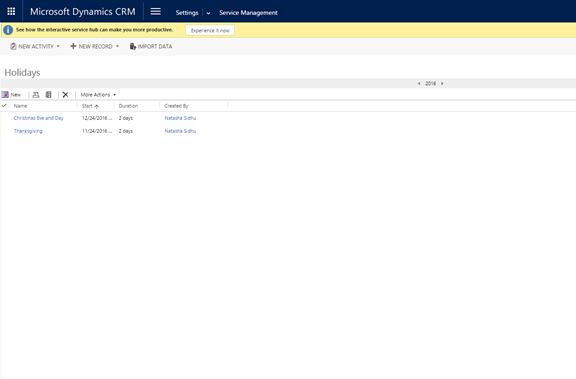
Under the Service Management settings click on Holiday Schedule. Once in there click New and enter the name and description of the holiday schedule you are creating. Once you click create the schedule you can add holidays with name of holiday and the dates. Once done it should look like the following sample schedule below:
Set up Customer Service Schedule
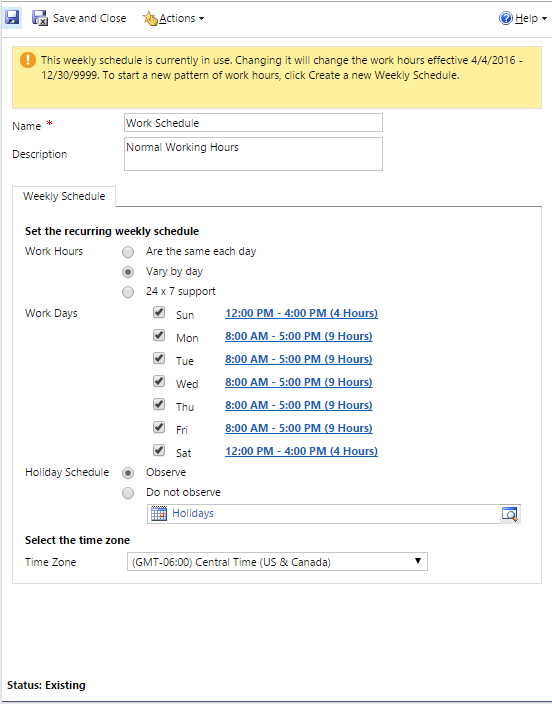
Under service terms click Customer Service Schedule. In the top left of the next page hit new and give your schedule a name and description then hit create. A window will pop as shown below and you can make your working schedule. In this case we will choose the ‘vary by day’ option so we can set specific hours for each day as they tend to be different some days. Now fill in the hours, observe the holiday schedule we created, and then hit save. Here is an example of this below:
Set up the Service Level Agreements
Under Service Management, click Service Level Agreements, then click new first of all you will need to fill in the Business required information (Name, Applicable From, SLA Type, Allow Pause and Resume) and click save. Once done you will need to press the + above the SLA details grid. This is where you will set up your conditions for the timer to warn when it is running low on time and then out of time and in addition state when this timer applies on the case form. In this case when the case type equals problem then this timer will apply. See below for how this is set up:
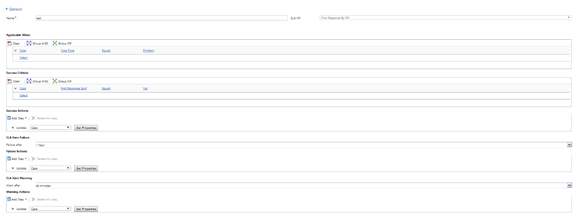
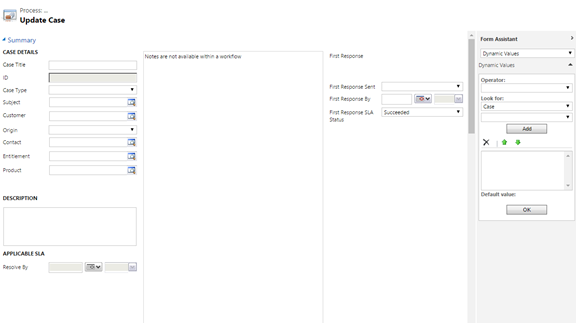
As you see there are those Set Properties boxes, this is where you state what the First Response SLA Status changes too. Below I am showing you the warning condition. The rest work the same way just a different status to nearing noncompliance. So for success condition it would be succeeded and for failure condition it would be Non-Compliant. See below:
After saving, you need to set this Agreement as the default and activate it. Now your Service Level Agreement is complete.
Now to Test!
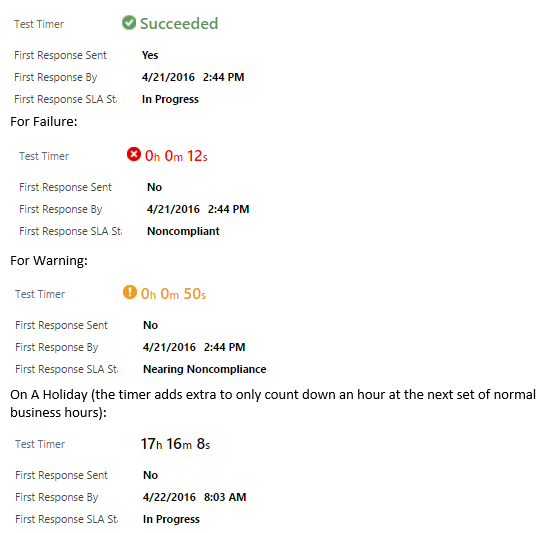
Once you have set the timer up it is time to test it to make sure it is working if it works this is how will look.
For Success:
For additional information and help regarding Microsoft Dynamics CRM, please check out the rest of the blog. If you are looking for support or possible implementation of Microsoft Dynamics CRM, please contact our Dynamics CRM professionals at RSM by phone at 855.437.7202 or by email at crm@rsmus.com.
by Natasha Sidhu for RSM

 RSMUS.com