Introduction
Security in Microsoft Dynamics365 for Operations is essential now. Securing the objects that you have created is a requirement of new development within Microsoft Dynamics 365 for Operations (MsDyn365). This article explores the security operations of roles, duties, and privileges. In this case, we will try possibilities using a familiar tool, the Magic 8 Ball®. The Magic 8 Ball (made by Mattel®) is a mysterious device that provides solutions to all of life’s questions with a simple shake of the ball. Beneath the murky blue netherworld, there are many more choices than expected. Our example builds upon previous articles were we covered database manipulation, X++ control statements, and the user interface. This expands upon those ideas and finishes them up with a security design that allows specific access to the Magic 8 Ball.
Setup
For our process we will need a couple of different privileges for Magic 8 Ball. It is key to privilege development to create a “view” for view-only processes and a “maintain” view for maintenance of the data. This project will also have a new model dependency in order to incorporate the extension of the Fleet Management menu in the demonstration image, if it is not already enabled.
Privilege Creation
- Open Visual Studio as an Administrator and open the
- Right-click the project, and select Add > New Item.
- Select Security > Security Privilege.
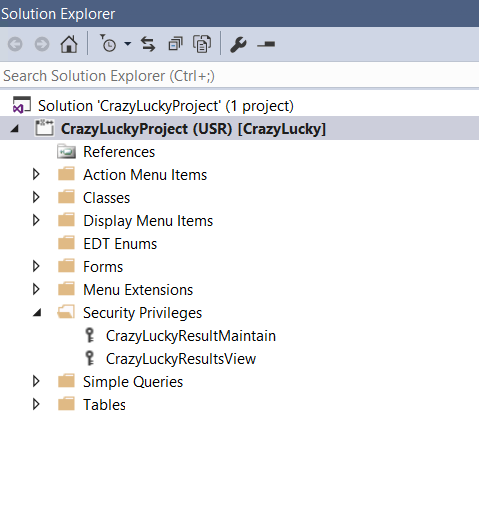
- Enter CrazyLuckyResultsView for the name and click Add.
- Right-click the project, and select Add > New Item.
- Select Security > Security Privilege.
- Enter CrazyLuckyResultsMaintain for the name and click Add.
- Save all and click Build.
- Ensure that there are no errors. If you have an error resolve and rebuild.
Update Model Dependency
- Click the Dynamics 365 menu and select Model Management > Update model parameters.
- Select CrazyLucky and click Next.
- Select FleetManagement.
- Click Next.
- Click Finish.
We will need to attach the menu items to the new privileges, extend the roles, and add the privileges to the roles.
Attach Menu Items
- In the Solution explorer, expand the Display Menu items if they are not already visible.
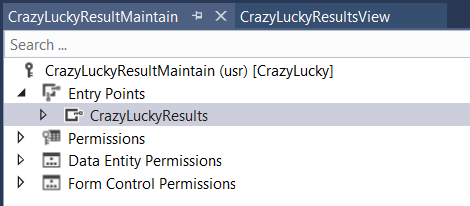
- Drag the CrazyLuckyResults menu item from Display menu items to the entry points for CrazyLuckyResultsMaintain.
- Select the new created CrazyLuckyResults Entry point

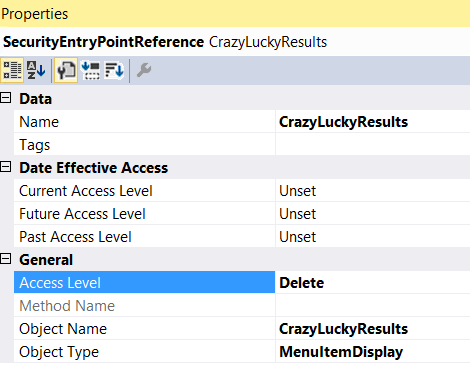
- Configure by setting the access level to Delete.

- Select the CrazyLuckResultsView privilege and click Open. (If it is already open in middle pane, select it.)
- Drag the CrazyLuckyResults menu item from Display menu items to the entry points for CrazyLuckyResultsView.
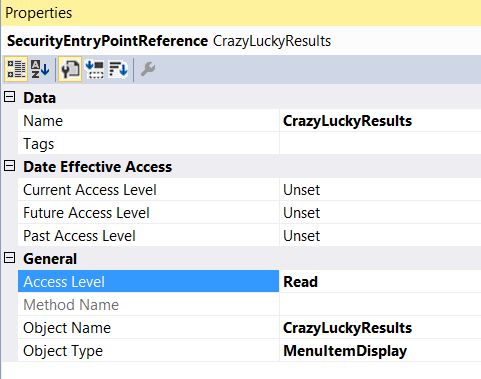
- Configure by setting the access level to Read.

- Save all and click Build.
- Ensure that there are no errors. If you have an error, resolve and rebuild.
Extend Roles
- In the AOT, expand Security > Security Roles.
- Right-click FMClerk and select Create extension.
- Right-click FMManager, and select Create extension.
- In the Solution Explorer, right-click the new Extension and select Open.
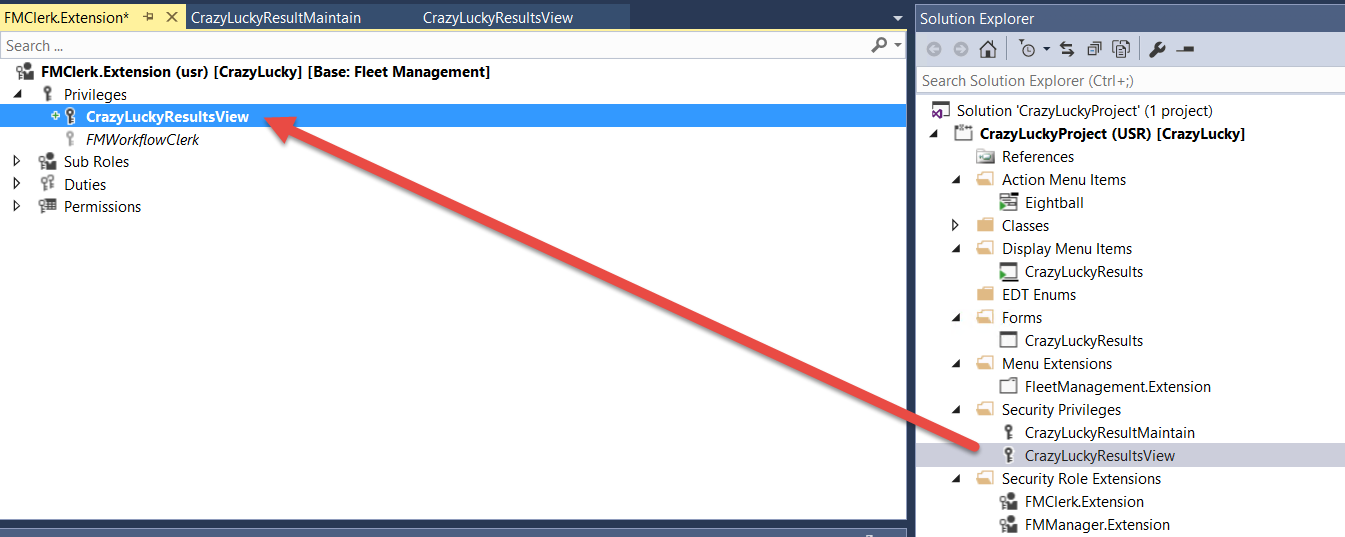
- Drag the CrazyLuckResultsView privilege to the privileges of FMExtension in the middle pane.

- In the Solution Explorer, right-click the new Extension and select Open.
- Drag the CrazyLuckResultsView privilege to the privileges of Extension in the middle pane.
- Save all and click Build.
- Ensure that there are no errors. If you have an error, resolve and rebuild.
Now the real fun begins: you can now test your security with your Magic 8 Ball in the user interface. If you are unfamiliar with the process, follow the steps below.
Assigning the Role
- Open Dynamics 365 for Operations as an Administrator.
- Click Show navigation pane.
- Open System Administrator > Users > Users.
- Select the user for testing. Note: This must be an AAD user from your domain that you know the password for.
- Once in the user, unassign all roles except Employee and System User.
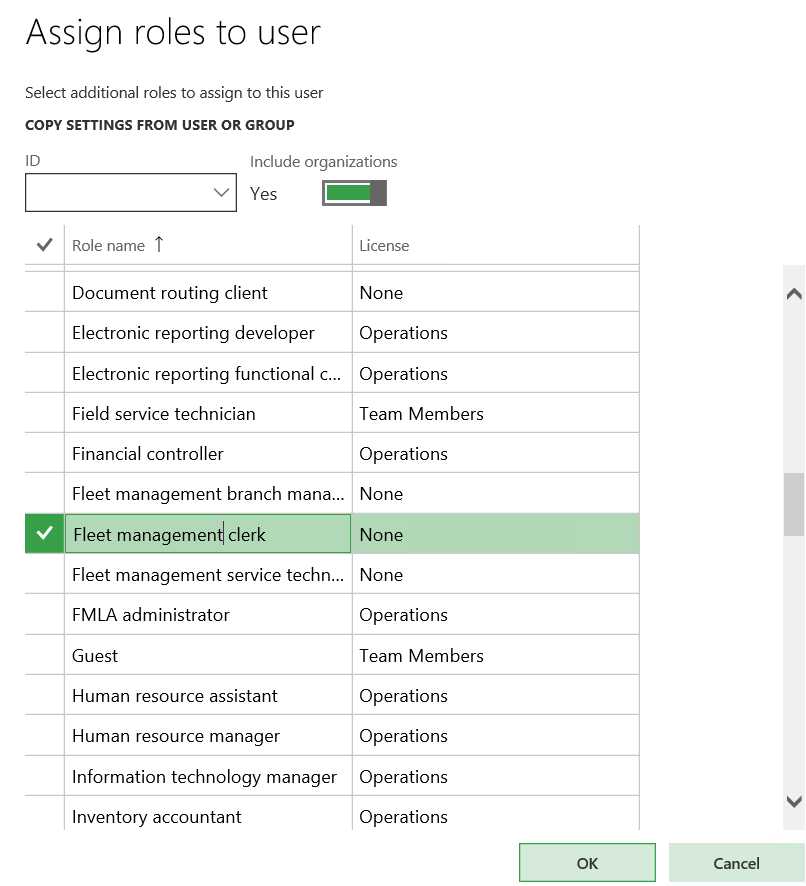
- In the Action Pane strip, click Assign Roles > Select Fleet management clerk.

- Click OK.
- Log out of Dynamics 365.
Testing the Interface
- Open Dynamics 365 for Operations as the assigned user.
- Open the Fleet Management module.
- Click Crazy Lucky Result Decision Maker under Rentals.
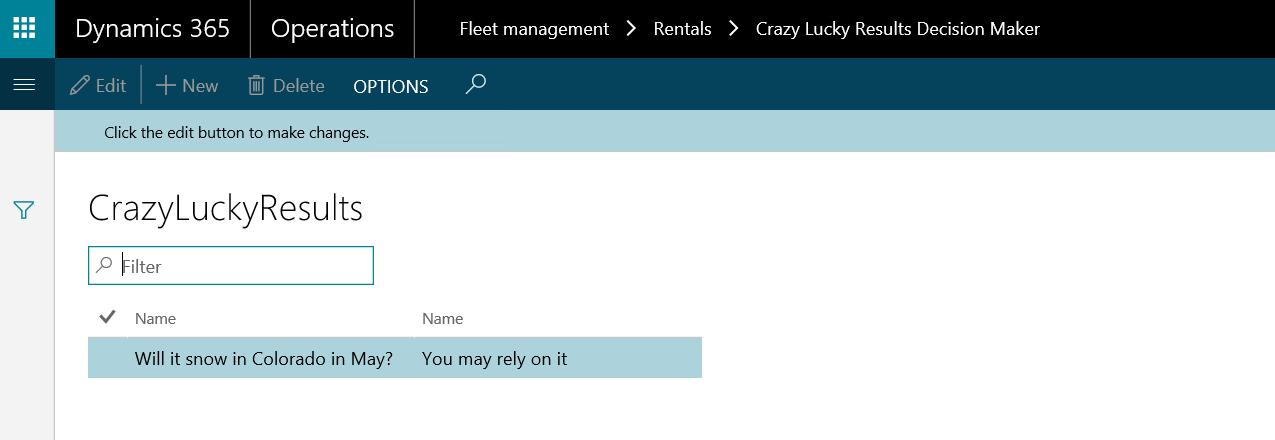
- The following are the results for the FMClerk. Notice the grayed out section for Edit and Delete.

Now you can return to the Assign Roles step as Administrator and use the Fleet management branch manager.
- Open Dynamics 365 for Operations as the assigned user.
- Open the Fleet management
- Click Crazy Lucky Result Decision Maker under Rentals.
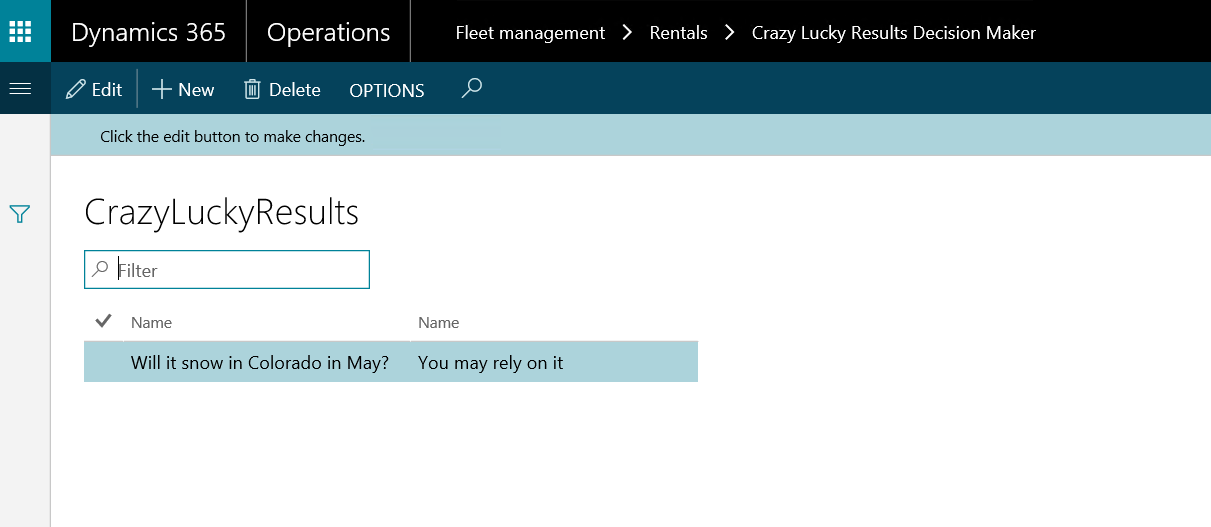
- The following are the results for the FMManager. Notice the ability for edit and delete.
This article explored the key aspects of the basic security design in MsDyn365 for the Magic 8 Ball. First, we set up the privileges needed for the view and maintain of the CrazyLuckyResults List Page. Second, we configured the two privileges after adding the menu items. Next, we added the new privileges to role extensions for use. Then we tested the model by assigning the new role extension to a user.
Additional development beyond this point would include the user interface for the CrazyLuckyTable were the user can change the comments. With that expansion, there would be a duty or privilege that can be created that would be called Enable allow for the setup of the table.
A challenge for you to do right now is to ensure the Action Menu Item Eight Ball is properly configured so that you can run the application. Enjoy the Magic 8 Ball, but keep in mind that it is not recommended for production or for those 100+ years and older!
For more information, I would recommend that you attend our Dynamics AX or Dynamics 365 training in person or on-demand online to learn more.
Plus keep an eye out for more articles that dive in to the technical aspects of using X++ code. Visit academy.rsmus.com for more information and training materials that will cover this and hundreds of other topics for AX2012 and MsDyn365
Configure by setting the access level to Delete.

 RSMUS.com