Microsoft’s release notes give a lot of information on the new features of the new Field Service release, but it doesn’t include some of the details on how to configure these new features. In this article I will highlight some of the most important functionality in the upcoming release, scheduled for November 2018.
One major change is the fact that users will now have to use the Field Service and Unified Scheduling app to access the application. Field service will no longer be available through the ‘old’ interface.
New Resource types
This version of Field Service introduces two new resource types: Facilities and Resource Pools.
Facilities
Facility type resources are physical locations where work can be performed. Previously, we could only schedule work at a customer location, but with the new resource type of Facility we can schedule work to be performed at another location.
Facility type examples are:
- Reserve a room for an event or party
- Reserve a room for an exercise class
- Reserve a bay at mechanic shop
- Reserve a boat
Resource Pools
Resource Pools enable schedulers to book requirements to a generic pool without needing to decide which resource will actually perform the work. We can then reschedule these bookings to the pool members on a later date.
Pool members can be permanently or temporarily assigned to pools, date effective. Keep in mind that a resource can only be assigned to ONE POOL for that period. Example: If Jon is assigned to the electrician pool from 1/1/2019-1/2/2019 he can’t be in another pool during that time period.
Resource pools can be either pools of facilities, or pools of accounts/contacts/users, or pools of equipment. Pools are intended to be a set of the same type of resources with the same skills. Example: A pool of resources that are electricians, or a pool of rooms that have the same capacity or a pool of equipment that has the same type of ladders in the pool. Pools also have the capability to auto calculate the pool’s capacity, meaning how many resources are in the pool.
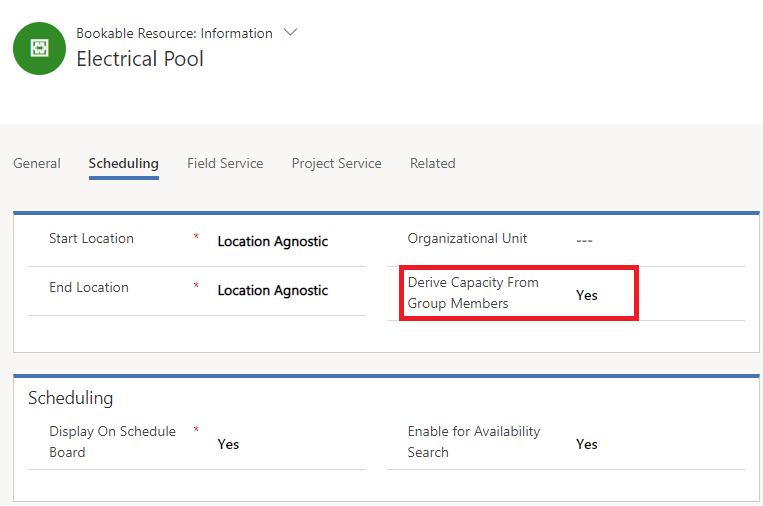
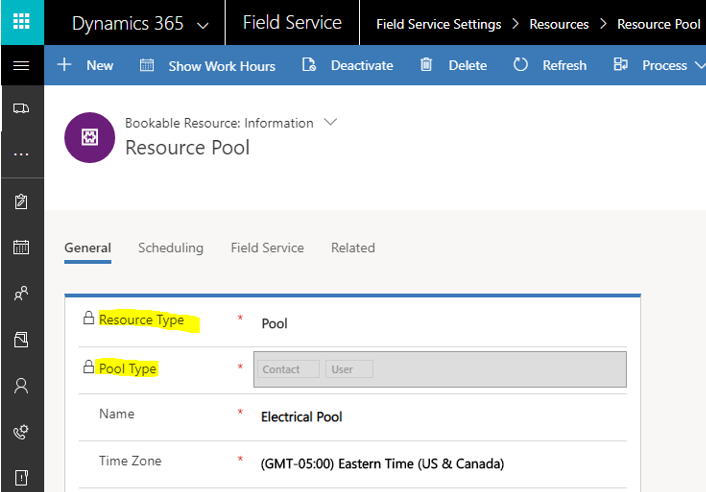
How do we create and configure these records? When a bookable resource is created, users have the option to choose the resource type for that resource.
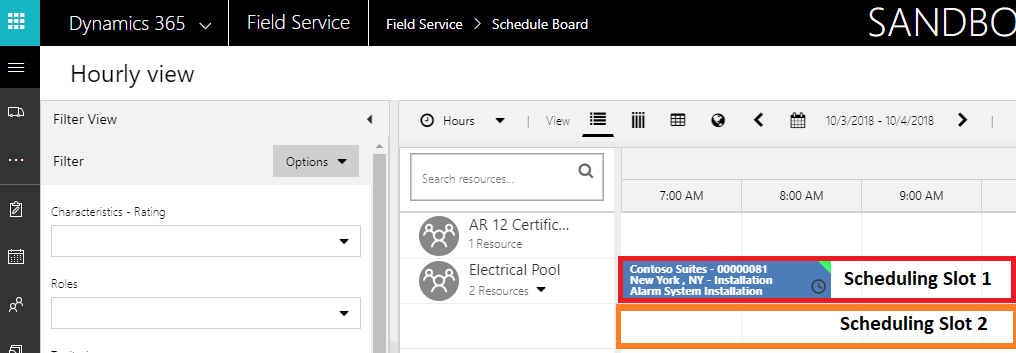
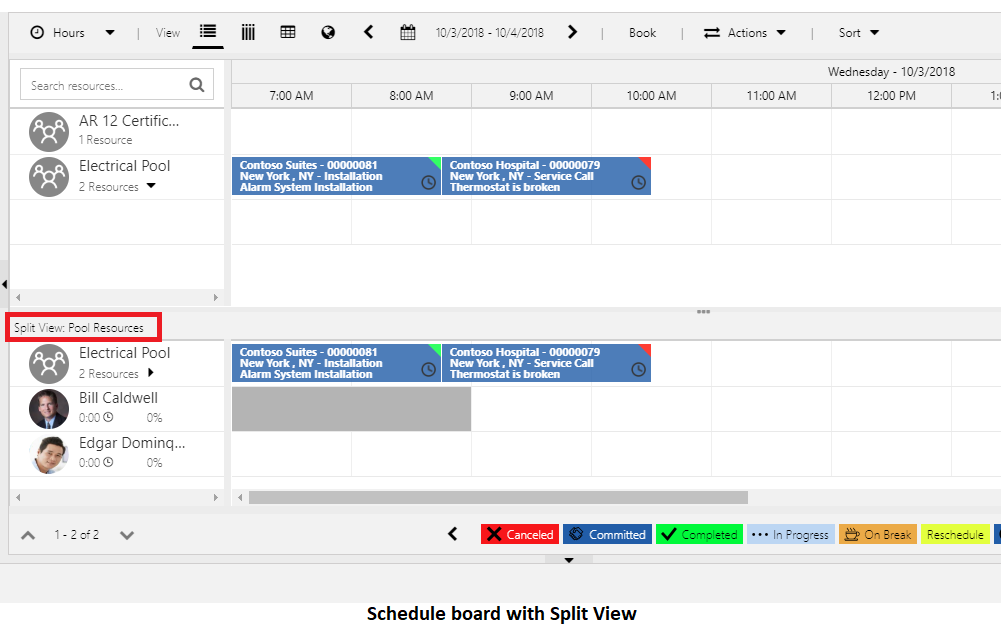
Once the pool has been created we can see it on the schedule board. Clicking on the drop down arrow of the pool will show us the total capacity of the pool (it will show the slots can used for scheduling). These bookings can later be re-scheduled to actual named resources that belong to that pool. We can do that by right clicking on the booking that has been assigned to the pool and selecting “Substitute” it will run through the scheduling assistant and will ONLY SELECT members of the pool that match the skills/characteristics of the requirement.
The split view functionality allows users to manage the pool and their members. Right clicking on the pool and selecting “View Pool Resources in Split View”.
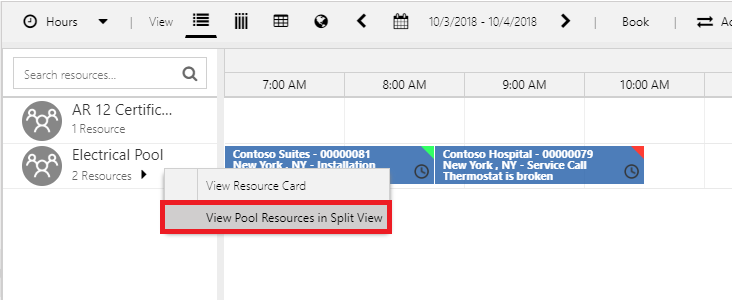
This will open a second window in the schedule board, showing the members of the pool.
Crew Updates
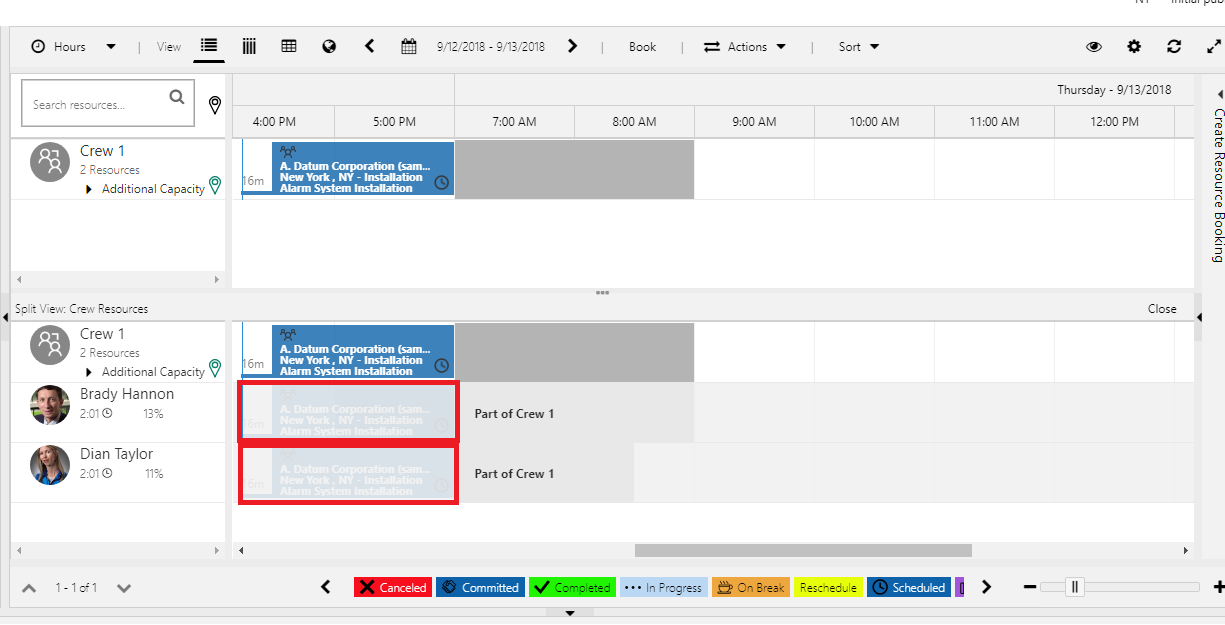
The split view we just discussed for Pools is also available for crews. One big update is the fact that crews are now going to be included in the resource search and offered as a scheduling option if the resources have the characteristics needed to complete the work order. What this means is that skills related to crew members will roll up from the crew member resources to the crew they are related to.

Just like before, once a work order is booked against a crew, all the members of the crew will get a booking assigned, the difference is that these bookings are barely visible on the individual resource records. If we hover our mouse over these bookings, we can see them more clearly.
Requirement Groups
The new Requirement Groups entity can be accessed by logging into the Universal Resource Scheduling App. Users can create templates with subgroups and resource requirements that can be reused just like project templates. The main thing about requirement groups is that dispatchers will be able to schedule an entire team of resources for one individual work order,. Previously, users had to manually create additional requirements if a word order needed multiple individuals and/or equipment to work on a job, which we will now be able to automate using requirement groups.
Configuration
In terms of configuration, we can create subgroups under the main group. In the below screenshot, we have the main group which is called Group Test, and two subgroups named Group 1 and Group 2. Under each group we can see the requirements for each group. Group 1 has three requirements: HVAC, Sales Rep and Apprentice. Group 2 has two requirements: HVAC and Apprentice.
The Select All or Any field next to Group Test means different things:
- If All next to Group Test is selected that means we want to book every resource in Group 1 and Group 2.
- If Any next to Group Test is selected that means we need either Group 1 or group 2.
The same goes for the All/Any selections in Group 1 or 2:
- If All next to Group 1 is selected that means we need HVAC, and Sales Rep and Apprentice resource.
- If Any next to Group 1 is selected that means we need HVAC, or Sales Rep or Apprentice resource.
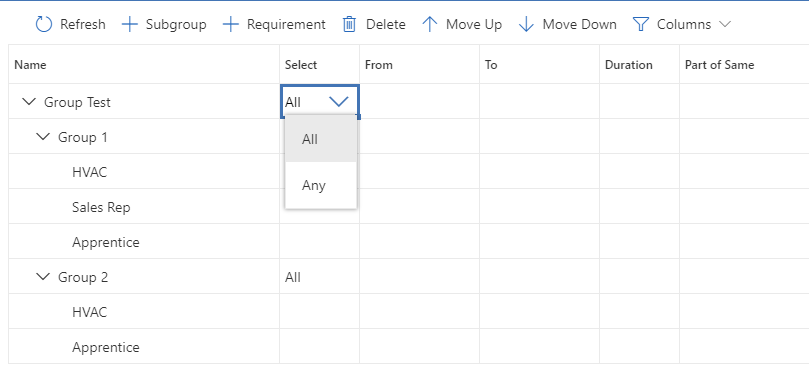
The order in which these subgroups and requirements are showing in the view are also important, as they are prioritized based on their order. If I would set Group Test to “Any”, Group 1 will be the priority to schedule for. If Group 1 would be set to “Any”, HVAC would be the first priority, then Sales Rep, then Apprentice.
The sort option function is related to resources:
- Sort option most busy: looks at resources that are available in the time searched, and will present the resource that has the most bookings
- Sort Option Least Busy: looks at resources that are available in the time searched, and will present the resource that has the least bookings,

Multi Resource Scheduling
When you click on the book button from a requirement group that has requirements associated with it, you will see the team scheduling window on the schedule board.
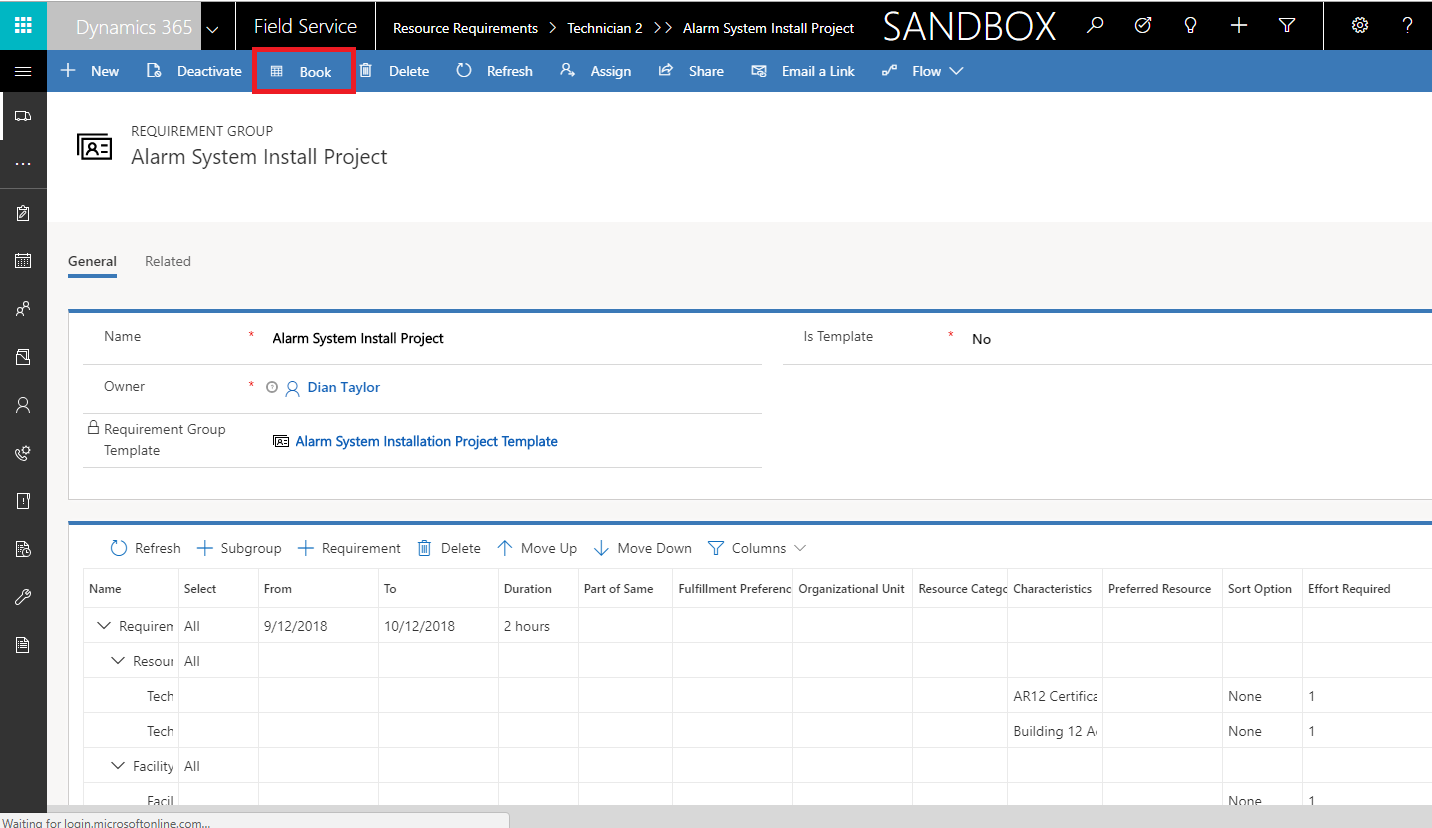
According to the MS documentation, incident types can be related to these requirement group templates so that when you create a work order and select an incident type, a group of requirements will be added to the work order, lighting up multi-resource scheduling. This was not enabled in my preview instance, so I wasn’t able to test this.
I hope this article helped to get some insights on what is coming out for Field Service in the fall release!
To make sure you stay up to date with the Microsoft Dynamics Community, subscribe to our Microsoft Dynamics Community Newsletter. For more information on Microsoft Dynamics 365, contact us.
By: Dian Taylor

 RSMUS.com