RSMUS.com
Are you tired of the tedious process of clicking through multiple buttons to upload a file into the correct folder in NetSuite’s File Cabinet? Say goodbye to the hassle with the NetSuite File Drag and Drop feature – a convenient and cost-free bundle that enables users to effortlessly drag and drop attachments into their designated folders. Whether you’re already using File Drag and Drop or considering its installation, this blog will serve as a guide to set up and configure this time-saving tool. Let’s dive in and simplify your file management process with ease!
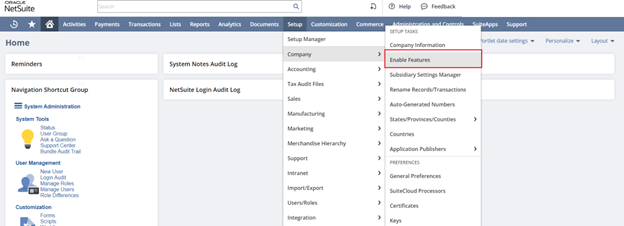
Before we jump into the installation process, it’s important to ensure that certain features are enabled in your NetSuite account. To enable the necessary features, when logged in as an Administrator, follow these steps:
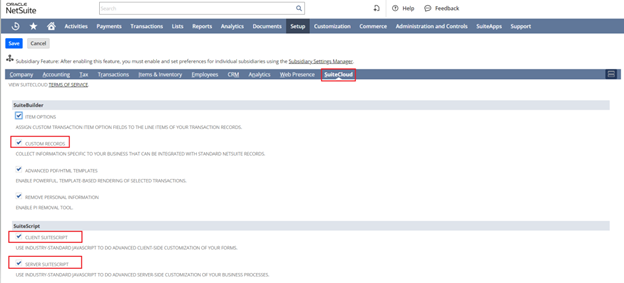
Navigate to Setup > Company > Enabled Features. Click on the SuiteCloud subtab and enable the following options:
- Client SuiteScript
- Server SuiteScript
- Custom Records
How to Install:
Now that you have completed prerequisites, go to Customization > SuiteBundler > Search & Install Bundles. 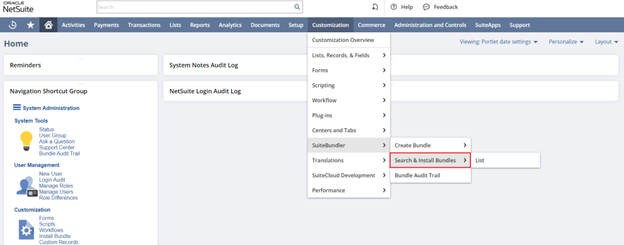
You may enter the bundle ID or the bundle name into the Keyword field. Use the following information to search for the bundle:
- Bundle Name: File Drag and Drop
- Bundle ID: 41309
- Location: Production (Account ID 3751218)
Click on the File Drag and Drop hyperlink and click Install. 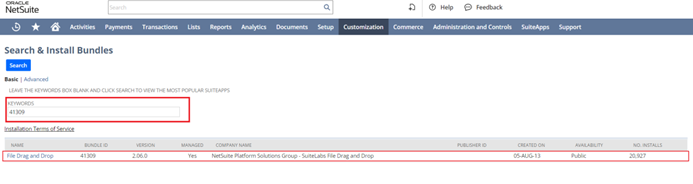
- Note: It will take a couple of minutes for the bundle to be installed. Please refresh the page to view the installation status.
Now that the installation is complete, let’s proceed with configuring File Drag and Drop.
Configuration:
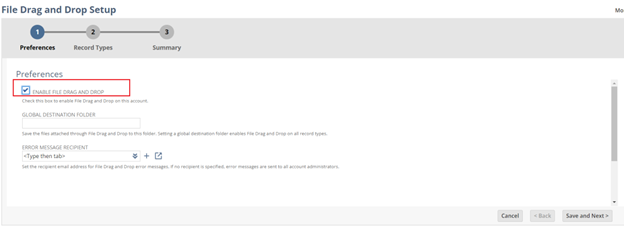
- Navigate to Setup> Customization > File Drag and Drop Setup. Select or enter the following values on the Preference page:
- Check the box Enabled File Drag and Drop.
- Select a Global Destination Folder if applicable.
- Note: Setting a global destination folder will enable File Drag and Drop on all record types.
- Select a recipient on the Error Message Recipient field.
- Selected recipient will be notified if there is a File Drag & Drop error. If no recipient is selected, all administrators will receive the error message.

- Selected recipient will be notified if there is a File Drag & Drop error. If no recipient is selected, all administrators will receive the error message.
- Review information selected on the Preference page and click Save and Next.
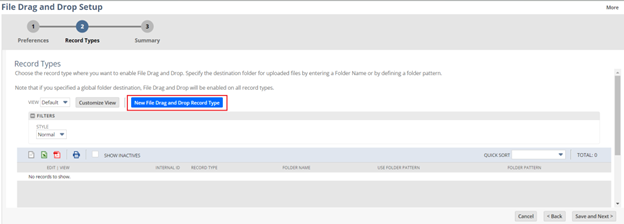
- On the Record Types page, select ‘New File Drag and Drop Record Type’ to activate file drag-and-drop functionality for a specific record type. For example, attachments added to a purchase order will automatically be stored in the ‘Purchase Order Folder.
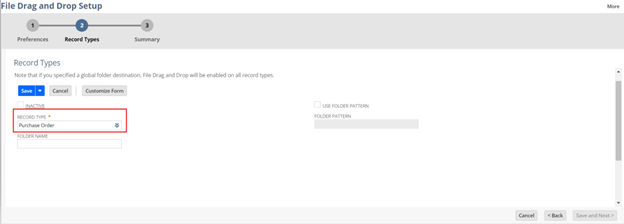
- Select a record type where you want the file to be placed on the Record Type field.
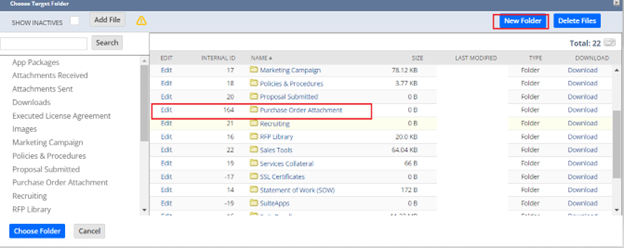
- Click on the Folder Name field and select a designated folder for the record type. Then click Choose Folder.
- Note: You can directly create a new folder by clicking on the ‘New Folder’ button if the specified folder doesn’t exist.
- Note: You can directly create a new folder by clicking on the ‘New Folder’ button if the specified folder doesn’t exist.
- Optional – Check the “Use Folder Pattern” box if you want File Drag and Drop to automatically create distinct folders based on a given pattern and save uploaded files accordingly.
- Note: The “Choose Folder” field will be greyed out if the “Use Folder Pattern” box is checked.
- Click Save.
- Repeat steps a – e until all target record type and folder have been selected.
- Select a record type where you want the file to be placed on the Record Type field.
- Click Save and Next.
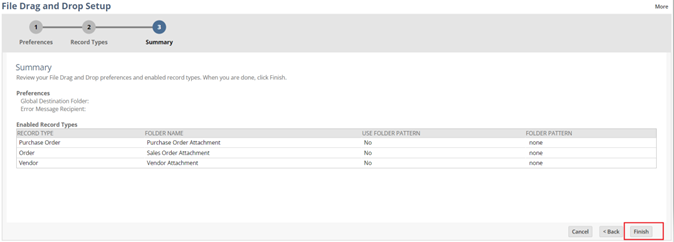
- Review all the record types and their associated folders, then click Finish on the Summary page.
You should now see the File Drag & Drop icon at the top right corner of your NetSuite page when viewing or editing a transaction or specific record.
Kayleen Huang
Oracle Netsuite Consultant