RSMUS.com
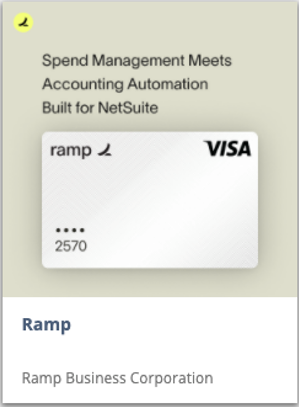
At RSM, we frequently get asked to integrate AP automation solutions with our clients’ NetSuite instances, and sometimes even get asked to make recommendations on AP solutions to integrate with. My last client has had a great experience working with Ramp, and the integration with NetSuite was quite simple. Ramp is an AP automation platform, with the capability to enter and pay bills, manage corporate cards, and more. I put together a step-by-step guide on how to approach the NetSuite-Ramp setup, as well as some commonly asked questions and disclaimers of areas where some issues might arise.
Step 1:
- Log into NetSuite and navigate to Setup > Company to see if Subsidiaries are setup.
- The steps below are applicable for an instance with Subsidiaries. Separate instructions are necessary for non-subsidiary instances.
- Disclaimer: You must be signed in as an Administrator into NetSuite and that your client has the Bookkeeper or Admin role in Ramp.
Step 2:
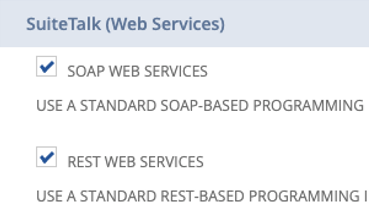
- Navigate to Setup > Company > Enable Features. Click on the SuiteCloud
- Check the following checkboxes: SOAP WEB SERVICES, REST WEB SERVICES, TOKEN BASED AUTHENTICATION
- Click Save.
Step 3:
- Click on the SuiteApps tab on the ribbon
- Search for the Ramp SuiteApp and click on the SuiteApp.
- Click Install. Once Installed, the Status will change to ‘Installed’.
Step 4:
- Navigate to Setup > Users/Roles > Manage Users
- Click on your name from the list of Admins, click Edit, and navigate to the Access
- Add the Ramp Accountant role to your employee record.
- Click Save.
Step 5:
- Navigate to Customization > Scripting > Script Deployments.
- Click View next to customdeploy_ramp_reslet.
- Locate the External URL and copy the string of text that is formatted as script=111&deploy=1. String of text may differ for each NetSuite instance. Copy and paste this string in a document, as this will later be used when setting up your client’s integration.
- In the External URL field, copy the account ID (string of numbers following the https://), in this case 1234567. Copy and paste this in a document, as this will be used later when setting up your client’s integration
Step 6:
- Sign out of NetSuite, then log back in.
Step 7:
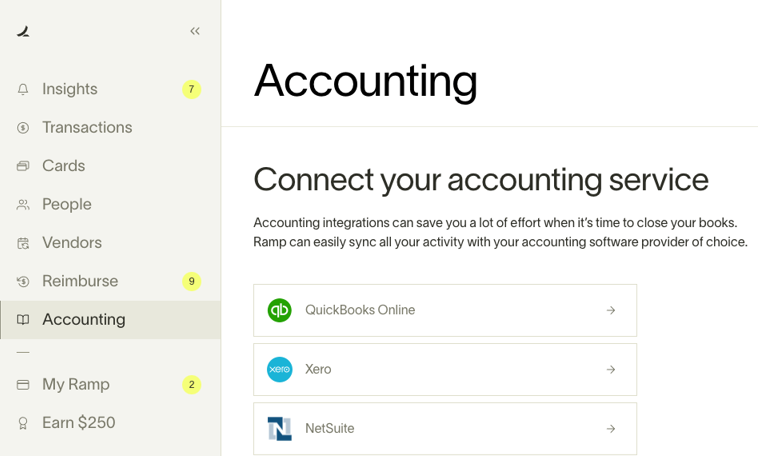
- Your client will log into Ramp (with or without you, up to your client’s discretion)
- Client will click on the Accounting tab on the left and click NetSuite
- Disclaimer: If client has their Ramp instance already integrated with another system, such as Quickbooks, they will not see the NetSuite button if they are currently integrated with another platform. Once their Ramp is disconnected from Quickbooks, they will be able to select NetSuite as their accounting service

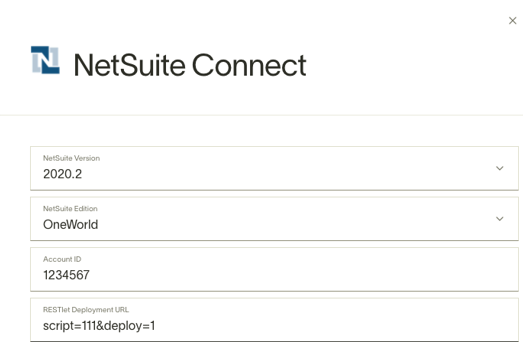
- Client will select the NetSuite Version
- This can be found on the NetSuite homepage, next to NetSuite Release at the bottom.
- Client will select the NetSuite Edition
- Disclaimer: If the NetSuite environment has Subsidiaries, even if it is just one subsidiary, please select ‘OneWorld’
- Client will input the Account ID with the account ID that was saved in Step 5d
- Client will input the RESTlet Deployment URL field with the value saved in Step 5c
- Click Save & Continue.
- Client will see the NetSuite authorization screen. Client will click Choose Role next to the Ramp Accountant and then click Allow.
Step 8
- Client will be redirected to Ramp. If client was not redirected, click on Settings on the bottom and find the entities.
- The default entity will apply to all existing transactions and reimbursements.
Step 9 (if applicable)
- If client has custom segments they would like to view and use in Ramp, custom segment record must be updated in NetSuite on the Credit Card, Bill, and Bill Payment forms.
- Navigate to Customization > Lists, Records, Fields > Custom Segments.
- Select the segment you would like to use in Ramp.
- Update the permissions if necessary next to the Ramp Accountant for the following:
-
-
- Value Management Access: Full
- Record Access: Edit
-
- Search/Reporting Access: Edit
Common areas of questions
- Why am I not seeing the NetSuite button when logged into Ramp and trying to select it as my accounting service?
If the client’s Ramp account is currently integrated with Quickbooks or another accounting service, you will not be able to select NetSuite. Once Ramp is disconnected from their previous platform, you will now be able to select a new accounting service to integrate.
- Why are some of my transactions not syncing from Ramp to NetSuite?
There are a few things to check to see why this might be occurring. Review the list below to see some possible reasons why some transactions are not syncing over to NetSuite:
-
- First, you should check to make sure all of the initial enable features have been set up properly.
- In your Ramp account, check to make sure your Ramp accounts have been mapped to appropriate accounts from your NetSuite Chart of Accounts.
- Make sure that the accounts that you have mapped in your Chart of Accounts have the proper subsidiaries associated to them and in Ramp.
- Identify the common denominator of the transactions that are failing. Are they all hitting the same account? Are they all hitting the same account type? Try to see if you can select that account or account type if you were to have created that same transaction manually in NetSuite. If you cannot select that account, go to Setup > Accounting > Accounting Preferences and check ‘Expand Accounting List’. This will allow you to select more account types on your transactions.