RSMUS.com
In manufacturing, knowing the cost of an assembly before production begins is critical. Early visibility into costs supports smarter decision-making, stronger cost control, and more effective resource planning.
While NetSuite automatically calculates and displays an estimated or projected cost on Assembly Build records, it does not do the same for Work Orders. This means production teams can’t easily see expected costs when printing a Work Order or Bill of Materials (BOM)—unless you customize it.
This guide walks through how to calculate and display Estimated Assembly Costs on Work Orders and BOM printouts using Average Cost or Purchase Price of components.
Solution Overview
The solution involves creating a custom calculation that sums component costs and displays the result on the Work Order and BOM.
Cost Rules:
-
Average Cost → used if the component is an Inventory Item or Assembly Item
-
Purchase Price → used as a fallback when Average Cost is missing (null or zero)
-
Non-Inventory/Other Item Types → always use Purchase Price
Step 1: Prepare Required Fields on Work Order Lines
By default, key fields like Item Type, Purchase Price, and Average Cost are not available at the Work Order line level. To fix this, create the following custom fields:
Transaction Column (Line) Fields (Customization > Lists, Records, & Fields > Transaction Body Fields > New):
-
custcol_rsm_kpm_item_type→ source from Item: Type -
custcol_rsm_kpm_purchase_price→ source from Item: Purchase Price -
custcol_rsm_kpm_cost→ source from Item: Average Cost -
custcol_est_unit_cost→ calculated unit cost field -
custcol_est_total_cost→ calculated total cost field (Unit Cost × Quantity)
⚠️ Important: This solution works only when the Work Order is released, because NetSuite only pulls BOM components into the Work Order at that stage.
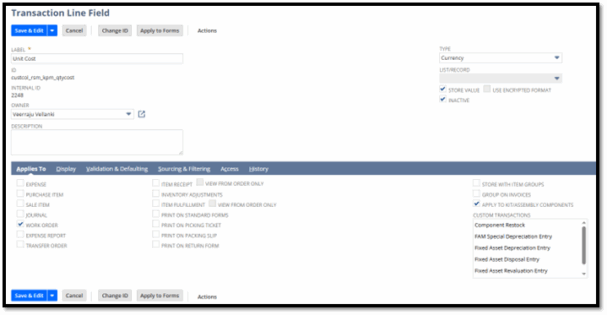
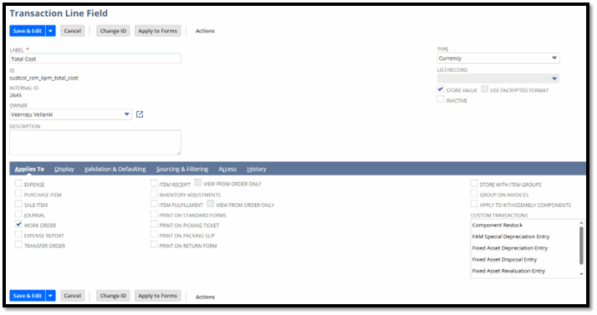
Create Custom Transaction Line Fields and Source the Fields from the Item Record as below:
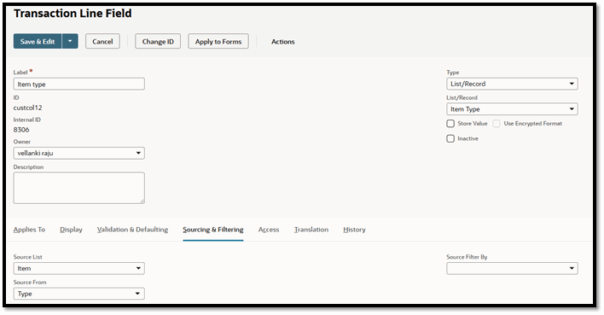


Create below 2 custom fields to capture the unit cost of each item per quantity (Average cost/purchase price):
Capture Total cost (BOM quantity X Average cost/purchase price):
Step 2: Create a Workflow to Populate Unit & Total Cost
Go to Customization > Workflows > New.
-
Enter a name
-
Record Type: Transaction
-
Subtype: Work Order
Within the workflow:
-
Create a new sublist group in State 1.
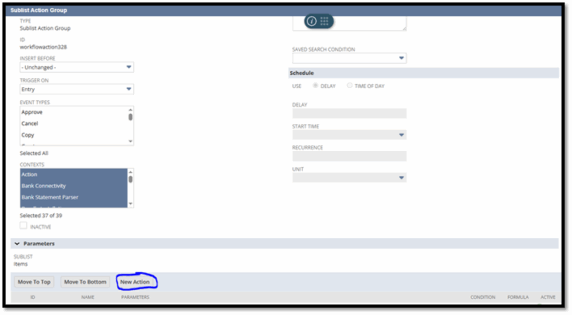
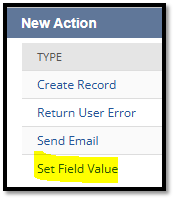
2. Add a New Action → Set Field Value.
3. Select Unit Cost, enter this formula in the formula field:
-
Select Total Cost field, enter this formula in the formula field:
Step 3: Create a Transaction Saved Search
Next, create a transaction saved search to capture the total component cost on the Work Order.
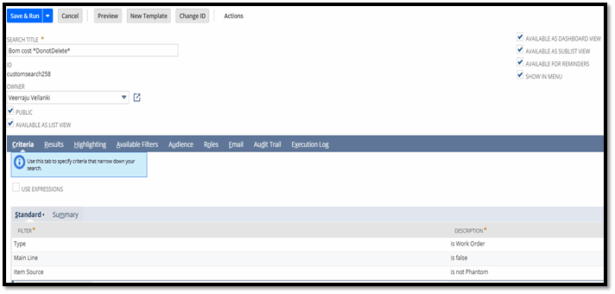
In the Results tab, use this formula:
Don’t forget to apply the required filters shown below to ensure accuracy.
![]()
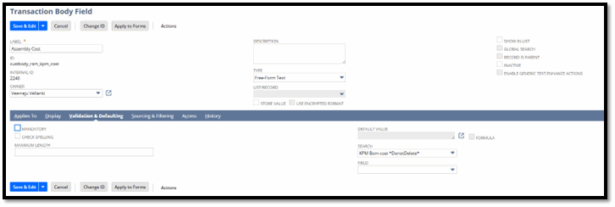
Step 4: Create a Transaction Body Field
Now create a Transaction (Work Order) Body field and link it to the saved search created in Step 3. This field will display the sum of component costs on the Work Order.
See the result below from our solution:
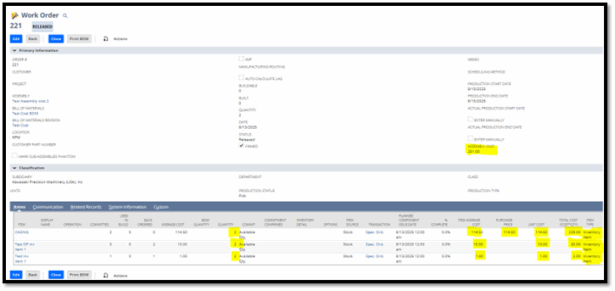
⚠️ Remember: values appear only when the Work Order is released.
Once complete, print the BOM and verify the cost results.
Step 5: Review and Test
Run through the following test scenarios:
-
Components with only Average Cost
-
Components with only Purchase Price
-
A mix of item types
When the Work Order is released, costs populate automatically. Print the Work Order or BOM to confirm accuracy.
Benefits of This Solution
-
Early Cost Visibility – Review costs before production starts
-
Better Planning – Decide if builds are worth proceeding
-
Improved Accuracy – Reduce surprises in post-build costing
-
Consistency – Reuse the same formula logic across workflows, saved searches, and PDFs
-
Single Source of Truth – Align costs across Work Orders, BOM prints, and reports
Final Tips
-
Maintain Average Cost or Purchase Price for all component items.
-
Keep formulas consistent across saved searches, workflows, and Advanced PDF templates.
-
Release Work Orders to ensure costs populate correctly.
Conclusion
NetSuite does a great job showing costs on Assembly Builds, but Work Orders require customization to provide the same visibility. By adding a simple formula that pulls Average Cost or Purchase Price, you can make Work Orders and BOM prints significantly more valuable for your production team.
Veerraju Vellanki
I am an Oracle Certified JD Edwards Finance Functional Consultant with 11 years of experience, including 3 years of domain expertise. I have worked on implementations, upgrades, and support projects across various JDE versions, including JDE Worldsoft. This experience encompasses both onsite and offshore locations.